Painting lamps can be a fun and creative way to spruce up your home decor. Whether you are looking for something new to add life to a boring tabletop or want to make an old lamp look brand new, learning the basics of painting lamps is easy!
In this blog post, we will teach you how to paint lamps. We’ll examine the steps from preliminary preparation through protective finishing layers. We will also discuss when it’s best to use paints specifically made for lamp-refinishing projects, as opposed to standard interior wall finishing paints.
You will also learn tips and tricks to ensure that your lamp painting project is a success! With just some simple supplies and a bit of patience, you’ll have beautifully painted lamps in no time!
Step-by-step Guidelines on How to Paint Lamps
Step 1: Preparing the Lamp for Paint:
Start by cleaning all dirt and dust from the lamp with a damp cloth. If you have an old, scratched and chipped lamp, the first step is to sand it and create a smooth surface. You can use an electric sander or sandpaper for this task. Once the lamp is smooth, wipe it down with a damp cloth and let it dry completely. Then, use painter’s tape to cover any parts of the lamp that you don’t want to paint.
Step 2: Priming the Lamp:
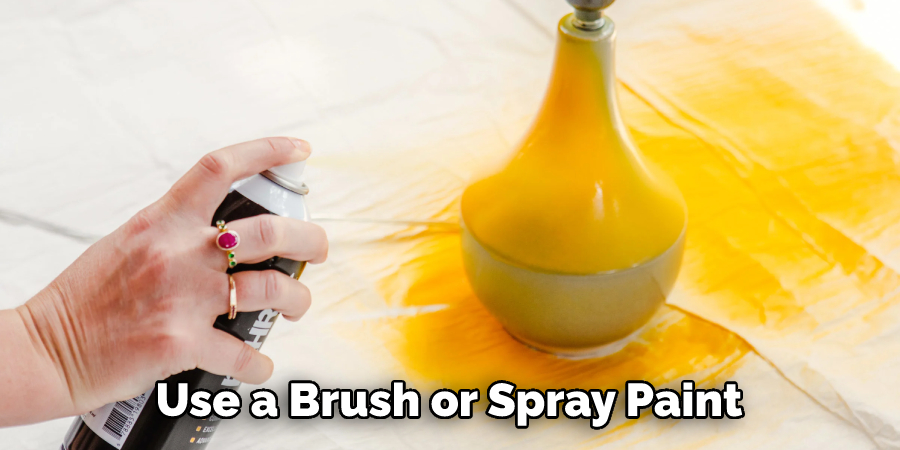
Apply a thin layer of primer on the lamp, using either a brush or spray paint. This will give the paint something to stick to and help it last longer. Let the primer dry before moving on to step three. You may need to add a few more coats of primer if the lamp is very old or has been well-used. Remember, the more coats of primer you use, the better the paint will bond to your lamp.
Step 3: Applying Paint:
Now that you have prepped and primed your lamp, you are now ready for painting. For best results, use paints specifically made for lamps or outdoor furniture. Apply two coats of paint in even strokes and let each coat dry completely before proceeding with the next one.
Allow 24 hours for maximum bonding between layers of paint. It’s best to use high-quality, water-based paint for this project.
Step 4: Protective Coating/Finishing Layer:
Once you have applied two coats of paint, finish off by applying a protective coating. This will help protect the paint from scratches and general wear and tear. Let this layer dry for at least 24 hours before using your painted lamp. This will ensure that the protective coating adheres properly and your painted lamp gets maximum durability. You can also apply a few layers of wax to the lamp if you like.
Step 5: Enjoying Your Newly Painted Lamp:
And that’s it! You are now ready to enjoy the new look your lamp has taken on. Place it anywhere in your home and bask in its beauty. Congratulations, you have successfully painted a lamp! This DIY project can be a fun and creative way to add life to your home decor. It can also be a great addition to any room.

Enjoy your lamp! You earned it! Remember to clean it often and reapply the protective coating when necessary. Painting lamps can be an exciting way to add a unique touch of creativity to your home decor. With just a few supplies and some patience, you can create beautiful masterpieces for yourself and others to admire. So grab all of the necessary materials today and get started painting lamps!
Which Materials Do You Need?
First, you need to gather all the necessary materials for painting lamps. These include a damp cloth, sandpaper or electric sander, painter’s tape, primer, paint (for best results use paints specifically made for lamps or outdoor furniture), a brush or spray paint, and a protective coating.
Once you have all the materials, follow the instructions above to get started. Remember to take your time and enjoy the process as you create your very own works of art. This project is a great way to express your creativity and add beauty to your home.
How to Choose the Appropriate Colour?
Now that you have all the materials, the next step is to choose the right colour for your lamp. You can use any type of paint you like but make sure it’s made specifically for lamps or outdoor furniture. As a general rule, lighter shades work best with an antique look while darker shades are better suited for modern designs. You can also mix and match colours to create an original look.
After deciding on the colour, use a brush or spray paint to apply two coats of paint, letting each one dry before adding the next one. When it comes to painting lamps, patience is key. Make sure that you take your time with every step and enjoy creating something unique and beautiful.
Different Types of Paint Quality
When it comes to the quality of paint, you want to make sure that you’re using a high-quality, water-based product. These paints are perfect for lamps because they provide lasting protection and vibrant colours. There are also specialty paints made specifically for outdoor furniture that can be used on lamps as well.
So, if you’re looking for a way to add some colour and style to your home decor, painting lamps is the perfect project. With just a few supplies, some patience and dedication, you can create unique masterpieces that will last for years to come. So get started today and enjoy the process of creating something beautiful!
Should I Use Professionals Support?
If you know the basics of how to paint lamps, painting lamps can be done easily on your own but you may want to consider hiring a professional for the job. Professional painters have experience and expertise that can help ensure that your project is finished quickly and with quality results.
A professional will also be able to recommend certain types of paint or finishes that may work best for your specific situation. Whether you decide to do it yourself or hire a professional, painting lamps can be a fun and creative way to add some life to your home decor.
How Much Will It Cost?
The cost of painting a lamp will depend on the size, materials and complexity of the project. Generally speaking, DIY projects will be cheaper but hiring a professional painter will likely result in better quality results.
In either case, it is important to factor in the cost of supplies such as paint, primer and protective coating when budgeting for the project. Once you have completed your project, the result will be a unique and beautiful lamp that can be enjoyed for years to come.
How to Make Your Lamp Paint Last Longer?
After you’ve finished painting your lamp, it is important to add a protective coating for extra durability. A good sealer or varnish will help protect the paint from scratches and fading over time. It is also important to clean your lamps regularly with a soft cloth so that dust and dirt do not accumulate on the surface.
Following these simple steps will help keep your lamp looking like new for years to come. Painting lamps is a great way to add some colour and personality to your home decor. With a few supplies, patience and creativity, you can create unique works of art that will last for many years.
Frequently Asked Questions
Q: What is the Best Paint to Use for Painting Lamps?
A: The best paint for painting lamps is high-quality, water-based paints specifically made for lamps or outdoor furniture. These paints offer lasting protection and vibrant colours.
Q: How Do I Choose the Right Colour for My Lamp?
A: When it comes to choosing the right colour for your lamp, lighter shades work best with an antique look while darker shades are better suited for modern designs. You can also mix and match colours to create an original look.
Q: How Many Coats of Paint Should I Apply?
A: It is recommended that you apply two coats of paint for best results, letting each one dry before adding the next one.
Q: Can I Use Spray Paint to Paint Lamps?
A: Yes, you can use spray paint to paint your lamps. Just make sure that you use a high-quality, water-based product specifically made for lamps or outdoor furniture.
Q: Is It Possible to Repaint a Lamp?
A: Yes, you can repaint a lamp. Just make sure that the first coat of paint has completely dried before painting the second one.
Painting lamps can be a fun and rewarding experience. With just a few materials and a bit of patience, you can transform any lamp into an artistic masterpiece that will brighten up your home decor. So gather all the necessary materials today and get started painting lamps! Enjoy the process and enjoy your beautiful creation when it’s finished. You
Conclusion
After reading this article, you know everything about how to paint lamps. All in all, painting a lamp is a fun, creative activity that can easily refresh and upgrade the look of your home. Not only will it give you a sense of accomplishment to have created such a beautiful, unique piece, but you also won’t need to worry about your lamp clashing color-wise with the other furniture in the room.
With this step-by-step guide to painting lamps, you’re sure to be successful! No matter your skill level, minimal supplies, and materials are needed when creating these one-of-a-kind items. So why not take some time today and start crafting? Who knows—painted lamps could very well become your newest hobby!
You Can Also Check This Out To Decorate Lamp Post for Halloween

