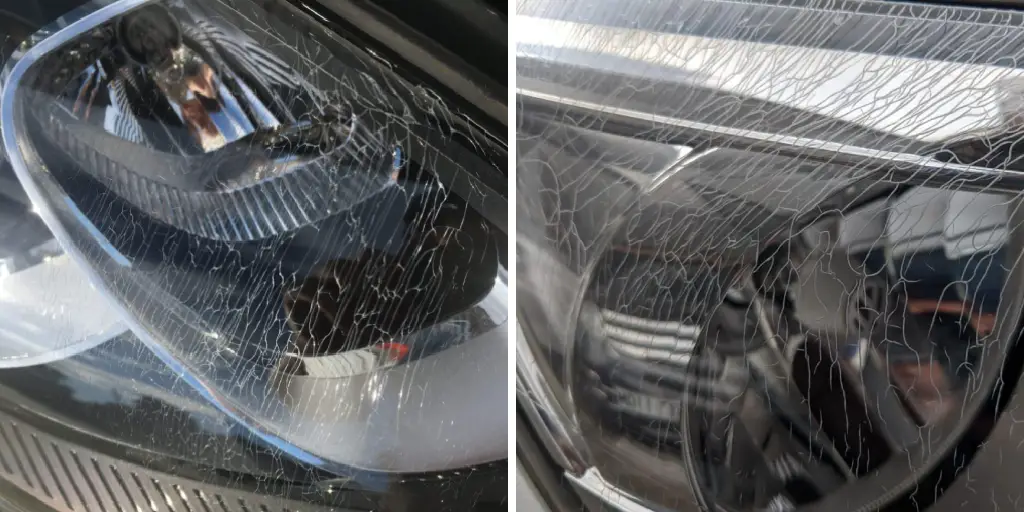
There are several reasons why you should learn to fix spider cracks in headlights. Firstly, spider cracks can make your car look old and worn out, reducing its overall appearance and value. Secondly, spider cracks can compromise the safety of your vehicle by reducing the effectiveness of your headlights, making it difficult for you to see while driving at night or during bad weather conditions.

The main advantage of fixing spider cracks in headlights is that it saves you money. Many people often resort to replacing their headlights when they notice spider cracks, believing that it is the only solution.
However, by learning how to fix these types of cracks, you can save yourself the expense of buying a new set of headlights. You can find step-by-step instructions on how to fix spider cracks in headlights in this blog article.
Step-by-step Instructions for How to Fix Spider Cracks in Headlights
Step 1: Inspect the Damage
The first step in fixing spider cracks in headlights is to inspect the damage. Carefully examine the headlight for any signs of cracking or damage. This will help determine the severity of the issue and whether it can be fixed or if a replacement is necessary.
Step 2: Clean the Headlight
Before attempting to fix the spider cracks, it’s important to clean the headlight thoroughly. Use a gentle soap and water solution to remove any dirt, debris, or grime from the surface of the headlight. Dry it completely before proceeding to the next step.
Step 3: Sand the Headlight
Using a fine-grit sandpaper (around 2000 grit), gently sand the area where the spider cracks are located. This will help smooth out the surface and remove any rough edges or imperfections that may be present. To protect the surrounding areas of the headlight, apply masking tape around the edges of the cracks. This will ensure that any repair materials do not get on other parts of the headlight.
Step 4: Mix and Apply the Filler
Next, mix the headlight repair filler according to the manufacturer’s instructions. Apply a thin layer of filler over the cracks using a putty knife or similar tool. Make sure to spread it evenly and smoothly over the entire affected area. Allow the filler to dry completely according to the manufacturer’s instructions. This may take anywhere from 30 minutes to a few hours, depending on the product used.
Step 5: Sand Again
Once the filler has dried, use a fine-grit sandpaper to smooth out any rough edges or uneven areas. Be careful not to sand too aggressively as this can cause further damage. Using a headlight restoration kit or a polishing compound, gently polish the headlight to restore its clarity and shine. This will also help blend in any remaining filler for a seamless finish.

Step 6: Remove Masking Tape
Once the headlight has been polished and the repair is complete, carefully remove the masking tape from the edges of the cracks. To prevent future damage and to maintain the repair, apply a sealant over the entire headlight. This will help protect against UV rays and other environmental factors that can cause cracking or discoloration.
By following these simple steps, you can easily fix spider cracks in your headlights and restore their clarity and functionality. Remember to always inspect your headlights regularly for any signs of damage and address any issues as soon as possible to avoid further damage.
Safety Tips for How to Fix Spider Cracks in Headlights
- When working with sandpaper, filler, and other repair materials, it’s important to wear gloves and safety glasses to protect your hands and eyes from any potential hazards.
- Some repair products may emit strong fumes, so be sure to work in a well-ventilated area or wear a respiratory mask if necessary.
- Always follow the manufacturer’s instructions when mixing and applying repair materials to ensure the best results.
- Avoid using harsh chemicals or abrasive cleaners on your headlights as this can cause further damage or discoloration.
- If the spider cracks are too severe, it may be necessary to replace the entire headlight instead of attempting a repair.
- Take your time and be patient when sanding and applying filler to ensure a smooth and even finish.
- If you are unsure about how to fix the spider cracks or do not feel comfortable doing it yourself, it’s best to seek professional help from an auto body repair shop or mechanic. They have the experience and tools necessary to properly repair your headlights without causing further damage.

By following these safety tips and precautions, you can effectively fix spider cracks in your headlights while also protecting yourself from potential hazards. Remember to always prioritize safety when working on any DIY project.
6 Causes of Causes Spider Cracks in Headlights
Spider cracks in headlights typically occur on the outer layer of plastic or glass that covers the light bulbs. This layer is known as a lens and is designed to protect the bulbs from damage while still allowing light to pass through. However, due to various factors, this protective layer can become damaged and develop spider cracks. Here are some of the most common causes of spider cracks in headlights.
1. Road Debris
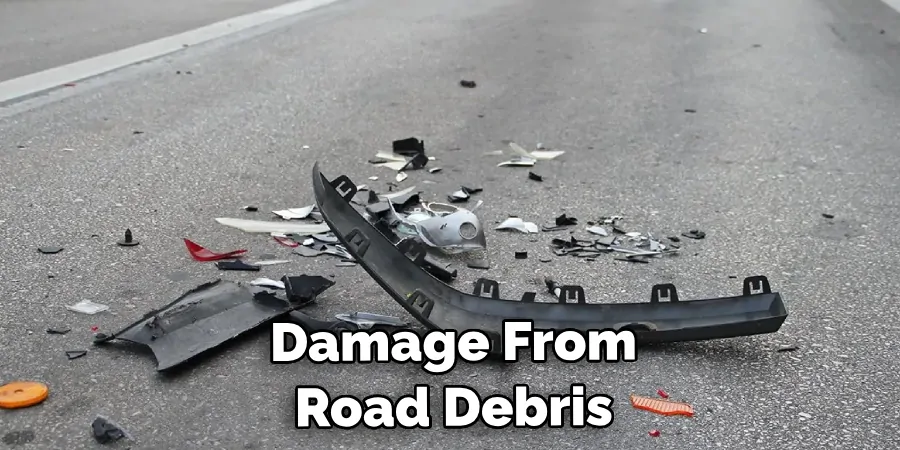
When you’re driving, your car’s headlights are constantly exposed to rocks, gravel, and other debris on the road. Over time, these tiny particles can cause small scratches on the lens of your headlights. These scratches may not be noticeable at first but can eventually lead to spider cracks.
2. Extreme Temperatures
Your car’s headlights are exposed to extreme temperatures on a daily basis – from the scorching heat of summer to the freezing cold of winter. These temperature changes can cause the plastic or glass covering your headlights to expand and contract, leading to stress cracks that eventually develop into spider cracks.
3. UV Radiation
Just like our skin, plastic and glass can also be damaged by UV radiation from the sun. Over time, exposure to UV rays can cause the plastic or glass covering your headlights to become brittle and crack, leading to spider cracks.
4. Age
As a car ages, its headlights also become more prone to developing spider cracks. This is because the plastic or glass covering becomes weaker and more brittle over time, making it more susceptible to damage from road debris, temperature changes, and UV radiation.

5. Improper Cleaning
Using harsh chemicals or abrasive materials to clean your car’s headlights can also cause spider cracks. These chemicals can strip away the protective layer on the lens of your headlights, leaving them vulnerable to damage.
6. Manufacturing Defects
In some cases, spider cracks may be caused by manufacturing defects. If the plastic or glass covering your headlights is not made properly or if there are bubbles or imperfections in the material, it may be more prone to developing cracks.
How to Prevent Spider Cracks in Headlights
Now that we’ve explored some of the most common causes of spider cracks in headlights, here are a few tips on how you can prevent them from occurring:
- Regularly clean your headlights with mild soap and water, using a soft cloth or sponge. Avoid using harsh chemicals or abrasive materials.
- Park your car in the shade whenever possible to protect it from UV radiation.
- If you notice any scratches or small cracks on your headlights, have them repaired immediately before they develop into spider cracks.
- Replace your headlights if they are old or damaged beyond repair.
- Consider applying a protective film over your headlights to prevent cracks and scratches from occurring.
By following these simple tips, you can keep your car’s headlights looking clear and free of spider cracks, helping to maintain your vehicle’s safety and appearance. Remember to always take care of your car’s headlights – after all, they are an important aspect of your vehicle and play a crucial role in keeping you safe on the road.

Conclusion
In conclusion, spider cracks in headlights are a common occurrence and can greatly affect the appearance and functionality of your vehicle. Fortunately, there are several steps you can take to fix them without having to spend a lot of money or replace the entire headlight. First, it is important to identify the cause of the spider cracks. This could be due to temperature changes, UV exposure, or physical damage. Once you know the cause, you can take preventative measures to avoid future cracks.
Next, clean the affected area with a mild soap and water solution. This will remove any dirt or debris that may be causing the spider cracks to appear more prominent. Then, use a headlight restoration kit specifically designed for removing scratches and small cracks. I hope this article has been beneficial for learning how to fix spider cracks in headlights. Make Sure the precautionary measures are followed chronologically.
You Can Check It Out to Fix Flickering Headlights

