Are you looking for an easier way to control your car’s headlights? Installing a toggle switch in your vehicle is a great solution! A toggle switch can give you the ability to quickly and easily turn on or off your headlight system without having to take up extra space.

Wiring it may seem like a daunting task; however, understanding the basics of how it works will make it relatively easy. In this blog post, we’ll explain how to wire headlights to a toggle switch and everything that goes along with it so that you don’t have any difficulty getting the job done right. Let’s get started!
Do Headlights Need a Relay?
In most cases, headlights do not need a relay when wired to a toggle switch. This is because the toggle switch simply turns power on and off – there is no need to run current through a relay in order to control the headlights.
However, it is important to make sure that the wiring used can handle the amount of current flowing through it, so that the lights will work properly without overheating or causing damage. If you are unsure whether your wiring can handle this much current, using a relay may be advisable.
The use of relays with headlights does have benefits, such as increased lifespan for bulbs and less strain on other components like switches, but for basic setups involving only one pair of headlights connected directly to a toggle switch, they are generally not necessary. However, if you plan on running multiple pairs of headlights or spotlights and need higher levels of current control, a relay is probably the best option.
When working with electricity, safety must be your primary concern. If you are in doubt about whether or not to use a relay when wiring up your headlights, consult an electrician or other qualified person who can help you make the right decision for your particular scenario.
Additionally, always wear safety equipment and practice safe electrical work procedures. With care and common sense, you can safely wire up your headlights to a toggle switch with confidence.

10 Methods How to Wire Headlights to a Toggle Switch
1. Choose the Right Toggle Switch.
There are many different types of toggle switches available on the market, so it is important to choose one that is rated for the current and voltage that your headlights will be drawing. You can typically find this information on the packaging of the toggle switch or in the specifications of the product.
If you are unsure, consult a professional to ensure that you choose the right switch for your application. To reduce the risk of short circuits and fires, never exceed the current or voltage ratings of your toggle switch. However, it is also important that the toggle switch is rated for more current and voltage than your headlights will be drawing to ensure maximum performance.
2. Choose the Right Wiring Harness.
In order to wire your headlights to a toggle switch, you will need a wiring harness that is compatible with your vehicle. You can usually find these at your local auto parts store or online.
When selecting a wiring harness, make sure that it is rated for the wattage of your headlights, as this will ensure optimal performance and safety. If you have LED headlights, make sure to choose a wiring harness that is compatible with LEDs.
3. Locate the Headlight Wires in Your Vehicle.
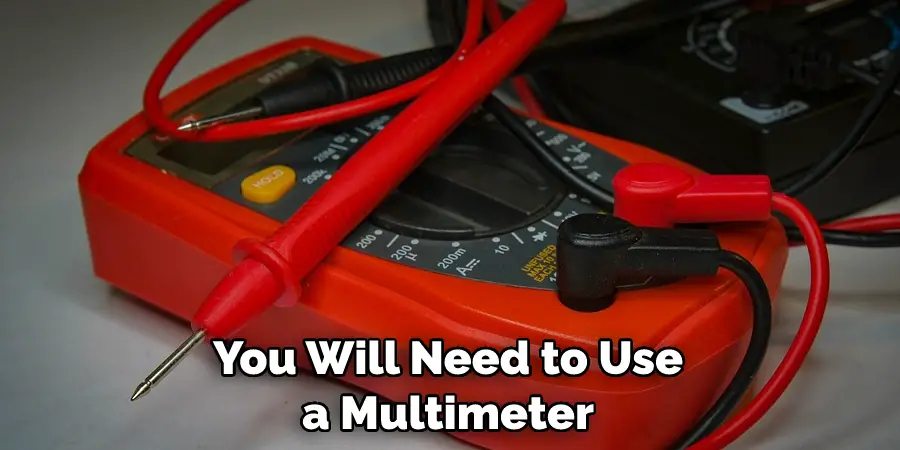
In order to wire your headlights to a toggle switch, you will need to locate the wires that power your headlights. These are typically located near the headlight assembly in your vehicle. It is important to identify which wires power your headlights before you proceed. To identify the wires, you will need to use a multimeter and test each wire to ensure that it is connected to a power source.

4. Splice into the Headlight Wires.
Once you have located the headlight wires, you will need to splice into them in order to connect them to the wiring harness. This can be done using a wire cutter/stripper tool or by soldering the wires together.
Connect the two wires to the wiring harness and secure them in place. While connecting the wires, it is important to keep in mind which wire corresponds with the positive and negative terminals.
5. Connect the Wiring Harness to the Toggle Switch.
Once you have spliced into the headlight wires, you will need to connect the wiring harness to the toggle switch. This can be done by soldering the wires together or by using crimp connectors.
If you use crimp connectors, be sure to cover the connections with electrical tape or shrink wrap. Once the connections are secure, test the switch by turning it on and off to make sure it is working properly. If all is good, you are now ready to mount the toggle switch in your vehicle.
6. Mount the Toggle Switch in a Convenient Location.
After you have connected the wiring harness to the toggle switch, you will need to mount the toggle switch in a convenient location within reach of the driver. This can be done using double-sided tape, velcro, or zip ties. Make sure that the switch is firmly attached to the mounting surface.
Once it is mounted in place, you can now turn on and off your headlights with the toggle switch. However, remember to always turn your headlights off when you are done driving. Doing so will help prevent unnecessary battery drain and ensure that your headlights remain in good working condition.

7. Test the Connection by Turning on the Headlights.
Once you have mounted the toggle switch, you should test the connection by turning on the headlights. If everything is wired correctly, then the headlights should turn on when you flip the toggle switch to the “on” position.
If the headlights do not turn on, then you should check your wiring again to make sure everything is connected correctly. While testing the connection, you should also make sure that the toggle switch is properly grounded. If it is not grounded correctly, then the headlights will not turn on.
8. Secure All Wiring with Electrical Tape and Zip Ties.
Once you have tested the connection, you should use electrical tape and zip ties to secure the wiring. This will help to protect it from any damage, such as fraying or short circuiting. Make sure that all the wires are tucked away neatly and that everything is properly sealed and insulated.
Once you have secured all the wiring, your headlights should now be successfully wired to a toggle switch. However, it is important to remember to test them regularly to make sure that the connection remains secure. Doing so will help ensure your safety and keep your headlights working properly.
9. Install a Fuse in the Circuit.
Finally, you should install a fuse in the circuit as an added safety precaution. This will help to protect the headlights, wiring and your car in general from damage that could be caused by an electrical overload. Determine the appropriate amperage rating for the fuse, then connect it in between the power source and the headlights.
The fuse should be mounted securely in the circuit to ensure that it cannot come loose or be disconnected accidentally. Once the fuse has been installed, you can test your toggle switch and headlights to ensure that they are operating correctly. If all checks out, you can enjoy the convenience of using a toggle switch to turn your headlights on and off.

10. Test the Its Functionality.
Now that you have wired your headlights to a toggle switch, it is time to test its functionality. With the power supply turned on, move the toggle switch to the “on” position and check your headlights. If they are illuminated, then you have successfully wired your headlights to a toggle switch.
Congratulations! If they do not light up, recheck all connections and steps in this guide. Repeat as needed until desired results are achieved. However, if all else fails, consider seeking assistance from a professional electrician.
With your headlights successfully wired to a toggle switch, you can count on having easy access and control over your headlights whenever they are in use. With this simple yet reliable setup, you will be able to drive safely no matter what the conditions may be. Enjoy the convenience of having your headlights at the flip of a switch and never worry about forgetting to turn them off or not being able to turn them on.
Conclusion
Knowing how to wire headlights to a toggle switch can be useful for those wanting to install additional lighting to improve driving safety or just wanting to customize the look of their car.
Whatever the desired reason may be, the process is easy when you have the correct tools and fail-proof instructions. After taking these steps each time you should be prepared in case there are any irregular steps that need adjustments depending on your specific model or plan.

