Are you on the hunt for the perfect overhead statement piece to bring light and character to your home? Then look no further than a chandelier! A classic choice that will not only cast its own special glow but add an undeniable sense of grandeur and elegance wherever it’s placed.

While they can be intimidating to install, wiring a chandelier with multiple lights is actually simpler than you might think – as long as you have the right directions!
In this post, we’ll explore exactly how to wire a chandelier with multiple lights in just a few easy steps. All you need is some knowledge about electrical safety, basic hand tools, supplies, and some patience – so let’s get started!
Tools and Materials You Will Need to Wire a Chandelier With Multiple Lights
Before you start wiring your chandelier, there are a few basic tools and materials that you’ll need to have on hand. These include:
- Chandelier wires
- Electrical wire caps
- Electrical tape
- Wire cutters/strippers
- Screwdriver or drill with screw bit
- Grounding clamp (if the chandelier uses one)
- Voltage detector
- Ladder (optional but recommended)
Step-by-Step Guidelines on How to Wire a Chandelier With Multiple Lights
Step 1: Make Sure Your Power is Off
Before you do anything else, it’s essential that you turn off the power to the chandelier circuit. You should also use a voltage detector to make sure that power is not present in the area you’ll be working on. This is a critical safety step that should never be skipped. You don’t want any nasty surprises!
Step 2: Prepare Your Wires
Next, you’ll need to prepare the chandelier wires and fixture wires so that they can be connected. Start by removing half an inch of insulation from the end of each wire using a wire stripper. Then use your electrical tape to wrap the exposed ends in order to protect them from any kind of damage.
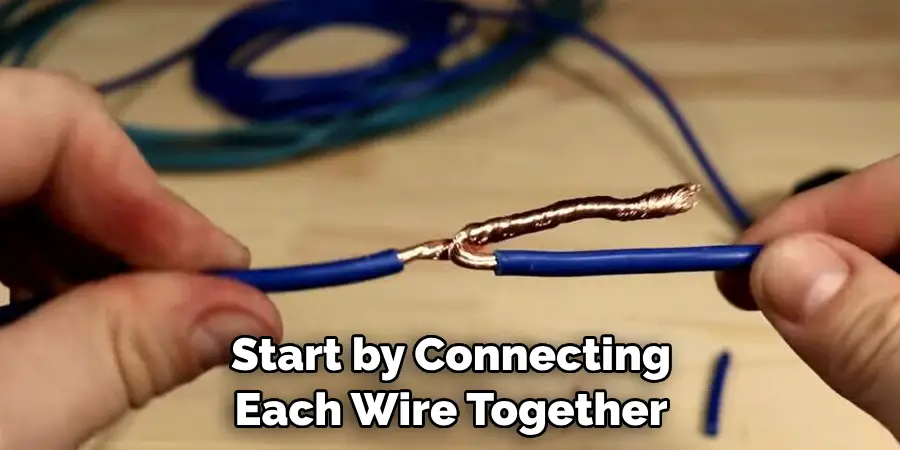
Step 3: Connect the Wires Together
Now it’s time to make the connections between your chandelier wires and the fixture wires. Start by connecting each wire together, matching the black (hot) wire from the fixture with the black wire from the chandelier, then do the same for the white (neutral) wire. Finally, connect the two green (ground) wires together with a grounding clamp, then secure them in place with electrical tape.
Step 4: Attach Your Lights
Now that all of your wires are connected and secured, you can start to attach your lights. Start by unscrewing each light socket from the chandelier base and then screwing in the new light sockets. Once you’ve done that, attach your lights to each socket by twisting the bulb into place.
Step 5: Test Your Work
Before moving on to reinstallation, it’s always a good idea to make sure your wiring job is working correctly. Flip the power switch back to the “on” position, then individually check each light to make sure they are all working as expected. Make sure to turn the power back off when you are done testing.
Step 6: Reinstall Your Chandelier
Now that all of your wiring is in place, it’s time to reinstall your chandelier! Start by connecting the new wires from your light sockets into the junction box on the ceiling where they will be secured with wire caps. Once you’ve done that, carefully lift your chandelier into place and secure it with the screws.
Step 7: Enjoy Your Newly Wired Chandelier!
Once your chandelier is securely in place, turn the power back on and bask in the glow of your hard work! From now on, you can enjoy all of the beauty of your chandelier, knowing that it was safely and correctly wired.

Following these steps, you now have the knowledge that you need to wire a chandelier with multiple lights. All that’s left to do is find the perfect chandelier for your space and make sure it’s installed safely and correctly! Good luck, and enjoy!
Additional Tips and Tricks to Wire a Chandelier With Multiple Lights
1. When wiring a chandelier with multiple lights, it is important to remember that each individual light needs to have its own wiring. This means that you will need to run wiring for each of the light fixtures separately.
2. You should always make sure that all of the wires are properly secured and insulated before connecting them to the chandelier’s central hub. This will help to prevent any potential short circuits from occurring.
3. To ensure a safe installation, you should always opt for an electrician to do the wiring work. This is especially true if your chandelier is of an ornate or complex design.
4. Apart from following basic safety protocols, it’s also important to make sure that your chandelier is properly mounted. The mounting should be done securely and with the utmost care to ensure that it won’t fall down in the future, potentially causing injury.
5. Once your chandelier has been safely wired and installed, you can enjoy its beauty for many years to come! Make sure to provide regular maintenance and cleaning so that it remains looking as good as new for a long time.
6. If you want to add some extra sparkle and glamour to your chandelier, try adding decorative touches such as crystals or beads. This will help give your chandelier an even more luxurious look!
7. If you ever need any assistance with wiring or installing your chandelier, don’t hesitate to contact a professional. They can provide you with invaluable advice and guidance to ensure that your chandelier is properly wired and installed for years of beautiful lighting in your home!
8. Lastly, always make sure to double-check all connection points before plugging in the chandelier – never take any chances when it comes to electrical work. Doing so could end up being a costly mistake.

These tips and tricks should help you ensure that your chandelier is wired and installed correctly. With the right precautions and care, it should last for many years of beautiful lighting in your home!
Precautions Need to Follow for Wiring a Chandelier With Multiple Lights
- Always make sure that your work area is well-ventilated and free from moisture.
- Ensure to wear protective glasses and gloves before starting the wiring process.
- Unscrew the center section of the chandelier, which usually contains several wires connected to it. If there are various components such as bulbs or ballast, disconnect them carefully from each other.
- Install the mounting hardware for your chandelier in the ceiling junction box, making sure that it is securely connected and properly grounded.
- Now reconnect all the components to their respective wiring positions using electrical tape or heat shrink tubing to secure them in place.
- Connect all the wires with care; start by connecting each of the individual lights’ hot wires to the same color from your power source.
- Connect the common neutral wire of your power source with all the neutral wires of the individual lights.
- Finally, connect the ground wire to a designated ground screw or grounding bar within your junction box for extra safety precautions.
Following these precautions and instructions closely during the installation of a chandelier with multiple lights will help to create a safe and secure wiring system.
Advantages Of Installing A Chandelier With Multiple Lights
- Installing a chandelier with multiple lights can be practical as well as easy on the pocket since it requires fewer wires and fixtures.
- Multiple light installations provide an impressive and modern look to your living space, while also providing consistent lighting in the entire area.
- The installation of a multiple-light chandelier helps reduce energy costs by using fewer bulbs and wattage.
- Finally, it eliminates the need for a complex wiring system since all lights are connected to the same power source.
Installing a chandelier with multiple lights in your home can be an easy, cost-effective way to improve its lighting design and also save on energy bills. With these simple steps and precautions, you’ll be able to successfully complete your wiring setup and enjoy a brighter, more modern look at home.
Frequently Asked Questions
What Kind of Wires Should I Use?
To ensure that your chandelier is safely wired, you should use the correct type of wires. It is recommended to use insulated wire in all wiring projects. This will help protect against electrical shock and ensure that your lights work properly. If you are unsure what type of wires to use, ask a qualified electrician for assistance or read the manufacturer’s instructions carefully.

Where Should I Place the Switches?
If your chandelier comes with multiple light switches, it is important to place them in a strategic location. You should avoid placing switches in areas where they can be easily damaged or concealed from view. Consider placing the switches at eye level for easy access. Additionally, you may want to choose a switch that is easy to reach, such as one that can be activated by foot.
What is the Best Way to Test the Lights?
Once you have wired your chandelier, you should test it to ensure that all of the lights are working properly. This can be done in a few simple steps: Make sure that all switches are in the off position, turn on the circuit breaker if necessary, and check all of the lights. If any of the lights are not working, you may need to adjust the wiring or consult a qualified electrician for assistance.
Conclusion
All in all, knowing how to wire a chandelier with multiple lights is a great skill to have. It can help you save money and avoid potential hazards from improper wiring.
Understanding the basics of chandelier wiring, such as the type of wires to use and how to test the lights, will ensure that your project is safe and successful. With these tips in mind, you should be able to wire your own chandelier with multiple lights without any problems. Good luck and happy wiring!

