Are you struggling to unscrew a lightbulb that seems to be stuck? Don’t worry, you’re not alone. Many people have encountered this frustrating problem at some point in their lives. Luckily, there are a few simple tricks you can try to successfully unscrew the stubborn lightbulb without damaging it.
Dealing with a stuck lightbulb can be a frustrating and potentially hazardous task. Whether it’s due to over-tightening, corrosion, or simply the passage of time, finding yourself unable to unscrew a lightbulb is a common household dilemma. However, with the right techniques and precautions, you can safely and efficiently handle this situation.
This guide will walk you through the steps on how to unscrew a lightbulb that is stuck, ensuring your safety and preserving the integrity of your light fixture.
Is It Safe to Unscrew a Light Bulb?
Before we dive into the techniques of unscrewing a stuck lightbulb, it’s important to address any safety concerns. If you’re dealing with a lightbulb that is still lit or recently turned off, make sure to turn off the power before attempting to unscrew it. This will prevent any potential electrical accidents.
Additionally, handling a glass object like a lightbulb can be dangerous. Make sure to wear gloves and protective eyewear to avoid any potential injuries from shattered glass.
Taking the necessary safety precautions is crucial in successfully and safely unscrewing a stuck lightbulb.
Why Do Lightbulbs Get Stuck?
Before we dive into the solutions, it’s important to understand why lightbulbs get stuck in the first place. There are a few common reasons for this issue:
- Over-tightening: Sometimes, when replacing a lightbulb, we tend to twist them too hard, resulting in them getting stuck.
- Corrosion: Over time, the metal base of the lightbulb and the socket can become corroded, making it difficult to unscrew.
- Heat: When a lightbulb is in use for an extended period, it can generate heat that causes the bulb to expand and get stuck in its socket.
Knowing these potential causes can help you prevent a lightbulb from getting stuck in the future. Now, let’s move on to the solutions.
What Will You Need?
To successfully unscrew a stuck lightbulb, you will need a few tools:
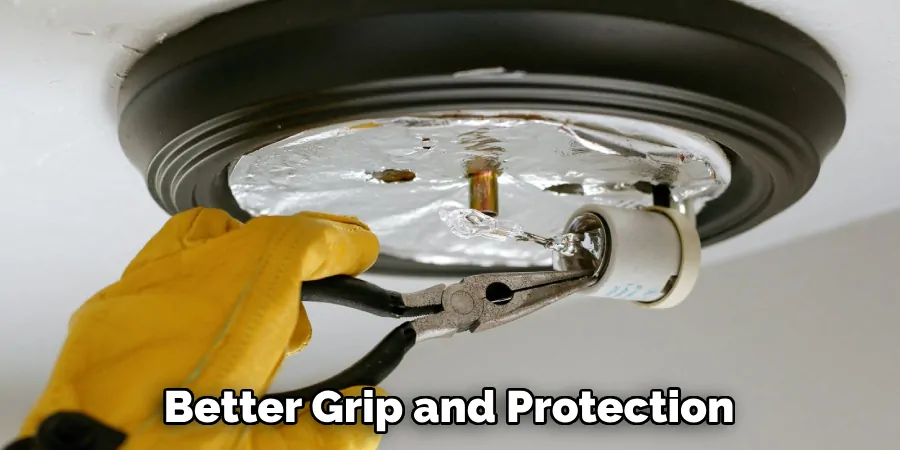
- Rubber Gloves: These will provide better grip and protection while handling the lightbulb.
- Safety Glasses: In case the bulb breaks, safety glasses will protect your eyes from any small pieces of glass.
- Needle-nose Pliers or Duct Tape: These will come in handy for removing the bulb if it breaks.
- Lightbulb Lubricant or Spray: This can help loosen corrosion and make unscrewing easier.
Now that you have your tools let’s get started!
10 Easy Steps on How to Unscrew a Lightbulb That is Stuck
Step 1. Turn Off the Power:
Safety should always be your first priority. Ensure the light switch is turned off before attempting to unscrew the bulb. If possible, unplug the lamp or turn off the circuit breaker for additional safety. This will prevent any risk of electrical shock.
Step 2. Wait for the Bulb to Cool Down:
Before you try to unscrew the lightbulb, give it ample time to cool down if it was recently used. A hot bulb is not only more difficult to handle due to its fragility and the risk of burns, but the heat could also cause the bulb to expand slightly, making it even more stuck. Waiting for the bulb to return to room temperature reduces these risks and makes the entire process safer and easier.
Step 3. Wear Safety Gear:
Now that you have ensured the bulb is cool, and the power is off, it’s time to put on your safety gear. Slip on your rubber gloves to better grip the bulb, and wear your safety glasses to protect your eyes. This step is crucial to ensuring your safety in case the bulb breaks during the process. Safety gear increases your grip on the bulb and reduces the risk of injury.
Step 4. Apply Gentle Pressure:
With your safety gear on, grip the base of the lightbulb with your hand. Make sure your touch is firm yet gentle to avoid breaking the bulb. Slowly and steadily, try to turn the bulb counterclockwise. Do not apply more force if the bulb doesn’t budge after a few gentle attempts. This could risk breaking the bulb. Instead, move on to the next step for a different approach.
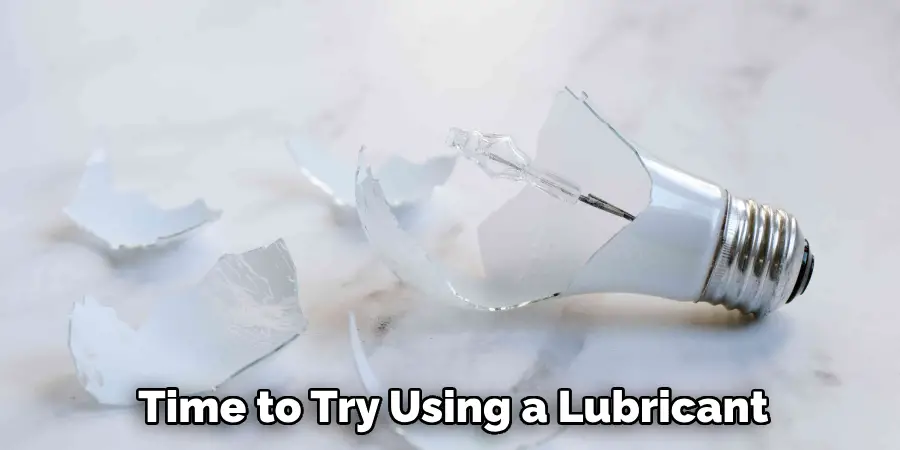
Step 5. Use a Lubricant:
If the lightbulb is still refusing to budge after applying gentle pressure, it’s time to try using a lubricant. Apply a lightbulb-specific or household lubricant sparingly around the base where the bulb meets the socket. Be careful not to apply too much, as excess can drip into the socket and cause issues. Allow the lubricant to sit for a few minutes to penetrate and loosen any corrosion. After waiting, attempt to unscrew the bulb again, using the same gentle, counter-clockwise motion.
Step 6. Use Rubber Gloves for Improved Grip:
If applying lubricant doesn’t immediately solve the problem, enhancing your grip might do the trick. Keep your safety gear on and reinforce your grip on the bulb using rubber gloves. The added friction from the gloves can significantly enhance your ability to turn the bulb. Grasp the bulb’s base firmly but gently with your gloved hand and attempt to unscrew it counterclockwise again. The combination of lubricant and increased grip often proves effective in loosening stuck lightbulbs.
Step 7. Tap Gently to Loosen:
If the bulb is still stuck after trying to improve your grip, a gentle tap might help break any corrosion holding it in place. Carefully tap the side of the bulb’s base with the handle of a screwdriver. This can help loosen the connection between the bulb and the socket. Be cautious to tap lightly to avoid damaging the bulb or the fixture. After tapping, try to unscrew the bulb again using the previous methods. This often dislodges slight corrosion and makes unscrewing possible.
Step 8. Break and Remove for Stubborn Cases:
In the event that all previous steps fail and you’re dealing with a bulb that simply won’t come loose, prepare to carefully break and remove the bulb. First, cover the bulb with a thick cloth to contain any glass shards. Gently tap the bulb with a hammer until it breaks. Then, using needle-nose pliers, carefully remove the remnants of the bulb’s base from the socket, turning counterclockwise. Remember to wear your safety gear to protect against cuts and ensure the power is completely off to avoid any electrical hazards. This method should be used as a last resort and handled with utmost care.
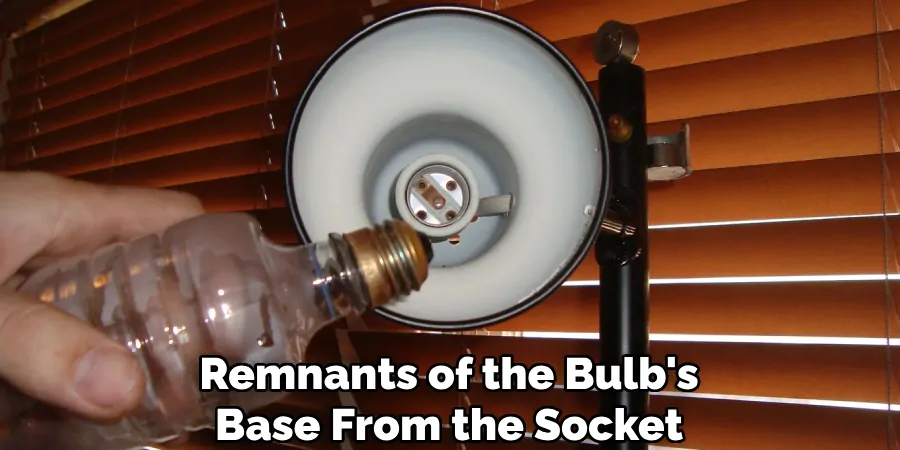
Step 9. Clean the Socket:
Once the remnants of the stuck bulb have been successfully removed, it’s important to clean the socket before inserting a new bulb. Use a small, dry paintbrush or a soft cloth to gently remove any debris or corrosion from inside the socket. Be very careful not to insert anything metal into the socket to avoid any risk of electrical shock. Properly cleaning the socket ensures a good connection with the new bulb and reduces the chance of future bulbs getting stuck.
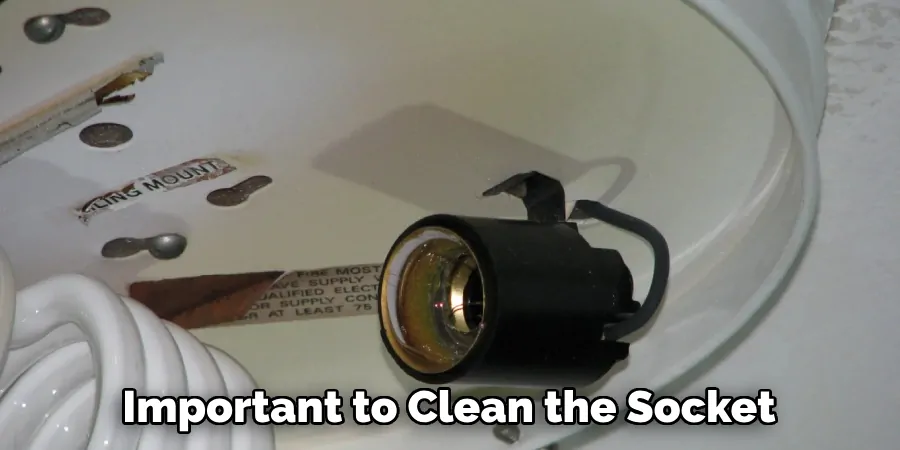
Step 10. Test with a New Bulb:
After cleaning the socket, it’s time to insert a new bulb. Ensure the power is still off, then carefully screw in the new bulb using a gentle, clockwise motion. Do not over-tighten; just make it snug. Turn the power back on and test the light to ensure everything is working correctly. This final step not only confirms the success of your efforts but also illuminates your space once again.
By following these ten easy steps, you should now be able to successfully unscrew a lightbulb that is stuck. Just remember to always prioritize your safety and take caution throughout the process.
5 Additional Tips and Tricks
- Use Duct Tape for Extra Grip: Wrap the glass part of the bulb in duct tape, leaving a flap you can hold onto. Use this as a makeshift handle to unscrew the bulb with a firmer grip.
- Lubricate the Threads: If the bulb is stuck because of corrosion in the socket, applying a small amount of lubricant like WD-40 on the bulb’s base (make sure the electricity is off and the bulb is cool) can help loosen it. Wipe away any excess lubricant to avoid slipping.
- The Potato Method (For Broken Bulbs): If the glass part of the bulb has broken, cut a potato in half and press it against the bulb’s base. The potato will grip the base, allowing you to safely twist and remove the bulb’s remains. Ensure the power is off before attempting this.
- Use a Bulb Changer: For bulbs in hard-to-reach places, a bulb changer attached to an extension pole can provide the necessary reach and grip to unscrew the bulb safely from the ground.
- Temperature Fluctuations: Sometimes, carefully heating the bulb’s metal base (not the glass) with a hairdryer can expand the metal slightly, making it easier to unscrew. Conversely, applying ice to the bulb’s base to contract the metal might also work. Always exercise caution with temperature changes to avoid injury or damage.
With these additional tips, you’ll have even more tools at your disposal to tackle a stuck lightbulb.

5 Things You Should Avoid
- Do Not Use Excessive Force: Applying too much pressure can break the bulb in the socket, leading to potential injury from shattered glass. Always apply a gentle, consistent force when attempting to unscrew the bulb.
- Avoid Using Bare Hands on Broken Bulbs: If the bulb has already broken, do not try to remove it with your bare hands, as this can lead to cuts. Instead, use protective gloves or methods like the potato trick to safely remove the remains.
- Don’t Ignore Electrical Safety: Ensure the electricity is turned off at the circuit breaker before attempting to remove a stuck bulb. This prevents the risk of electric shock, which is especially important if the bulb is broken.
- Refrain from Using Improper Tools: Utilizing tools that are not designed for changing bulbs, like pliers or hammers, can cause damage both to the light socket and bulb and increase the risk of injury.
- Skip Applying Liquid Directly onto the Bulb or Socket: While lubricants can help, applying them directly onto the bulb or socket increases the risk of electrical hazards or makes the bulb even harder to unscrew. Always apply a small amount to a cloth or use sparingly.
By avoiding these common mistakes, you can safely and effectively remove a stuck lightbulb without any added issues or harm.
Why Won’t Your Light Bulb Screw Into the Socket?
There are a few potential reasons why your light bulb may not be able to screw into the socket easily:
- The Threads are Damaged: Over time, the threads on the bulb or socket can become damaged or worn, making it difficult for them to properly align and screw in.
- Corrosion or Buildup: If there is corrosion or buildup on the threads of the bulb or socket, it can prevent them from smoothly screwing together. This is why lubricants can be helpful in loosening stuck bulbs.
- Misalignment: Sometimes, a light bulb may appear to be screwed in properly but is actually not aligned correctly with the socket. This can happen if you accidentally cross-thread the bulb during installation.
- Incorrect Bulb Size: If you are trying to screw in a bulb that is not the correct size for the socket, it will not fit properly and can become stuck.
- Bulb Base Shape: Some bulbs have different base shapes, such as candelabra or mogul bases, which may not fit into certain sockets. Ensure you are using the correct bulb type for your specific socket.
If you encounter difficulty in screwing in a light bulb, try troubleshooting these potential issues before resorting to more extreme measures. Always remember to exercise caution when dealing with electricity and never force anything that doesn’t seem to fit properly.
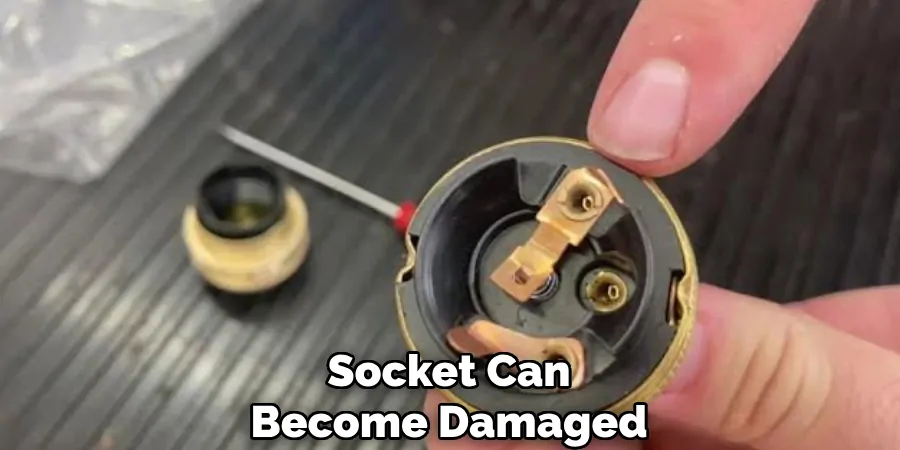
What Happens if You Screw in the Wrong Light Bulb?
Screwing in the wrong light bulb can have a number of consequences, depending on the specific situation. Here are a few possible scenarios and their outcomes:
- The Bulb Doesn’t Fit: If you try to screw in a bulb with the incorrect base size or shape, it simply won’t fit into the socket. In this case, you will need to find the correct bulb size and try again.
- The Bulb Breaks: Incorrectly screwing in a bulb with excessive force or without properly aligning it can cause the bulb to break inside the socket, leaving you with a mess to clean up and potentially damaging the socket.
- Fire Hazards: Using a light bulb with a wattage that is too high for the fixture can cause it to overheat, potentially leading to a fire hazard. Always make sure to use bulbs with the appropriate wattage for your fixtures.
- Electrical Issues: In some cases, using the wrong type of light bulb can cause electrical issues such as flickering lights or short circuits. This is why it’s important to always use bulbs that are compatible with your fixtures.
In conclusion, it’s important to always use the correct type and size of light bulb for your fixtures to avoid potential issues and ensure safety. If you encounter any difficulties in screwing in a light bulb, try troubleshooting before resorting to more extreme measures. Remember to prioritize safety and caution when dealing with electricity.
How Do You Know if a Light Bulb is Damaged?
There are a few signs that can indicate a damaged light bulb:
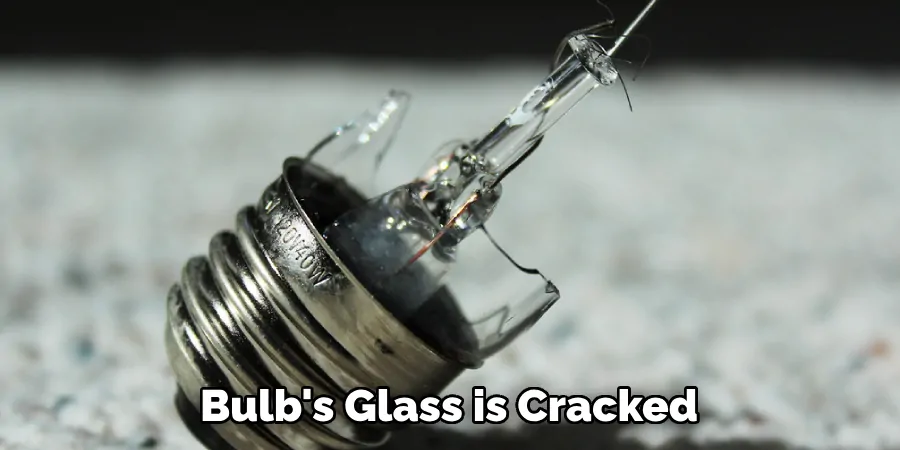
- Visible Damage: If the bulb’s glass is cracked, chipped, or shattered, it is likely damaged and should not be used.
- Flickering or Dimming: A light bulb that flickers, dims, or changes in brightness could indicate damage to the filament inside. This can be a sign of the bulb’s end of life and should be replaced.
- Burn Marks or Discoloration: If there are burn marks or discoloration on the base or glass of the bulb, it could indicate overheating and potential damage.
- Bulb Not Turning On: If the light does not turn on when you flip the switch, it could be a sign of a damaged bulb. Try replacing the bulb to see if that solves the issue.
- Strange Smell or Sound: If you smell burning or hear buzzing or crackling noises coming from the bulb, it could indicate damage and potential danger. Turn off the electricity and replace the bulb immediately.
If you notice any of these signs, it’s best to replace the bulb with a new one to ensure safety and prevent further damage. Light bulbs are relatively inexpensive and easy to replace, so don’t take any chances with a potentially damaged bulb.
Conclusion
In conclusion, how to unscrew a lightbulb that is stuck may seem like a simple task, but it requires patience, the right techniques, and a focus on safety to prevent injury or damage. There are several effective methods to address this issue, from ensuring the power is turned off to gently applying heat or lubrication.
Remember, using the correct tools and techniques not only makes the process easier but also safeguards your light fixtures and personal safety. If all methods fail or you need clarification, it’s always best to consult with a professional electrician to handle the situation.
By following these guidelines, you can safely and efficiently solve the problem of a stuck lightbulb, keeping your home bright and your fixtures in good condition.

