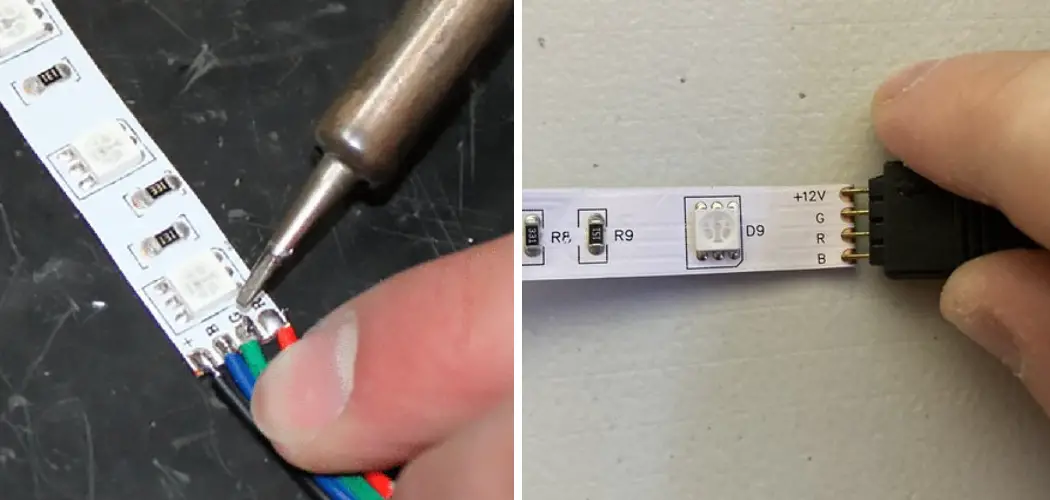
It is common to use LED strips for various lighting needs, such as decorating rooms or creating ambiance in a space. However, accidents can happen, and the LED strip might get cut accidentally during installation or usage.
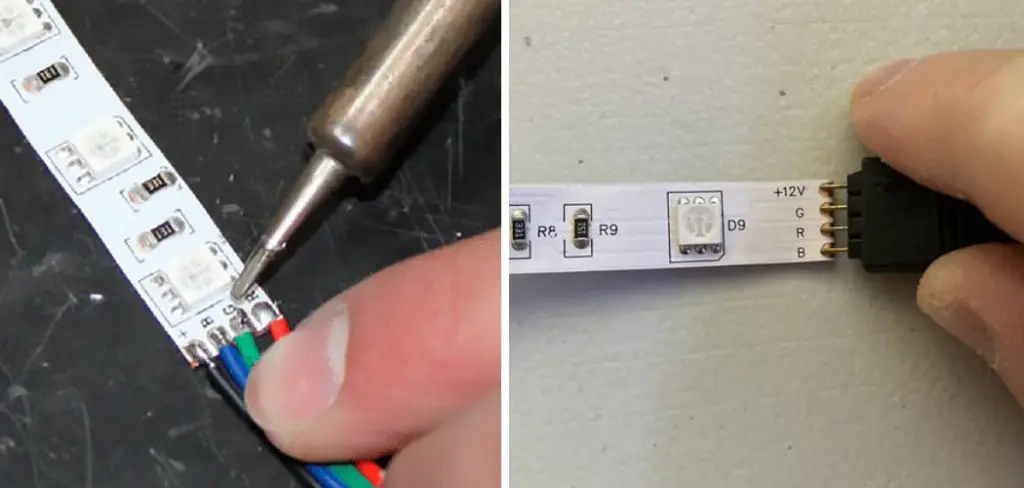
This may leave you with a cut LED strip without any connectors attached at the ends. But don’t worry; there are still ways to reconnect these cut LED strips without connectors. In this tutorial on how to reconnect cut LED strips without connectors, we will discuss some methods to help you reconnect cut LED strips without connectors.
Necessary Items
In order to reconnect cut LED strips without connectors, you will need the following items:
- Soldering iron
- Solder
- Wire strippers or scissors
- Electrical tape or shrink-wrap tubing (optional)
8 Things to Know Before You Start
The reconnection process might seem daunting, but don’t worry! Here are some important things to know before you start reconnecting your cut LED strips without connectors:
1. Make Sure the Power Supply is Disconnected
Before working with any electrical component, it is crucial to make sure that the power supply is disconnected to avoid accidents. If the LED strip is connected to a power source, disconnect it before proceeding with the reconnection process.
2. Understand How Your LED Strips are Wired
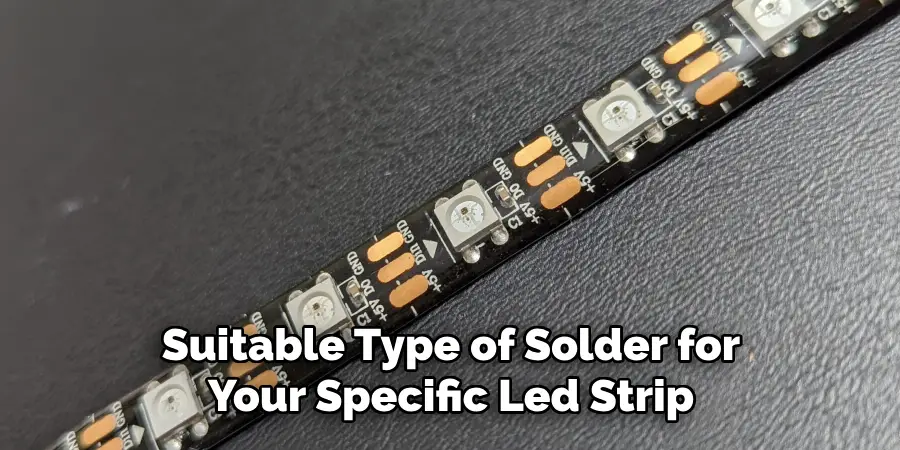
Before you start reconnecting your cut LED strips, it is essential to understand how they are wired. Most LED strips have two copper dots on one end and two copper pads on the other end. The positive (+) and negative (-) polarity are marked on the strips, indicating which way the current flows.
3. Measure the Length of the Cut LED Strip
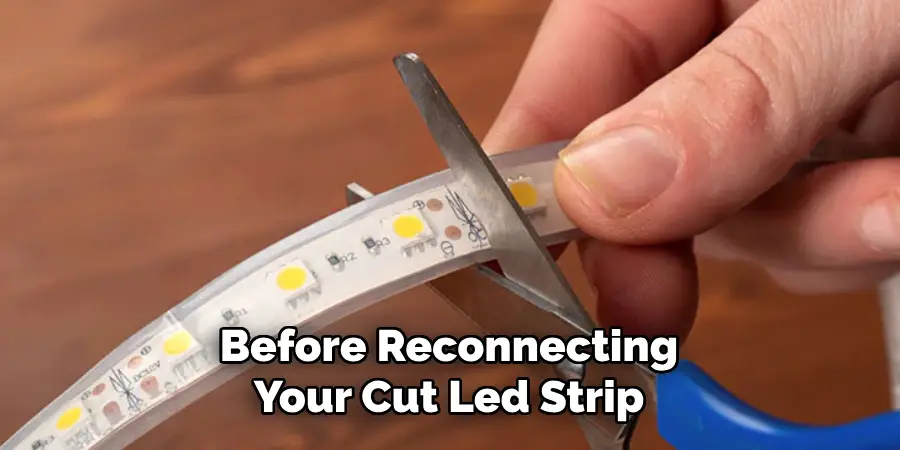
Before reconnecting your cut LED strip, measure the length that needs to be reconnected. This will help you determine how much wire is needed for a successful reconnection. Then, cut the wire to that length.
4. Use the Correct Wire Gauge
It is important to use the correct wire gauge for your LED strip reconnection. A wire gauge that is too thin might not be able to carry enough current, while a wire gauge that is too thick will not fit into the connectors on the LED strip.
5. Prepare the Wires
Using wire strippers or scissors, strip off the insulation from both ends of the cut LED strip and the wire. While stripping, make sure the exposed wire is clean and free from any damage. And remember to strip only the necessary length, not more or less.
6. Twist the Wires Together
Twist together the exposed wire ends of both the LED strip and the wire you are using for reconnection. Make sure they are securely twisted and that there is no exposed wire hanging out. But make sure the wires are not twisted too tight, as this might cause difficulty in soldering.
7. Solder the Connection
Using a soldering iron and solder, carefully solder the twisted wires together to create a strong connection between them. Make sure the solder is evenly distributed and that there are no cold joints. Cold joints can cause weak connections and may result in malfunctioning LED strips.
8. Insulate the Connection
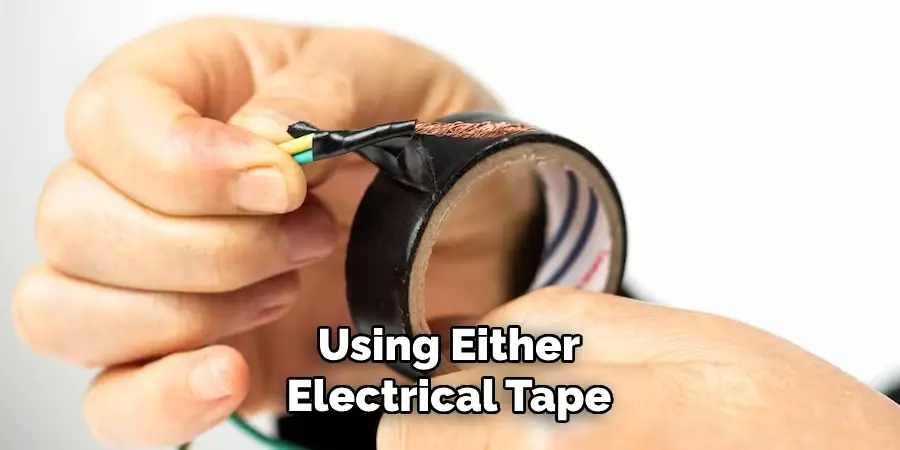
After soldering, you can choose to insulate the connection using either electrical tape or shrink-wrap tubing. This will help secure the connection and prevent any exposed wires from coming into contact with each other.
Reconnecting cut LED strips without connectors might seem challenging, but with the right tools and knowledge, it can be done easily. Remember to always disconnect the power supply before working on any electrical component and use the correct wire gauge for a successful reconnection. With these tips in mind, you can confidently fix your cut LED strips without needing any connectors.
12 Steps on How to Reconnect Cut Led Strips Without Connectors
Step 1: Prepare the Cut Ends
Start by preparing the cut ends of the LED strip. Use a sharp knife or wire cutter to remove about half an inch of the protective coating from each end of the strip. This will expose the copper pads on the strip.
Step 2: Prepare the Wires for Reconnection
Prepare the wire that you will be using to reconnect the cut LED strip. Strip off about half an inch of insulation from both ends of the wire using wire strippers or scissors. And make sure the wires are clean and free from any damage.
Step 3: Twist the Wires Together
Twist together the exposed ends of both the LED strip and wire. Make sure they are securely twisted but not too tight that it becomes difficult to solder them together. While twisting, make sure there are no exposed wires hanging out.
Step 4: Tin the Wires
Tinning is the process of applying a thin coat of solder to the wires before soldering them together. Tinning helps ensure a strong and secure connection between the two wires. Simply apply some solder to your soldering iron and use it to coat the twisted end of the wires.
Step 5: Solder the Connection
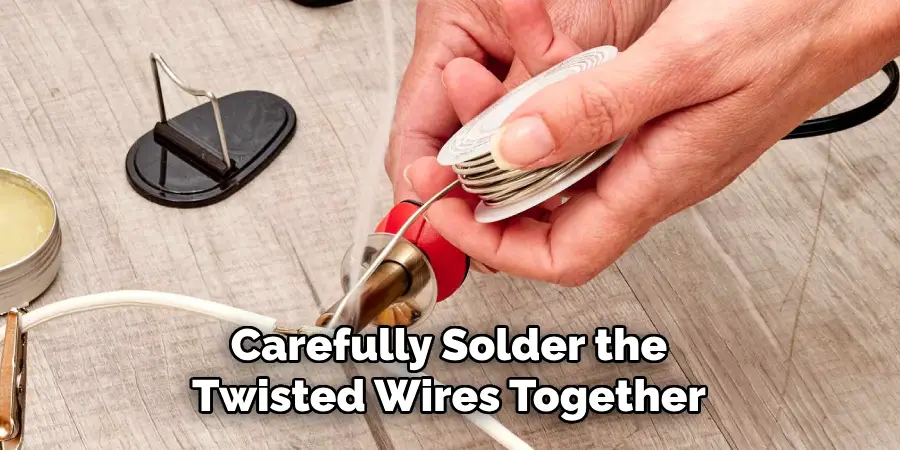
Using a soldering iron, carefully solder the twisted wires together. Make sure the solder is evenly distributed and that there are no cold joints. Cold joints can result in weak connections and may cause your LED strip to malfunction.
Step 6: Insulate the Connection
After you have successfully soldered the connection, you can choose to insulate it using either electrical tape or shrink-wrap tubing. This will help secure the connection and prevent any exposed wires from coming into contact with each other.
Step 7: Repeat for Multiple Connections
If your LED strip has multiple cuts that need reconnection, repeat the above steps for each cut. Measure the length of wire needed for each cut before moving on to the next step.
Step 8: Test the Connections
Before reinstalling your LED strip, it is important to test the connections you have made. Connect the power supply and turn on your LED strip. If all connections are secure, your LED strip should light up without any issues.
Step 9: Secure the Reconnected Strip
Once you have tested the connections and they are working correctly, secure the reconnected LED strip using adhesive or clips. This will prevent any movement of the wires and ensure a long-lasting connection.
Step 10: Avoid Overlapping Connections
When reconnecting multiple cut LED strips, make sure the connections do not overlap. If they do, it can cause short circuits and damage your LED strip. Plan the placement of your connections carefully to avoid this issue.
Step 11: Consider Using Solderless Connectors
If you are not confident with soldering or want a more secure connection, you can opt to use solderless connectors for your cut LED strips. These connectors require no soldering and provide a strong connection between the wires.
Step 12: Disconnect the Power Supply
Remember to always disconnect the power supply before making any changes or working on your LED strip. This will ensure your safety and prevent any damage to your LED strip or other electrical components.
By following these steps on how to reconnect cut LED strips without connectors, you can easily reconnect cut LED strips without using connectors. Just remember to use the correct wire gauge, prepare the wires properly, and test the connections before reinstalling your LED strip. With these tips, you can confidently fix any cut LED strips and continue enjoying their bright and colorful lights.
So next time you have a cut LED strip on hand, don’t worry about not having connectors – just follow these steps and reconnect them like a pro!
8 Things to Avoid When Reconnecting Cut Led Strips Without Connectors
1. Using the Wrong Wire Gauge
Using the wrong wire gauge for your LED strip can result in weak connections and may cause your LED strip to malfunction. Make sure to use wires with an appropriate gauge that can handle the current of your LED strips.
2. Twisting Wires Too Tight
While twisting the wires together, make sure they are securely twisted but not too tight that it becomes hard to solder them. If the wires are twisted too tight, it can make it difficult to solder and may result in a weak connection.
3. Not Tinning the Wires
Tinning is an important step in ensuring strong connections when reconnecting cut LED strips without connectors. It helps create a secure bond between the two wires and prevents any loose or exposed strands of wire.
4. Using Low-Quality Solder
Using low-quality solder can result in weak connections that may break over time. Always use high-quality, lead-free solder for the best results and to ensure the longevity of your LED strips. But don’t forget to also use a soldering iron with adjustable temperature settings for better control.
5. Not Measuring Wire Length
Before soldering the wires, make sure to measure the length needed for each connection. This will help avoid any excess wire that can create a messy and insecure connection or cause overlapping connections.
6. Skipping Testing of Connections
After soldering the connections, it is important to test them before reinstalling your LED strip. Skipping this step can result in faulty connections that may not light up or cause issues with your LED strip’s performance.
7. Not Securing the Reconnected Strip
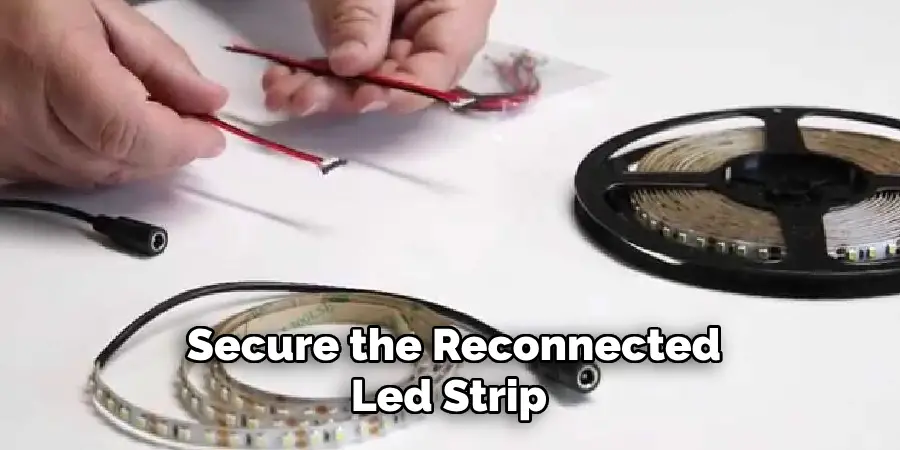
Failing to secure the reconnected LED strip can lead to loose wires and a weak connection that may break over time. Use adhesive or clips to secure the wires and prevent any movement that can damage the connections.
8. Forgetting to Disconnect the Power Supply
This is a crucial step in ensuring your safety while working on electrical components such as LED strips. Always remember to disconnect the power supply before making any changes or handling your LED strip to avoid any accidents or damage.
So, next time you are reconnecting cut LED strips without connectors, make sure to avoid these common mistakes for a successful and long-lasting connection!
By following these tips and avoiding these mistakes, you can confidently reconnect cut LED strips without the need for connectors. With proper preparation and testing, your LED strip will be back to illuminating your space in no time.
8 Additional Tips for Reconnecting Cut LED Strips Without Connectors
1. Use Heat Shrink Tubing
Instead of electrical tape, consider using heat shrink tubing to insulate your connections for a more secure and professional look. Simply slip the tubing over the soldered connection and use a heat gun or hairdryer to shrink it in place.
2. Clean the Wires Before Tinning
To achieve the best soldering results, make sure to clean the wire ends before tinning them. This will remove any dirt or residue that may hinder a strong bond between the two wires. So before winning, use sandpaper or a wire brush to clean the wires.
3. Use a Helping Hand Tool
A helping hand tool can come in handy when soldering wires together, especially if you are working alone. These tools hold the wires in place, freeing up your hands to focus on soldering. As a result, you can achieve cleaner and more precise connections.
4. Use Flux for Better Soldering
Flux is a compound that helps clean and reduce oxidation on the surfaces being soldered, making it easier to create strong bonds between the wires. Apply flux to the wire ends before tinning, or use flux-core solder for better results.
5. Use Solder Wick for Clean-Up
If you accidentally use too much solder or create a messy connection, don’t worry! You can easily clean it up using a solder wick. This copper braid absorbs excess solder and helps tidy up your connections.
6. Use Wire Nuts as Temporary Connectors
If you need to test your LED strip before permanently connecting the wires, wire nuts can be used as temporary connectors. They provide a secure and easy way to connect the wires without soldering.
7. Consider Using Solderless Connectors
If you frequently encounter cut LED strips and don’t want to go through the hassle of soldering every time, consider using solderless connectors. These connectors simply require crimping or screwing to create a secure connection between the wires.
8. Practice Makes Perfect
Soldering can be a tricky skill to master, especially for beginners. So don’t be discouraged if your first few attempts are not perfect.
As with any skill, practice makes perfect, and with time, you will become more confident and skilled at reconnecting cut LED strips without connectors. So keep practicing, and don’t be afraid to make mistakes – that’s how you learn!
With these additional tips on how to reconnect cut LED strips without connectors, you can further improve your skills and ensure successful connections every time you need to reconnect cut LED strips without connectors. So go ahead and confidently tackle any LED strip repair or installation project with ease.
Frequently Asked Questions on Reconnecting Cut LED Strips Without Connectors
Is It Safe to Solder Led Strips Without Connectors?
Yes, it is safe to solder LED strips as long as proper safety precautions are taken, such as disconnecting the power supply and using appropriate tools. It is important to handle electrical components with caution and follow proper soldering techniques.
Can You Reuse Soldered Connections?
Yes, you can reuse soldered connections as long as they are in good condition and properly insulated. However, it is recommended to always test the connections before reusing them to ensure their reliability.
How Do You Know If a Soldered Connection is Good?
A good soldered connection should be smooth, shiny, and free of any excess solder or gaps. It should also have a strong bond that cannot be easily pulled apart. To ensure the quality of your soldered connections, always test them before installation.
Can You Use Any Solder for LED Strips?
It is recommended to use high-quality, lead-free solder for LED strips to avoid any potential health hazards. Additionally, consider using flux-core solder for better results. Always read the manufacturer’s instructions and choose a suitable type of solder for your specific LED strip.
Is It Better to Use Connectors or Solder for LED Strips?
Both connectors and solder can be used successfully for LED strips. However, soldering provides a more permanent and reliable connection compared to connectors. It also allows for a more discreet installation without visible connections. Ultimately, the choice depends on personal preference and project needs. So now you have all the information and tips you need to confidently reconnect cut LED strips without connectors.
Conclusion
Reconnecting cut LED strips without connectors may seem daunting at first, but with the right tools and techniques on how to reconnect cut LED strips without connectors, it can be easily accomplished. By following these additional tips and avoiding common mistakes, you can achieve strong and long-lasting connections that will keep your LED strip shining brightly for years to come.
Remember always to prioritize safety and proper preparation when working with electrical components. And don’t forget, practice makes perfect! Keep honing your soldering skills, and soon, you will be a pro at reconnecting cut LED strips without connectors. So go ahead and get creative with your LED strip installations and repairs – the possibilities are endless.

