Friendship lamps are a creative and meaningful way to stay connected with loved ones, no matter the distance. By linking two or more lamps, you can send a gentle glow of light to a friend or family member with just a simple touch. This guide will walk you through the steps of how to link two friendship lamps, ensuring they are properly set up and ready to bridge the gap between you and those you care about.

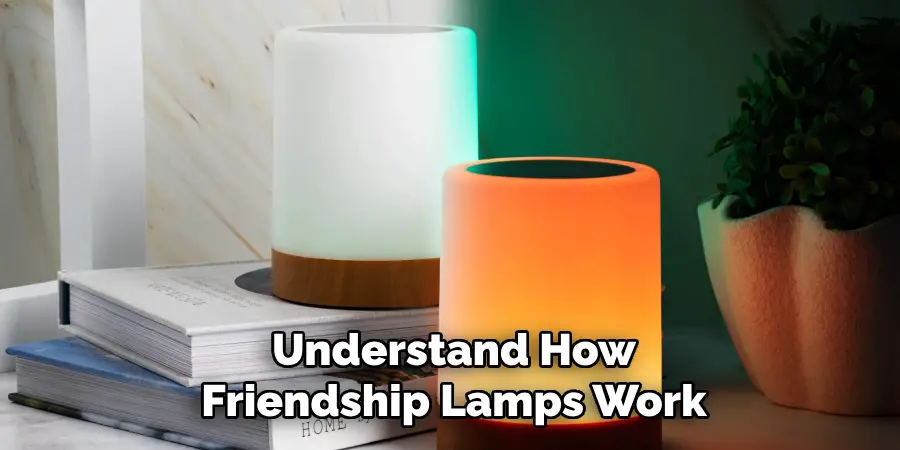
Understanding How Friendship Lamps Work
Friendship lamps use Wi-Fi technology to stay connected across any distance. Each lamp is linked to a shared group ID or unique code, allowing them to communicate with one another. When one lamp is touched, it sends a signal through the Wi-Fi network to activate the other linked lamp(s), causing them to light up in the designated color. This simple yet effective system relies on an active internet connection for synchronization, ensuring that whenever you touch your lamp, the linked lamps instantly respond—no matter where they are in the world. This heartfelt exchange of light symbolizes a moment of connection, bringing people closer together even when separated by miles.
What You Need Before Starting
Before you begin using these linked lamps to stay connected with your loved ones, there are a few essential items and preparations you’ll need. First, ensure you have access to a stable Wi-Fi network with internet connectivity, as it is crucial for the lamps to communicate with each other effectively. Next, you’ll need to download the companion app associated with the lamps, as this will allow you to set up and manage the connection between devices. Make sure to have the necessary login credentials for the app and Wi-Fi network handy during setup. Lastly, each lamp will need its own power source, so be sure to locate suitable outlets in the desired locations.
10 Steps How to Link Two Friendship Lamps
1. Understand How Friendship Lamps Work
Before diving into the linking process, it’s important to understand the technology behind friendship lamps. These are Wi-Fi-enabled devices that light up with a single touch to send a signal to a paired lamp, regardless of the distance between them. Each lamp connects to a shared group ID via a cloud network, allowing multiple lamps to communicate.

When one person touches their lamp, the linked lamp(s) glow with the same color in real time, signifying “I’m thinking of you.” Grasping this concept helps you better visualize the setup process and what each step accomplishes.
2. Set Up a Reliable Wi-Fi Connection
A steady Wi-Fi connection is the foundation for successfully linking two friendship lamps. Ensure that both lamps are placed in areas with reliable 2.4GHz Wi-Fi coverage, as most models don’t support 5GHz networks. Avoid using public or password-protected networks that require additional login steps (like those in hotels or offices). It’s also helpful to keep the lamp near your router during setup. Having stable Wi-Fi on both ends—your lamp and your friend’s—is essential to avoid delays or dropped connections in your lamp communication.
3. Unbox and Power On the Lamps
Once both parties have received their lamps, unbox the contents carefully. Most kits include the lamp, a power adapter, and a brief instruction manual. Plug the power adapter into a wall outlet and then into the lamp.

After powering on, the lamp will often cycle through a set of colors or blink to indicate it’s searching for Wi-Fi. Wait patiently for this startup process to complete before continuing with the setup. Ensure the lamp remains plugged in at all times for proper operation and syncing.
4. Download the Companion App or Access the Web Portal
Friendship lamp brands like Filimin typically provide a companion app or online portal to configure your lamp. Download the official app (if available) or visit the manufacturer’s website. Create an account using your email and set a secure password. Most platforms will then guide you to “Add a New Lamp” or “Register Device.” You’ll need access to the lamp during this process, as you may be asked to press it or take note of its blinking light pattern. Having both the lamp and your mobile device or computer ready will streamline setup.
5. Connect the Lamp to Wi-Fi via the Setup Tool
Next, link the lamp to your Wi-Fi network using the setup tool provided by the manufacturer. Some lamps emit a temporary Wi-Fi signal that your phone or laptop must connect to—this allows you to feed your home Wi-Fi credentials into the lamp. After connecting to the lamp’s network, you’ll be prompted to select your home Wi-Fi and enter the password.

Once inputted, the lamp will attempt to join the internet. Watch for color changes that indicate success (often a soft pulse or steady glow). If the lamp fails to connect, retry or move it closer to your router.
6. Assign a Group ID and Color Preferences
Once connected to Wi-Fi, you’ll assign a Group ID—a unique name that links your lamp to another. Choose a name that both you and your friend can enter during setup. Think of this ID like a chatroom; all lamps with the same Group ID can communicate. You can also assign each person a color using the app or web dashboard. For example, you might pick purple, and your friend might pick teal. When either of you touches your lamp, the other will see that specific color light up, adding a personalized touch to the interaction.
7. Repeat the Setup Process for the Second Lamp
To link both lamps successfully, your friend or loved one must repeat the same setup process on their end. They’ll plug in their lamp, connect it to Wi-Fi using the app or web tool, and enter the same Group ID that you used. Consistency in the Group ID is key—typos or mismatches will prevent the lamps from syncing. They should also choose their preferred color to identify themselves when they touch their lamp. Once both lamps are registered under the same group, they’ll begin communicating instantly.
8. Perform a Test Touch to Confirm the Link
With both lamps powered on, connected to Wi-Fi, and registered under the same group, it’s time to test the link. Gently touch the surface or top of your lamp (depending on the model). Within seconds, your friend’s lamp should light up in the color you selected, and yours may light up as well to confirm the action.

Have your friend do the same from their side. If both lamps respond correctly, your link is successful! If not, double-check the Group ID, internet connection, and registration details before troubleshooting further.
9. Troubleshoot Common Connectivity Issues
Occasionally, issues like a blinking light or delayed response may occur. Most problems can be traced to a Wi-Fi disconnection, weak signal, or incorrect group pairing. Check your internet speed and restart your router if needed. If the lamp’s light blinks in a pattern, refer to the manufacturer’s color code guide to understand the issue—some patterns signal a need for reconfiguration. Repeating the setup process often resolves connectivity glitches. Also, confirm that your firmware is updated, especially if the manufacturer pushes out occasional software enhancements.
10. Share the Joy and Create a Routine
Now that your friendship lamps are successfully linked, you can begin building meaningful rituals around them. Maybe you touch the lamp every morning to say “good day” or every night as a digital goodnight hug. You can also agree on color codes for different moods—blue for “I miss you,” red for “call me,” or green for “everything’s good.” The beauty of friendship lamps lies in their silent communication—a comforting glow that cuts through time zones and busy schedules. Whether you’re linking with a partner, a friend, or family member, your lamp becomes a visual language of love and connection.
Things to Consider When Using Friendship Lamps
Before incorporating friendship lamps into your life, there are a few factors to keep in mind to enhance the experience. First, ensure that the lamps are connected to a reliable Wi-Fi network to guarantee seamless communication regardless of distance. Additionally, discuss and agree on the color codes or patterns with your loved one in advance to avoid misunderstandings. Think about where you want to place your lamp—it should be in a spot where you’ll see it often but where its glow won’t disrupt your activities or sleep. Lastly, keep in mind that this tool is meant to complement, not replace, more direct forms of communication. Use it as a meaningful addition to stay connected on an emotional level.
Conclusion
In conclusion, touch lamps are a beautiful and simple way to stay emotionally connected with loved ones, regardless of the physical distance between you. By incorporating this device into your daily routine, you can create a constant reminder of your bond and share moments of connection in a unique and heartfelt way. Remember, a small gesture like lighting up the lamp can convey a world of emotions and strengthen relationships in meaningful ways. So, there you have it – a quick and easy guide on how to link two friendship lamps.

