Keeping your bathroom light fixtures in top condition is essential if you want to maintain a beautiful, hygienic space. But oftentimes, it can seem like an overwhelming task – especially if the lights are hard to reach or high up on the ceiling.

Don’t worry – with a few simple steps on how to clean bathroom light fixtures and the right tools and products, you’ll be able to efficiently clean and restore your bathroom light fixtures back to their original state so that everyone in your home enjoys a safe, sparkling environment. In this article, we’ll show you how!
Things to Consider Before Cleaning:
Before we dive into the steps on how to clean bathroom light fixtures, there are a few things you should consider. First, make sure that the lights are turned off and completely cooled down before you start cleaning. This will prevent any accidents or injuries from occurring. Additionally, make sure to have all necessary tools and products ready before starting – this will save you time and energy in the long run.
Tools and Products You’ll Need
- Ladder or Step Stool (if Your Light Fixtures Are High Up)
- Microfiber Cloth
- Soft-bristled Brush
- Dish Soap or All-purpose Cleaner
- Glass Cleaner (if Your Light Fixtures Have Glass Covers)
- Old Toothbrush (for Cleaning Hard-to-reach Areas)
- Rubber Gloves (to Protect Your Hands from Chemicals)
Now that you have all the necessary tools and products, let’s move on to the actual steps on how to clean bathroom light fixtures.
11 Step-by-step Guides on How to Clean Bathroom Light Fixtures
Step 1: Dusting
The first step in cleaning your bathroom light fixtures is dusting. Use a microfiber cloth to gently wipe away any dust or debris on the surface of your light fixtures. This will make it easier for you to see any stubborn spots or grime that need extra attention. You can also use a soft-bristled brush to remove any dust from crevices or hard-to-reach areas.

Step 2: Remove and Soak Glass Covers (If Applicable)
For light fixtures with glass covers, it’s best to remove them before cleaning. Fill your sink or basin with warm water and add some dish soap or all-purpose cleaner. Carefully place the glass covers into the water and let them soak for a few minutes while you move on to the next steps. It’s important to handle the glass covers with care to avoid any breakage.
Step 3: Mix Cleaning Solution
In a small bucket or bowl, mix some warm water with dish soap or all-purpose cleaner. You can also use a combination of vinegar and water for a more natural cleaning solution. But be careful not to mix vinegar with bleach or ammonia-based products as this can create harmful fumes. This cleaning solution will be used to wipe down the light fixtures.
Step 4: Wear Rubber Gloves
Before you start cleaning, put on some rubber gloves to protect your hands from any chemicals in the cleaning solution. This will also prevent your skin from getting irritated. It’s always better to be safe than sorry! Although, if you’re using a natural cleaning solution like vinegar and water, gloves may not be necessary.
Step 5: Wipe Down Light Fixtures with Cleaning Solution
Using a microfiber cloth or sponge, dip it into the cleaning solution and wring out any excess liquid. Gently wipe down all surfaces of your light fixtures. For any stubborn spots or grime, use an old toothbrush to scrub them away. Be sure to clean all crevices and hard-to-reach areas as well. However, avoid getting the electrical components of the light fixtures wet.
Step 6: Rinse with Clean Water
After you’ve wiped down the light fixtures with the cleaning solution, rinse them off with clean water. This will remove any remaining dirt or residue from the surface. It’s important to thoroughly rinse off the cleaning solution to avoid any build-up that can cause damage in the long run. You can use a clean cloth or sponge to wipe off the water.

Step 7: Dry with a Microfiber Cloth
Using a clean microfiber cloth, dry off all surfaces of your light fixtures. This will prevent any water spots from forming and give your fixtures a shiny finish. Make sure to also dry off any glass covers that were soaking in the cleaning solution. Otherwise, you can leave them to air dry. If your light fixtures have any intricate designs or engravings, use a hairdryer on a low setting to dry them.
Step 8: Clean Glass Covers (If Applicable)
Now that the glass covers have soaked in the cleaning solution, gently scrub them with a microfiber cloth or sponge. This will help remove any dirt or grime that has accumulated on them. Rinse off the covers with clean water and dry them off with a microfiber cloth. It’s important to handle the covers with care as they can be fragile.
Step 9: Polish Glass Covers (If Applicable)
For extra shine, you can use a glass cleaner to polish the glass covers. Simply spray the cleaner onto the covers and wipe it off with a clean microfiber cloth. Be careful not to use too much cleaner as this can cause streaks on the glass. You can also use vinegar and water solution as a natural alternative.
Step 10: Reinstall Glass Covers (If Applicable)
Once your light fixtures and glass covers are completely dry, it’s time to reinstall them. Carefully place the covers back onto the light fixtures and make sure they are securely in place. You can also give them a final wipe-down with a clean cloth or paper towel to ensure no water spots are left behind.
Step 11: Enjoy Your Clean Bathroom Light Fixtures
Congratulations! You’ve successfully cleaned your bathroom light fixtures. Take a step back and admire your hard work – not only will your light fixtures look shiny and new, but they’ll also provide better lighting in your bathroom.
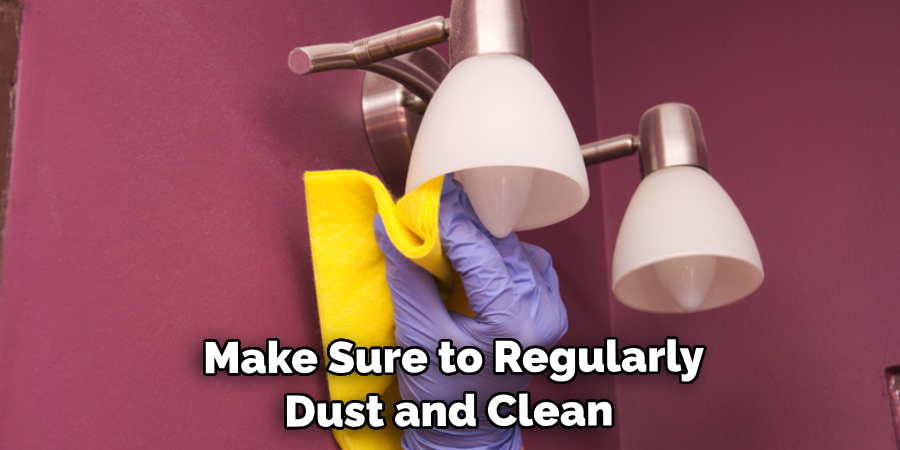
Make sure to regularly dust and clean your light fixtures to maintain their cleanliness and prevent any build-up that can lead to damage in the future. Otherwise, you can always refer back to this guide on how to clean bathroom light fixtures for a quick and easy cleaning process. Now go enjoy your sparkling bathroom!
Additional Tips for Maintaining Clean Bathroom Light Fixtures
- Avoid Using Harsh Chemicals or Abrasive Materials When Cleaning Your Light Fixtures as This Can Cause Damage.
- For Tougher Stains, You Can Use a Mixture of Baking Soda and Water to Create a Paste. Apply the Paste on the Stain and Let It Sit for a Few Minutes Before Wiping It Off With a Clean Cloth.
- Regularly Dusting Your Light Fixtures Will Prevent Dirt and Grime Build-Up.
- Use a Lint-Free Cloth or Paper Towel to Avoid Leaving Fibers on Your Light Fixtures.
- If Your Light Fixtures Are Made of Brass, Copper, or Other Metals, You Can Use Metal Polish to Restore Their Shine. But Be Sure to Follow the Manufacturer’s Instructions.
- For Glass Covers, Avoid Using Harsh Cleaners and Instead, Opt for a Mild Soap and Water Solution.
- Always Turn off the Power Before Cleaning Any Electrical Light Fixtures.
- Make Sure to Clean Your Light Fixtures Every 1-2 Months to Prevent Build-Up and Keep Them Looking Like New.
Frequently Asked Questions
Q1. How Often Should I Clean My Bathroom Light Fixtures?
A1. It is recommended to clean your bathroom light fixtures every 1-2 months to prevent build-up and maintain their cleanliness. However, this can vary depending on the frequency of use and the amount of dust in your bathroom.
Q2. Can I Use Vinegar to Clean My Light Fixtures?
A2. Yes, you can use a mixture of vinegar and water as a natural cleaning solution for your light fixtures. Just be careful not to mix vinegar with bleach or ammonia-based products as this can create harmful fumes.

Q3. Is It Safe to Use a Hairdryer to Dry My Light Fixtures?
A3. Yes, it is safe to use a hairdryer on a low setting to dry intricate designs or engravings on your light fixtures. However, avoid using it on any electrical components as they should not come into contact with water. However, if you are unsure or uncomfortable using a hairdryer, you can always air-dry your light fixtures.
Q4. Can I Use Metal Polish to Clean All Types of Light Fixtures?
A4.Yes, metal polish can be used on light fixtures made of brass, copper, or other metals. Just make sure to follow the manufacturer’s instructions and test it on a small area first before applying it to the entire fixture. However, avoid using metal polish on painted or plated fixtures as it can cause damage.
Conclusion
In conclusion on how to clean bathroom light fixtures, cleaning the light fixtures in your bathroom is a straightforward task that doesn’t require many materials. It is recommended that you clean your bathroom light fixtures at least every other month to ensure they are free of dust and dirt. After using the simple steps outlined here, you will have beautiful, sparkling fixtures that are sure to illuminate your bathroom with style and glamour.
Plus, investing in the right cleaning products and tools helps extend the life of your fixtures too! So don’t wait any longer—tackle that dust accumulation today and enjoy the results tomorrow! Start by gathering all your supplies, following instructions carefully, and savor the satisfaction of a job well done once it’s complete.
You Can Check It Out to Update Light Fixtures

