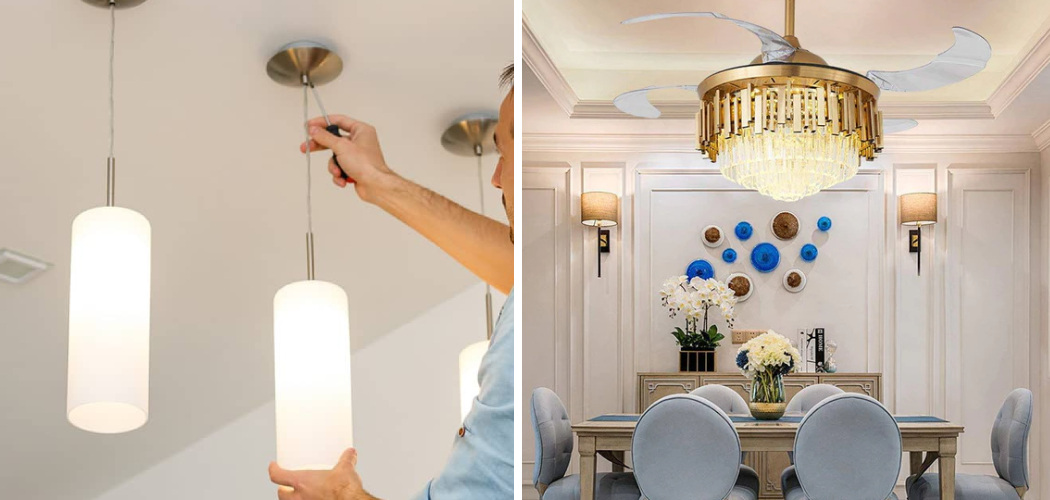
Are you looking to upgrade your living space with some class and elegance? Installing a chandelier can be just what you need to bring new life into any room. But switching your existing light from a can light to a chandelier may seem intimidating if you are used to ordinary, everyday lighting fixtures. Don’t worry! We’ve got you covered with this step-by-step guide on how to change can light to chandelier!

Can light refer to recessed lighting fixtures that are installed in a hollow opening in the ceiling? These lights have garnered popularity due to their sleek and modern appearance. However, they might provide less character and ambiance than a beautiful chandelier can.
So grab the necessary tools, put on some comfy clothes, and let’s start transforming your home into the showstopper it deserves.
What Will You Need?
Before diving into the process, ensure you have all the tools and materials to complete this project. Here’s a list of things you will need:
- Ladder (make sure it’s tall enough for you to reach the ceiling comfortably)
- Screwdriver or drill
- Utility knife
- Wire connectors
- Chandelier (make sure it is the correct size and weight for your space)
- Chandelier ceiling plate
- Light fixture bracket
- Electrical tape
Once you have all your tools and materials ready, let’s move on to the next steps.
10 Easy Steps on How to Change Can Light to Chandelier
Step 1: Turn off the Power
Safety first! Before beginning any electrical work, turn off the power source for the can light. You can do this by turning off the circuit breaker that controls it. You can also use a non-contact voltage tester to double-check if the power is off.
Step 2: Remove the Can of Light
Using a ladder, unscrew and detach the can light from its housing. Be careful not to damage any wires or connections inside the ceiling while doing this. If you’re having trouble removing it, try using a utility knife to pry it out gently.

Step 3: Disconnect the Wires
Once you’ve successfully removed the can light, you will see a set of wires (usually colored black, white, and green or bare) secured together with wire connectors (or wire nuts). Carefully unscrew these connectors to disconnect the wires.
Remember their arrangement as you’ll need to replicate this when installing the chandelier. It’s also a good idea to take a picture before disconnecting for future reference. Always handle wires with caution to ensure safety.
Step 4: Attach the Light Fixture Bracket
The light fixture bracket is a metal piece supporting the chandelier, ensuring it’s secured to the ceiling. Hold the bracket up to the hole left by the can light. Align the bracket with the screw holes and use screws to secure it to the ceiling. Ensure that the bracket is tightly fastened to prevent movement, as this could be dangerous with the chandelier’s weight.
Step 5: Attach the Chandelier Ceiling Plate
Next, you must attach the chandelier’s ceiling plate to the light fixture bracket. This plate is what the chandelier will hang from, so it needs to be securely fastened. Place the plate over the bracket, aligning the screw holes. Use screws to attach the plate to the bracket, ensuring it is tight and secure. Now, the base for your chandelier is ready.
Step 6: Prepare the Chandelier
Now, it’s time to prepare your chandelier. If your chandelier came unassembled, follow the manufacturer’s instructions to put it together. Ensure that all the pieces, including light bulbs, are securely fastened. You’d also want to attach the chain to the chandelier, but keep the wires running through the links of the chain, as this will provide additional support to your chandelier.
Step 7: Connect the Wires
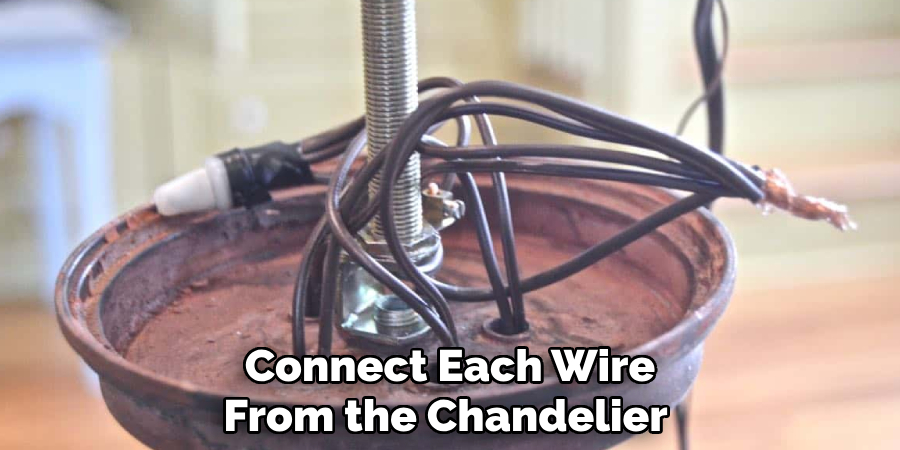
Bring your chandelier up to the ceiling plate. Connect each wire from the chandelier to their corresponding wires from the ceiling.

Usually, the black wire (hot) from the chandelier connects to the black wire from the ceiling, the white wire (neutral) relates to the white wire from the ceiling, and the green or bare wire (ground) connects to the green or bare wire from the ceiling.
Use wire connectors to secure these connections and then wrap them with electrical tape for safety.
Step 8: Attach the Chandelier
Once all the wires are connected, you can attach the chandelier to the ceiling plate. This step may vary depending on the design of your chandelier, but it often involves hooking the chandelier’s chain onto the hook or loop on the ceiling plate. Be careful not to pull on the wires while doing this, and make sure the chandelier is hanging straight.
Step 9: Install Light Bulbs
Screw in the recommended light bulbs for your chandelier. Always follow the manufacturer’s instructions for bulb type and wattage to prevent any damage or fire hazards. Try turning on the chandelier to test if it’s working before proceeding to the final step.
Step 10: Clean Up and Enjoy!
Clean up your work area and discard any packaging or waste. Now, stand back and admire your new chandelier! Turn on the power source and bask in the beautiful lighting this fixture adds to your room.
Following these easy steps, you can transform your space from plain to elegant in just a few hours. Remember always to prioritize safety and consult a professional if you feel uncomfortable with any part of the process. Now, go ahead and show off your new chandelier!
5 Additional Tips and Tricks
- Always turn off the power: Before changing a can light to a chandelier, always ensure the power is turned off at the circuit breaker to avoid any electrical accidents.
- Check the weight limit: Always be sure to check the weight limit of your existing can light fixture to ensure it can support the weight of your new chandelier.
- Use the correct tools: Always use the correct tools to change a can light to a chandelier. A step ladder, screwdriver, wire nuts, and adjustable wrench can make the process smoother.
- Get a second pair of hands: Since chandeliers can be bulky and heavy, having a second person to help you hold the fixture while you attach the wires can be a great help.
- Professional help: If you feel the task is too complex or if you need clarification, feel free to seek professional help. A professional electrician can ensure the job is done safely and correctly.

With these additional tips, you can confidently change a can light to a chandelier and transform the look of your space. Remember always to prioritize safety and use caution when dealing with electricity.
5 Things You Should Avoid
- Ignoring the instructions: Always read the manual that comes with your chandelier. Every model is different, and not following the specific instructions can lead to difficulties during the installation or even damage the product.
- Skipping the weight-check: Pay attention to the weight limit of your current fixture. Installing a chandelier that’s too heavy can result in damage to your ceiling or the chandelier falling.
- Working with power on: Only attempt to change a can light to a chandelier after first switching off the power at the circuit breaker. This is a common mistake that can lead to severe injuries.
- Using the wrong tools: Avoid using tools that aren’t suited for the task. The right tools are critical to a safe and efficient installation process.
- Rushing the process: Take your time with the installation process. Patience is crucial when changing a can light to a chandelier. Take your time to ensure all the steps are correctly followed and the chandelier is safely installed.
By avoiding these common mistakes, you can ensure a smooth and successful transformation of your lighting fixture.
Which Type of Chandelier is Best?
When choosing a chandelier to replace your can light, consider the style of your room and the functionality you desire. Some popular types include:
- Crystal chandeliers: These elegant fixtures are perfect for adding a touch of glamour to any room. They come in various sizes and styles, making finding one that fits your space easy.
- Modern chandeliers: These sleek and minimalist fixtures are ideal for contemporary spaces. They often feature clean lines and geometric shapes, adding a modern touch to your room.
- Rustic chandeliers: Opt for a chandelier made of natural wood or wrought iron for a more cozy and rustic feel. These fixtures are perfect for adding warmth and character to your space.
No matter the type of chandelier you choose, make sure it complements your room’s overall style and design. Proper installation and careful consideration make a chandelier a beautiful and functional addition to any space.

Conclusion
Taking on the challenge of converting your recessed can light to a chandelier may feel intimidating, but it’s definitely doable.
With some effort and in the right circumstances, replacing one fixture with a beautiful chandelier can be done without outside help from electricians and contractors.
You should always pay attention to safety aspects, including turning off the power, testing wires, using an extension ladder for better reach, or calling professionals when needed. Finally, picking out a suitable chandelier that fits both your budget and aesthetic goals should be considered for this project.
Hopefully, the article on how to change can light to chandelier has provided you with enough information and tips to tackle this DIY project. So go ahead and transform your plain burning lights into something much more luminous – getting creative with your lighting choice could make a statement in any room!

