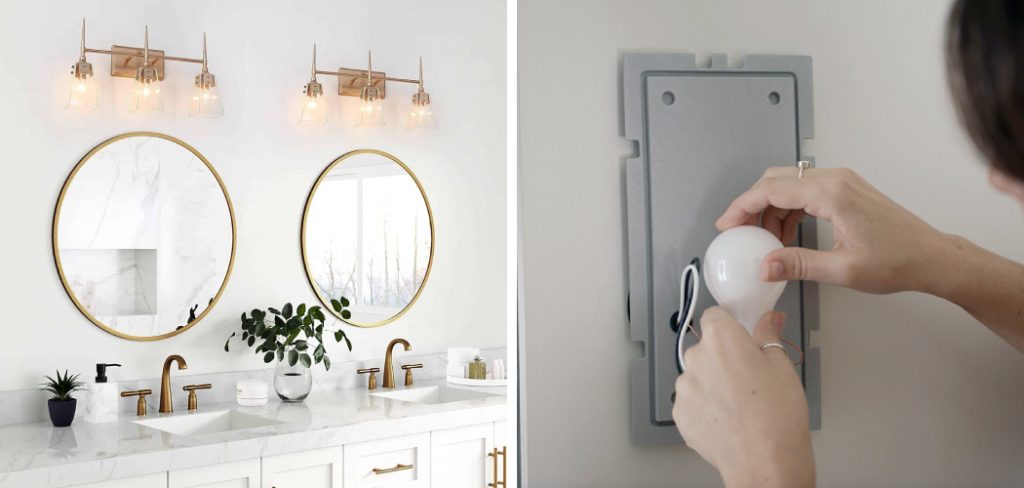
Having adequate lighting in your bathroom is crucial. Vanity lighting is an essential element of any bathroom design. It provides the necessary brightness for your grooming and makeup application. Installing a new vanity light may seem daunting, but it’s an easy DIY project that you can do within an hour. In this blog, we’ll guide you step-by-step on how to wire a vanity light fixture.

Can You Wire a Vanity Light?
Installing a vanity light may seem daunting at first, but with the proper tools and a bit of know-how, it can be a rewarding task to accomplish. Whether you’re looking to update your bathroom’s aesthetic or swap out an outdated fixture, wiring a vanity light can help give your space a fresh new look.
With a clear understanding of the power source, wiring, and connecting the new fixture, you can confidently tackle this project and create a beautifully lit bathroom space in no time. So roll up your sleeves and get ready to shine a light on your DIY skills with this rewarding and manageable project.
Why Should You Wire a Vanity Light?
Vanity lights are a great way to add a touch of elegance to your bathroom, but have you considered wiring them? While it may seem like an unnecessary expense, wiring your vanity lights offers several benefits. For starters, wired lights eliminate the need for battery replacements, ensuring a more reliable light source. Additionally, wiring your lights allows for greater customization in terms of brightness and control.
With a wired vanity light, you can easily adjust the light emitted, creating the perfect ambiance for your morning routine or evening unwinding. Beyond these practical benefits, wired vanity lights look better. Without the clutter of cords and power sources, your bathroom will have a more chic appearance. So, if you want to upgrade your bathroom décor while maintaining functionality, consider wiring your vanity lights today.
How to Wire A Vanity Light – A Comprehensive Guide
1. Turn off the Power
Before commencing any electrical work, ensure that the power supply is off. Locate your home’s circuit breaker and switch off the power connected to your bathroom. You can double-check this by trying to turn on the light switch in the bathroom. If it is not working, you are good to proceed.

2. Remove the Old Fixture
The next step is to remove the old vanity light fixture. Unscrew the screws holding the light to the wall and carefully detach the light from the wall. If the light fixture is heavy, it’s advisable to have a helper to assist you in removing it.
3. Check the Electrical Box
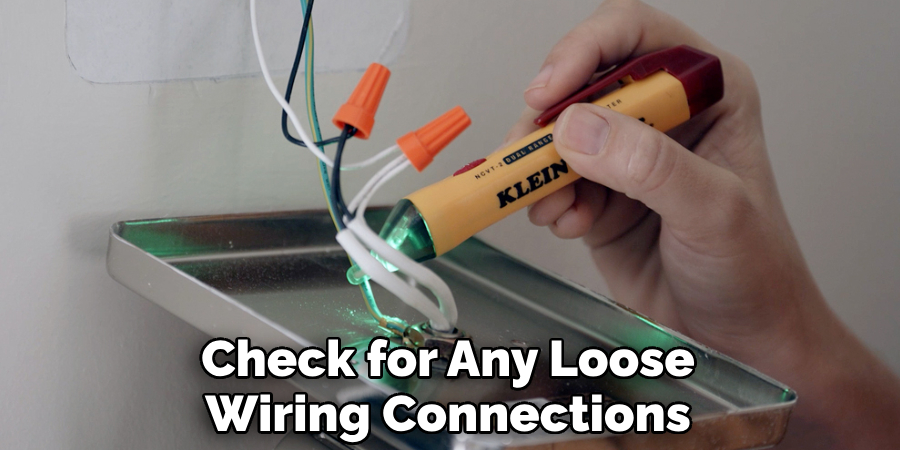
After removing the old light fixture, it’s time to investigate the electrical box to ensure it is safe. Check for any signs of wear and tear or damage. If you notice any electrical damage, it’s best to call an electrician to assess the problem.
4. Wiring the Vanity Light
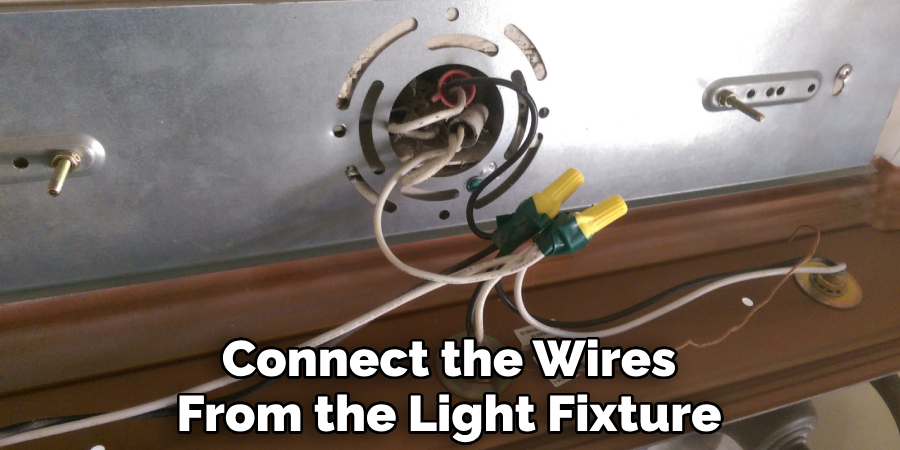
With the electrical box inspected and given a clean bill of health, you can now proceed with wiring the new vanity light. Typically, you will find black, white, and copper wire. Connect the black wire from the light to the black wire from the electrical box. Do the same with the white and copper wires. Ensure that the connections are tight to avoid any electrical issues.
5. Secure the Vanity Light
Once the wiring is complete, it’s now time to secure the vanity light to the wall. Use a screwdriver and screws provided in your vanity light kit to attach the light to the wall. Make sure that all of the connections are tight and secure.
6. Test the Light
Once you’ve secured the light to the wall, it’s important to test it to make sure everything is in working order. Turn on the circuit breaker and flip the switch in your bathroom. If all goes well, you should see your vanity light illuminated as intended.
7. Clear Up
Finally, once you’ve tested the vanity light and everything is functioning, it’s time to do a little cleanup. Put away any tools you use and clear up any debris from your work area. Be sure to check for any loose wiring connections and secure them before putting everything back in place.

That’s it! You’ve now learned how to wire a vanity light. With these steps in mind, you can tackle your next electrical project confidently! Good luck, and stay safe!
5 Considerations Things When You Need to Wire a Vanity Light
1. The first thing you must do when wiring a vanity light is turn off the power to the circuit you will be working on. This can be done by flipping the switch on the circuit breaker that controls the power to the room that you are working in.
2. Once the power is off, you must remove the old light fixture. To do this, unscrew the mounting bracket that holds the light in place. Once the bracket is removed, you can pull the light down and disconnect the wires.
3. The next step is to install the new light fixture. To do this, screw the mounting bracket into place and then connect the wires to the terminals on the new light. Be sure to tighten all of the connections before turning the power back on.
4. Once everything is connected, you can turn the power back on and test out your new light. If everything works properly, you can screw in the light bulbs and enjoy your new vanity light!
5. If you are having any trouble with your wiring, it is always best to consult with a professional electrician. They will be able to help you troubleshoot any problems and ensure that your vanity light is installed correctly and safely. This is the best way to ensure that your project is done right the first time!
5 Benefits of Wire a Vanity Light
1. Easy to Install
One of the primary benefits of wiring a vanity light is that it is easy to install. This is especially true if you are wiring a new light fixture. All you need to do is connect the wires from the light fixture to the wires in the wall. If you are wiring a new light, you will also need to connect the ground wire.

2. Cost-Effective
Another benefit of wiring a vanity light is that it is cost-effective. This is because you will not need to hire an electrician to do the job for you. Additionally, wiring a vanity light is a relatively simple task that most people can do themselves.
3. Improves Aesthetics
Wiring a vanity light can also improve the aesthetics of your bathroom. This is because vanity lights can add a touch of elegance and class to any bathroom. Additionally, wiring a vanity light can help to brighten up your bathroom and make it appear more spacious.
4. Increases Safety
Wiring a vanity light can also increase safety in your bathroom. This is because proper lighting can help to prevent accidents and falls. Additionally, having adequate lighting in your bathroom can help you see better when using the restroom, which can help reduce the risk of injuries.
5. Helps You Save Energy
Finally, wiring a vanity light can help you save energy. This is because LED lights are more energy-efficient than traditional incandescent bulbs. As such, wiring a vanity light can help you save money on your energy bill each month.
3 Common Mistakes People Make When Trying to Wire a Vanity Light
1. Not Reading the Instructions
One of the most common mistakes people make when trying to wire a vanity light is not reading the instructions. The instructions with your light will provide you with all the information you need to properly wire it. If you do not read the instructions, you may wield your light incorrectly, which could lead to electrical problems.
2. Not Shutting Off the Power
Another common mistake people make when wiring a vanity light is not shutting off the power. Always make sure to shut off the power before working on any electrical project. If you do not shut off the power, you could end up electrocuting yourself or causing a fire.
3. Not Using the Proper Tools
Another mistake people make when wiring a vanity light is not using the proper tools. You will need a few basic tools to wire your light, including wire strippers and pliers. If you do not have the proper tools, your light may not be wired correctly, which could lead to electrical problems.

Conclusion
Wiring a vanity light is a simple DIY project that anyone can accomplish. Follow this step-by-step guide, and you’ll have a new bathroom fixture installed quickly. Remember, safety is key, so always ensure the power is turned off before starting any electrical work. Don’t hesitate to call a professional electrician if you run into any difficulties. You can have a gorgeous, functional, and well-lit bathroom with these simple steps. Thanks for reading our post about how to wire a vanity light.

