Wiring a sconce light is a fundamental skill for DIY enthusiasts looking to enhance their home’s lighting aesthetics. Sconce lights, with their elegant and space-saving design, offer a stylish way to illuminate walls and add ambiance to various rooms. However, the installation process involves more than just mounting the fixture; understanding how to properly wire a sconce light is essential for both safety and functionality.
In this comprehensive guide, we will explore step-by-step methods on how to wire a sconce light, covering key considerations such as electrical safety, understanding wiring configurations, and connecting the fixture to the power source.
Whether you’re upgrading existing sconces or adding new ones to your home, this article aims to empower readers with the knowledge needed to navigate the wiring process confidently and enjoy the enhanced visual appeal that sconce lights bring to interior spaces.
Importance of Proper Wiring
Proper wiring is the foundation of any lighting installation, especially when it comes to sconce lights. Ensuring that your sconce is correctly wired is crucial for several reasons. Firstly, it guarantees the safety of your household. Incorrect wiring can lead to short circuits, electrical shocks, and even fires, posing serious risks.
Secondly, proper wiring ensures that your lighting fixtures operate efficiently and reliably. A well-wired sconce light will function smoothly, giving you control over the ambiance and illumination of your space without unexpected outages or issues.
Lastly, understanding and implementing correct wiring practices contribute to the longevity of your lighting fixtures, preventing damage and reducing the need for frequent repairs or replacements.
Understanding Sconce Light Fixtures
Before diving into the wiring process, it’s imperative to have a solid understanding of sconce light fixtures themselves. A sconce is a type of lighting that is mounted on a wall, emitting light upwards, downwards, or in multiple directions, depending on its design. These fixtures come in a variety of styles and sizes to complement the aesthetics of any room, from classic and traditional to modern and minimalist.
Sconce lights can be used for ambient, task, or accent lighting, making them incredibly versatile. Additionally, they require a power source from the wall and, in most cases, a switch to control them, which is where wiring becomes crucial. Familiarizing yourself with the components of your sconce light, including the mounting bracket, junction box, and wiring configurations, is a key step in ensuring a successful installation.

Types of Sconce Lights Available
When selecting a sconce light for your home, the variety of options available can be both exciting and overwhelming. Understanding the different types of sconce lights can help you choose a fixture that best suits your space and lighting needs. Here are some popular types:
- Up-Light Sconces: These fixtures direct light upwards, creating a warm, ambient glow that can make a room feel cozy and inviting. Up-light sconces are ideal for living rooms or bedrooms where subtle illumination is desired.
- Down-Light Sconces: Opposite to up-light sconces, down-light fixtures focus the light downward, making them suitable for task lighting in areas like bathrooms or reading nooks where direct lighting is beneficial.
- Candle Sconces: Mimicking the look of traditional candles, these sconces offer a romantic and vintage appeal. They are perfect for adding character to dining areas or hallways.
- Swing Arm Sconces: These sconces feature an adjustable arm that allows the light to be directed where it’s needed most. Swing arm sconces are highly versatile, ideal for bedside reading lamps or as task lighting in home offices.
- Picture Light Sconces: Designed to highlight artwork or photographs, picture light sconces cast a focused beam of light on the wall, enhancing the visual appeal of displayed items.
- Outdoor Sconces: Specifically built to withstand the elements, outdoor sconces can provide lighting for entryways, patios, or garden paths, enhancing both the aesthetics and security of exterior spaces.
Each type of sconce light offers different benefits and can be used to achieve various lighting effects, making it important to consider the function and atmosphere you wish to create in your space before making a selection.
Safety Considerations When Wiring Sconce Lights
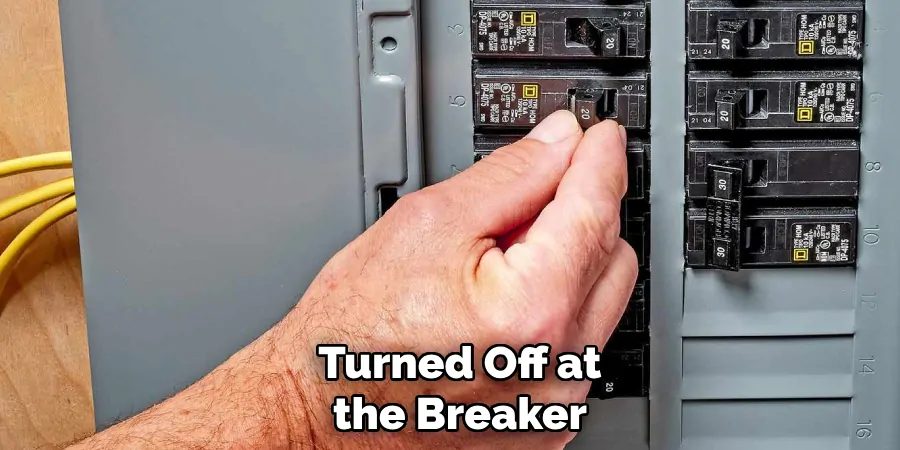
When undertaking the task of wiring sconce lights, prioritizing safety is paramount. Electrical work can be dangerous if not approached with caution and respect for standard safety procedures. Before starting, ensure the power supply to the circuit you’re working on is turned off at the breaker box to prevent electric shocks.
It’s also wise to use a voltage tester to verify that the power is indeed off before touching any wires. Additionally, wearing personal protective equipment like gloves and safety glasses can offer an extra layer of protection against unexpected sparks or wire ends. Always follow local electrical codes and regulations, as these are designed to ensure installations are safe and effective.
If at any point the wiring process seems beyond your skill level or you encounter unexpected issues, consider consulting a professional electrician. Remember, ensuring your safety and that of your household always comes first.
Gathering Tools and Materials
Before you begin the wiring process for your sconce light, compiling a list of necessary tools and materials is the first step towards a smooth installation. Having everything you need on hand will not only save time but also prevent potential interruptions. Essential tools for this project include:
- Screwdriver Set: For securing hardware and electrical box components.
- Wire Strippers/Cutters: To prepare your wires for connection.
- Voltage Tester: To ensure the power is off and verify safe working conditions.
- Drill and Drill Bits: If you need to make new holes for mounting the sconce or running wires.
- Level: To ensure your sconce lights are straight and evenly positioned.
- Tape Measure: For precise measurements and placements of your sconces.
- Wire Nuts: To safely connect wires.
- Electrical Tape: For insulating connections.
- Mounting Hardware: Typically included with your sconce light but always worth verifying.
In addition to these tools, you’ll need the appropriate electrical wires (usually provided) and, of course, your chosen sconce light fixture(s). Reviewing the manufacturer’s installation instructions before you start can also provide insights into any additional, specific tools or materials required for your particular model.
Preparing adequately ahead of time will facilitate a hassle-free installation, allowing you to enjoy your new lighting without unnecessary delays.
10 Methods How to Wire a Sconce Light
1. Turn Off Power:
Prioritize safety by turning off the power to the area where you’ll be installing the sconce light. Locate the circuit breaker or fuse box and switch off the corresponding circuit. Use a voltage tester to verify that there is no electrical current flowing to the wires.
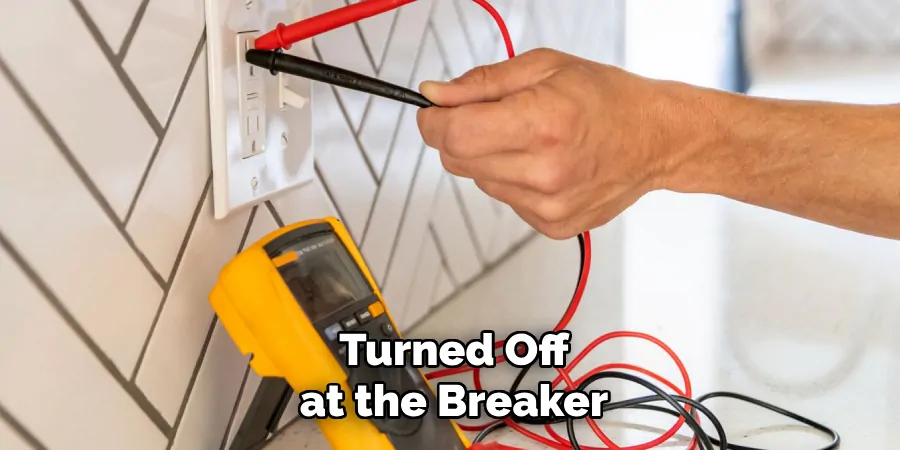
In addition, make sure to follow all safety guidelines and wear protective gear such as gloves and safety glasses. However, if you are unsure about how to safely turn off the power, it is recommended to consult a licensed electrician.
2. Gather Necessary Tools and Materials:
Before starting the wiring process, gather the required tools and materials. This typically includes a screwdriver, wire strippers, electrical tape, wire connectors, a voltage tester, and, of course, the sconce light fixture. Having everything at hand ensures a smoother installation process.
However, if you do not have these tools readily available, they can be easily purchased at any hardware store. Though basic electrical knowledge is recommended, the installation process does not require advanced technical skills.
3. Determine Wiring Configuration:
Identify the wiring configuration in your home to ensure compatibility with the sconce light. Common configurations include two-wire (hot and neutral) and three-wire (hot, neutral, and ground).
Understanding your home’s wiring helps in selecting the appropriate installation method for the sconce. If your home has a two-wire configuration, you will need to install a grounding wire for the sconce. This can be done by connecting a bare copper wire from the electrical box to the ground screw on the sconce.
Some other wiring configurations that you may come across include knob-and-tube wiring and aluminum wiring. These are older types of wiring that may require special considerations when installing a sconce light. It is recommended to consult a licensed electrician for proper installation and safety precautions.
4. Mark and Cut Power Wires:
Measure and mark the power wires (typically black or red) to the desired length, leaving enough slack for easy connection to the sconce light. Use wire strippers to remove approximately half an inch of insulation from the ends of the wires, exposing the conductive material. Twist the exposed wire strands together to keep them from fraying.
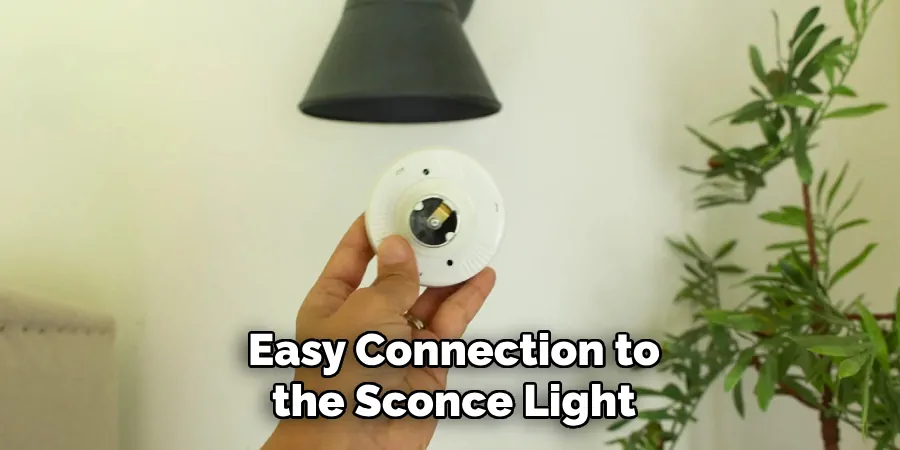
Use a sharp pair of scissors or wire cutters to carefully cut the power wires at the marked location. Make sure to make clean and straight cuts, as uneven or jagged ends can cause problems with proper connections later on.
After cutting the power wires, double check that they are still long enough to reach your light fixture. If they are not long enough, you will need to cut new power wires or use wire extenders.
When working with high voltage electrical systems, it is important to always follow safety precautions and wear protective gear such as gloves and goggles.
5. Connect Wires to the Sconce:
Match the marked power wires to the corresponding wires on the sconce light. Typically, the sconce will have a black wire (hot), a white wire (neutral), and a ground wire. Connect the black power wire to the black wire on the sconce, the white power wire to the white wire, and the ground wire to the grounding screw or wire on the fixture.
For added safety, you can secure the connection with wire nuts or electrical tape. Make sure all connections are tight and secure. While holding the sconce in place, gently tug on each wire to ensure they are properly connected.
Once all wires are connected, carefully tuck them into the electrical box and attach the sconce to the wall using screws or mounting plate provided with the fixture. Use a level to make sure the sconce is straight before fully tightening all screws.
6. Secure the Wires with Wire Connectors:
Once the wires are properly connected, secure them using wire connectors. Twist the exposed ends of the wires together clockwise and cover the connections with the appropriate-sized wire connectors. This ensures a reliable and safe electrical connection.
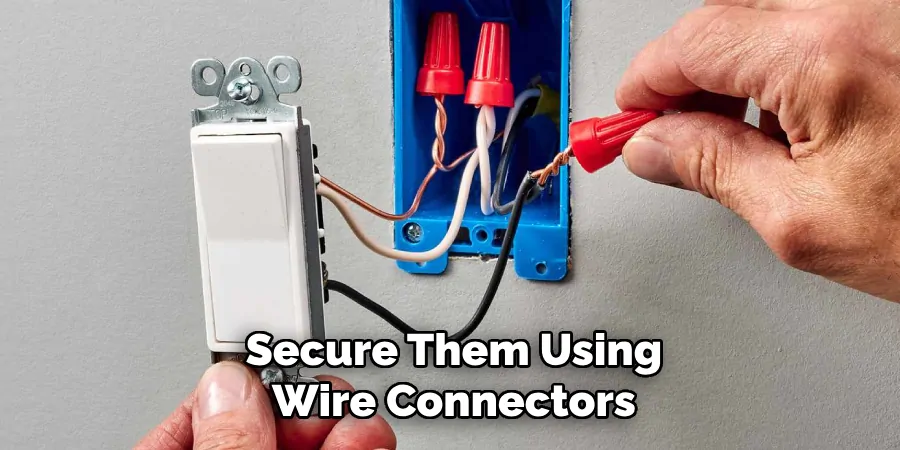
Wire connectors are available in different types and sizes, so it’s important to choose the right one for your project. Some common types include twist-on wire connectors, push-in wire connectors, and crimp-on wire connectors. Each type has its own advantages and disadvantages, so make sure to research and pick the best option for your specific needs.
When securing wires with wire connectors, make sure to use the correct size for your wires. Using a connector that is too small can cause damage to the wires and create an unsafe connection. Additionally, be sure to follow the manufacturer’s instructions for proper installation.
7. Mount the Sconce to the Wall:
Following the manufacturer’s instructions, mount the sconce to the wall using the provided screws and anchors. Ensure that the fixture is securely attached and level. Pay attention to any specific mounting instructions provided with the sconce.
Additionally, use a level to make sure the sconce is straight before tightening the screws. If necessary, use wall anchors for added support. Once the sconce is mounted securely, attach any additional decorative elements such as shades or light bulbs.
It is important to make sure that the sconce is properly attached to avoid any potential hazards or damage to the fixture. Regularly check and tighten screws if necessary to ensure the safety and stability of your sconce.
8. Test the Connections:
Before fully securing the sconce in place, turn the power back on and test the connections. Use a voltage tester to ensure that the wires are carrying the correct voltage. Verify that the sconce light functions as expected, cycling through any available settings or features.
If there are any issues, turn off the power again and check your connections to ensure they are secure and correct. Once you are satisfied that everything is working properly, turn off the power again and proceed with securing the sconce in its final position. However, the testing doesn’t end there.
You should also test the connections periodically, especially after significant changes or if you notice any irregularities with the sconce’s performance. This is to ensure that all wires are still securely connected and that there are no loose connections or damaged wires. Regular testing can help prevent any potential hazards and ensure that your sconce continues to function properly.

Additionally, it is important to test the connections in different lighting conditions. For example, if you installed the sconce in a well-lit room, try testing it at night or in a dimly lit area. This will give you a better understanding of how the sconce performs under various lighting circumstances and can alert you to any potential issues.
9. Secure the Sconce in Place:
Once you’ve confirmed that the sconce light is working correctly, secure it in its final position on the wall. Tighten the mounting screws, ensuring that the fixture is stable and aligned with your desired aesthetic and functional considerations.
When installing a sconce, it’s important to ensure that it is securely attached to the wall. This will not only prevent any accidents or damage but also ensure that the light remains in its desired position over time.
To secure the sconce in place, make sure to use appropriate mounting screws and anchors based on the material of your wall. If you are unsure about the type of screws to use, consult with a hardware store or a professional electrician.
When tightening the mounting screws, be careful not to overtighten them as this can damage the fixture. Use just enough force to secure the sconce in place while ensuring it is stable and aligned with your desired aesthetic and functional considerations.
10. Seal Openings and Insulate:
Seal any openings around the sconce where wires enter the wall to prevent drafts and maintain insulation. Use caulk or another appropriate sealant to fill gaps and ensure a finished look.
Additionally, insulate the wiring connections with electrical tape to provide an extra layer of protection. This will also help to maintain a consistent temperature and reduce energy costs.

Insulation is an important aspect of home maintenance, as it helps regulate the temperature inside your home and reduces energy consumption. In addition to sealing openings around sconces, there are other areas in your home that can benefit from insulation. This includes windows, doors, and even attics or basements.
Conclusion
In conclusion, mastering the art of wiring a sconce light is not only a practical skill but also a crucial aspect of ensuring safety and functionality in home lighting installations. By following the step-by-step guide outlined above and adhering to safety protocols, individuals can confidently undertake sconce light wiring projects.
Understanding electrical wiring basics, gathering the necessary tools and materials, and preparing the installation area are fundamental steps in the process. Properly connecting the fixture wires, mounting the sconce light securely, and conducting thorough testing and safety checks ensure a successful and reliable installation.
Hopefully, this article gave you some helpful tips about how to wire a sconce light successfully, so now that you have the proper knowledge on how to get the job done, why not give it a try today?

