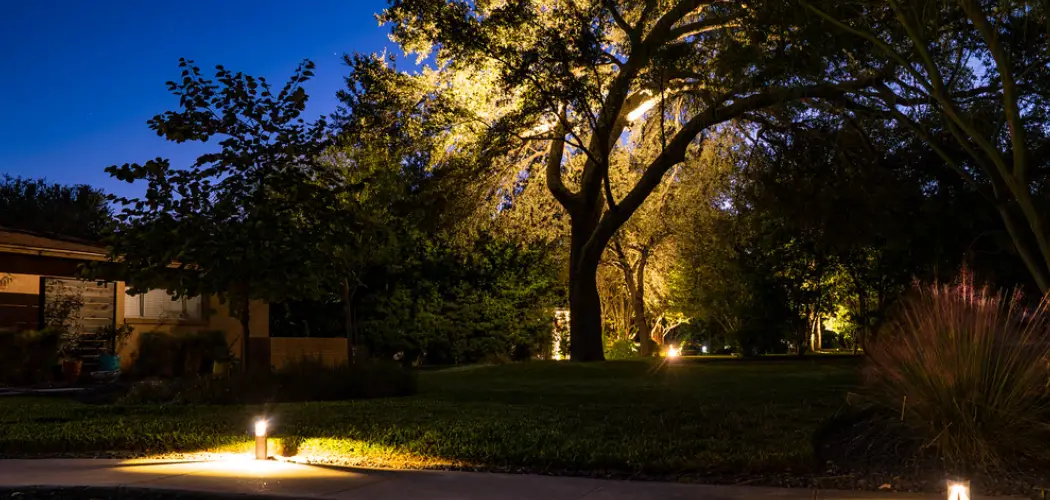
Are you looking to add a magical touch to your outdoor spaces? Uplighting trees is the perfect way to create an enchanting atmosphere that enhances the beauty of your landscape.
Uplighting trees can transform your garden or outdoor space into an enchanting nocturnal landscape. This technique involves positioning lights on the ground to shine upwards, accentuating the beautiful features of your trees and creating a dramatic effect after sunset. Whether you’re looking to highlight a single tree as a focal point or illuminate a group of trees for a stunning visual impact, uplighting can enhance the natural beauty of your outdoor environment.
In this guide on how to uplight trees, we’ll explore the essentials of uplighting trees, including choosing the right types of lights, proper placement, and installation tips to ensure your garden shines in its best light.
What Is Uplighting?
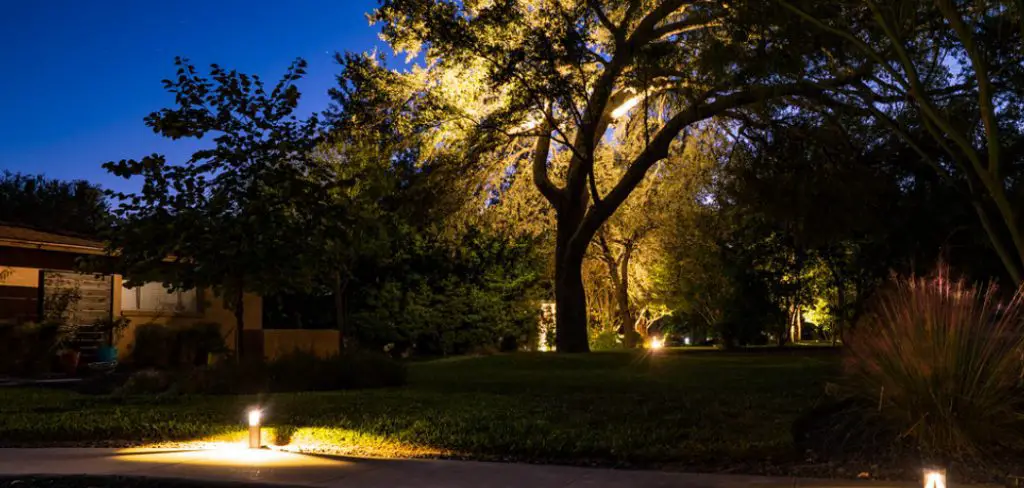
Uplighting is a lighting technique that uses lights to illuminate the architectural elements, plants, and trees in your outdoor space. Unlike traditional landscape lighting that focuses on pathways or illuminating specific areas of a garden, uplighting draws attention to vertical objects such as trees, walls, and sculptures. The light fixtures are typically installed at ground level and pointed
These lights are typically installed in the ground with their beams aimed upwards, creating a dramatic and magical effect. The light fixtures used for uplighting are also designed to withstand harsh outdoor conditions, ensuring longevity and durability.
What are the Benefits of Uplighting Trees?
Apart from the obvious aesthetic appeal, uplighting trees offer a range of benefits for your outdoor spaces. By accentuating your trees’ unique features and shapes, you can add depth and dimension to your landscape. This can also create a sense of drama and intrigue, making your garden feel like a hidden sanctuary after dark.
Additionally, uplighting trees can provide additional visibility and safety to your outdoor spaces. By illuminating pathways or dark corners, you can prevent accidents and make it easier for guests to navigate your garden at night.
Uplighting also adds an extra layer of security to your home by deterring potential intruders with increased visibility in key areas around your property.

What Will You Need?
Before you begin uplighting your trees, there are a few essential items you’ll need to gather:
- Light Fixtures: Choose from a variety of options such as well lights, bullet lights, or floodlights. Ensure they are suitable for outdoor use and have an adjustable beam angle for precise placement.
- LED Bulbs: Opt for energy-efficient LED bulbs with a warm or cool white color temperature to create the desired ambiance.
- Electrical Wire: Depending on the distance between your lights and power source, you may need to purchase additional electrical wire for installation.
- Transformer: This is necessary if you’re using low-voltage lighting. It converts high-voltage electricity into low-voltage for safe use in outdoor environments.
- Timer: A timer will allow you to schedule when your lights turn on and off, saving energy and ensuring your garden is always illuminated.
Once you have all the necessary materials, you can begin the process of uplighting your trees.
8 Easy Steps on How to Uplight Trees
Step 1. Choose the Right Location and Positioning
Choosing the right location for your uplighting is critical to achieving the desired effect in your outdoor space. Start by identifying the trees you want to highlight. Ideally, select trees with distinctive features such as unique bark, interesting shapes, or those that serve as a focal point in your landscape.
Once you’ve selected your trees, consider the angle and distance from which the light will be most effective. The aim is to position the lights so that they accentuate the tree’s features without causing glare or light pollution. Typically, placing the fixture at a distance of 8 to 10 feet from the tree and angling the beam so that it illuminates both the trunk and the canopy works well for most trees. Experiment with different positions before the final installation to ensure you achieve the most dramatic and visually appealing effect.
Step 2. Select the Appropriate Light Fixtures
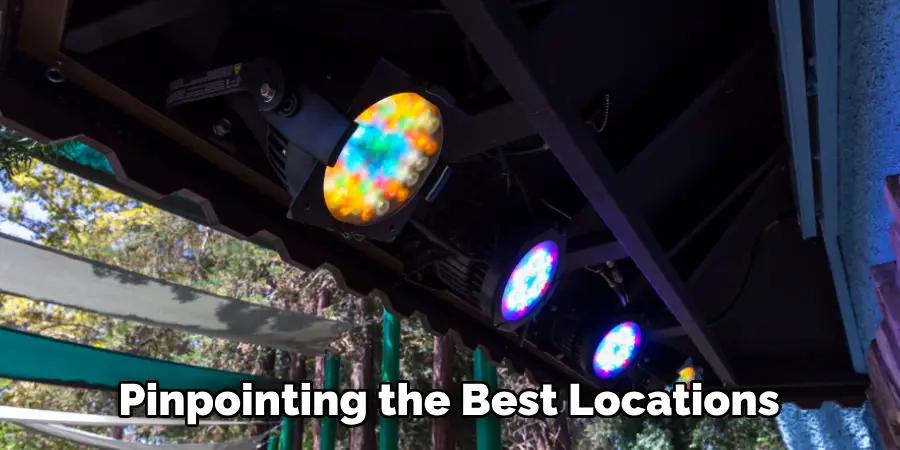
After pinpointing the best locations for your uplights, the next step is choosing the right fixtures. The ideal fixture depends on the size and type of tree and the desired effect. For smaller trees or if you wish to highlight only the trunk, well lights or small bullet lights may be ideal. More powerful floodlights could be a better choice for larger trees where you aim to illuminate the entire canopy. Consider fixtures with adjustable angles to customize the lighting as the trees grow or as your lighting preferences change. Also, ensure that the fixtures are rated for outdoor use and capable of withstanding weather elements to guarantee longevity and safety.
Step 3. Install the Light Fixtures
Once you have selected your light fixtures and determined their optimal placement, the next step is to install them. Begin by carefully digging a small trench or hole for each light fixture, ensuring not to disturb any roots or underground cables.
If using well lights, ensure the fixture’s top is level with the ground surface. For bullet or floodlights, adjust the stake depth to stabilize the fixture, but it can still be adjusted or moved if necessary. After placing the fixture in the ground, backfill the soil and press firmly around it to secure it in place. Connect the fixture to the electrical wire, following the manufacturer’s instructions to ensure a safe and proper connection. Repeat this process for each light fixture you’re installing around your trees.
Step 4. Wire the Light Fixtures to the Electrical Source
With your light fixtures securely installed, it’s time to connect them to the power source. Begin by laying out the electrical wire from your transformer to each light fixture, ensuring any tripping hazards or potential damage to the wire are avoided. Use a wire stripper to carefully expose the ends of the wires for connection.
Follow the color coding of the wires to match them correctly, and use wire connectors to secure them together. Consider using direct burial splice kits for a watertight seal, which is especially important in outdoor settings. Once all connections are made, carefully bury the wire, ensuring it’s hidden but can be accessed for future maintenance. Test the system to ensure all fixtures light up before burying the wire completely.
Step 5. Connect the System to a Transformer
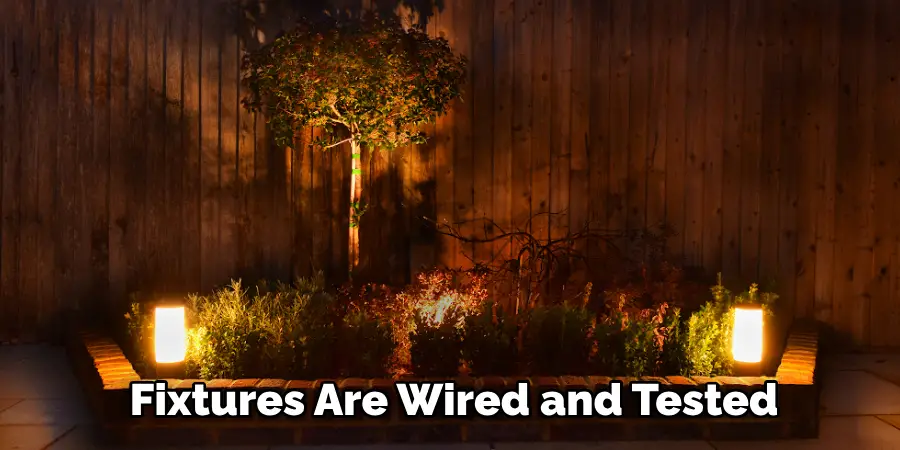
After all light fixtures are wired and tested, the next step is to connect the entire system to the transformer. The transformer is crucial as it reduces the standard 120-volt household current to a safer 12-volt or 24-volt, depending on the needs of your lighting system. First, mount the transformer on a stable surface near the power source, ensuring it’s accessible for future adjustments but hidden from direct view to maintain aesthetic appeal.
Then, connect the main wire from your light fixtures to the transformer’s terminal screws according to the manufacturer’s instructions, ensuring a secure and proper connection. Once connected, plug in the transformer and turn it on to verify that the entire system is functioning correctly. This is also a good time to adjust the timer settings on your transformer, if applicable, to automate when your lights turn on and off.
Step 6. Adjust the Light Fixtures for Optimal Illumination
After your system is powered and functional, fine-tune the positioning of each light fixture for the best visual impact. For good lights, ensure they’re not obscured by foliage or debris to maintain clear, upward lighting. Bullet and floodlights may require slight adjustments to angle and direction to highlight the tree’s features effectively without causing light pollution.
Experiment with different angles to find the most flattering illumination for your trees, considering how the light plays off the bark, leaves, and the surrounding area. This step might take some time and adjustment over different times of the day to achieve the perfect balance of light and shadow that enhances the natural beauty of your landscape.
Step 7. Maintain Your Lighting System Regularly
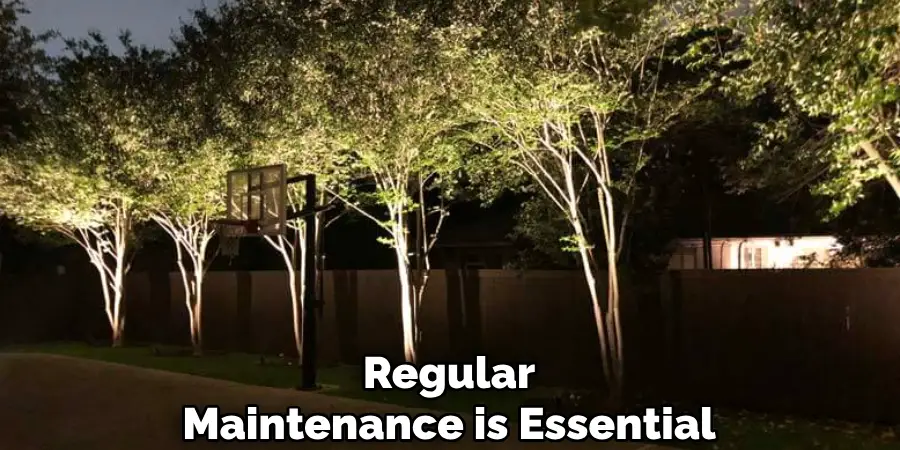
Regular maintenance is essential to ensure your uplighting system continues to function beautifully and efficiently. Check your light fixtures periodically for any signs of wear or damage, replacing bulbs as needed to keep the illumination bright and consistent.
Clear away any debris, leaves, or dirt that may accumulate around the fixtures to prevent obstruction of light and potential overheating. Inspect the electrical wires and connections for any signs of fraying or damage, especially after harsh weather conditions. This routine maintenance not only prolongs the life of your lighting system but also ensures your outdoor space remains beautifully lit and inviting throughout the year.
Step 8. Enjoy Your Beautifully Lit Landscape
With the installation and adjustments complete, it’s time to enjoy the fruits of your labor. The uplighting system you’ve installed highlights the natural beauty of your landscape and enhances the safety and security of your outdoor space.
Take time to observe your landscape during different times of the evening and night, as the changing light will create varying effects that can further accentuate the features of your trees and garden. Sharing this new ambiance with family and friends can offer a fresh perspective on outdoor gatherings. Remember, the goal of landscape uplighting is not only to illuminate but also to inspire and transform your outdoor environment into a place of beauty and tranquility.
By following these steps, you can confidently install an uplighting system that will enhance the natural beauty of your landscape and add a new level of functionality to your outdoor space.
5 Additional Tips and Tricks
- Experiment with Angles: The angle at which you position your lights can dramatically change the appearance of the tree and its surroundings. Try different angles to highlight the tree’s best features or to create interesting shadows.
- Use Timers and Dimmers: Incorporating timers can automate the lighting so your trees are lit at the most effective times, such as dusk. Dimmers allow you to adjust the intensity of the light, which can set the mood or change the focus as desired.
- Blend Different Types of Lighting: Don’t rely solely on uplighting. Combining uplighting with downlighting, pathway, or fairy lights can create a more dynamic and visually appealing landscape.
- Consider the Light Color: Different types of trees might look better under different colors or temperatures of light. Cool lights can bring out the greens in foliage, while warm lights can accentuate autumn colors or the texture of the tree bark.
- Keep it Simple: Avoid overcrowding your trees with too many lights. A few carefully placed lights can create a more natural and elegant look, whereas too many lights can appear cluttered and overwhelming. Consider the overall aesthetic of your landscape when deciding on the number of lights needed.
With these additional tips and tricks, you can take your tree uplighting to the next level. Experiment with different angles and lighting options to highlight your trees in unique and beautiful ways.

5 Things You Should Avoid
- Avoid Overlighting: Using too many lights or excessively bright lights can wash out the natural beauty of the tree, creating a harsh or uninviting ambiance. Aim to enhance, not overpower, the tree’s features.
- Steer Clear of Directing Lights in People’s Eyes: When positioning your lights, consider the line of sight from common viewpoints to prevent light from shining directly into people’s eyes. It’s important to balance beauty and practicality for comfort and safety.
- Don’t Ignore the Neighbors: Be mindful of how your lighting affects your neighbors. Ensure that your uplighting isn’t intrusive or disruptive to their living space, preserving harmony in the community.
- Avoid Using the Wrong Types of Fixtures: Not all lights are suitable for outdoor or landscape lighting. Ensure that the fixtures you choose are designed for outdoor use, waterproof, and appropriate for the lighting effect you wish to achieve.
- Neglecting Maintenance: Outdoor lighting systems require regular maintenance to keep them looking their best. Leaves, dirt, and debris can obscure lights over time, diminishing their intended effect. Regularly check and clean your lights to ensure they continue to enhance your landscape beautifully.
By avoiding these common mistakes, you can ensure that your tree uplighting is effective and visually appealing for years to come. With the right techniques, your trees can become stunning focal points in your landscape at any time of the year.
5 Different Theme Ideas for Uplighting Trees
- Holiday Magic: Use colorful lights to create a festive atmosphere during the holidays. Red and green lights can evoke Christmas vibes, while blue and white lights can give off a wintery feel.
- Enchanted Garden: Incorporate fairy lights or twinkling string lights in your trees to create a whimsical and magical setting. These lights can also add a touch of romance to outdoor events.
- Glamorous Outdoor Dining: Install warm, dimmable lights in your trees to create an intimate and elegant ambiance for outdoor dinner parties or date nights. Add candles and lanterns for a cozy and romantic atmosphere.
- Beachside Paradise: Utilize colorful, tropical-themed lights to create a relaxed and playful vibe. Palm trees can be lit up with warm, yellow lights, while string lights in blue and green hues can mimic the ocean.
- Rustic Charm: Create a cozy, rustic atmosphere by using soft, warm lights to illuminate your trees. Incorporate lanterns or mason jar lights for a charming touch. This theme works well for outdoor weddings or intimate gatherings.
The options are endless when it comes to uplighting trees, so don’t be afraid to get creative and think outside the box. Choose a theme that suits your style and the occasion, and you’ll have a stunningly lit landscape that will impress you.

What is the Beam Angle for Uplighting Trees?
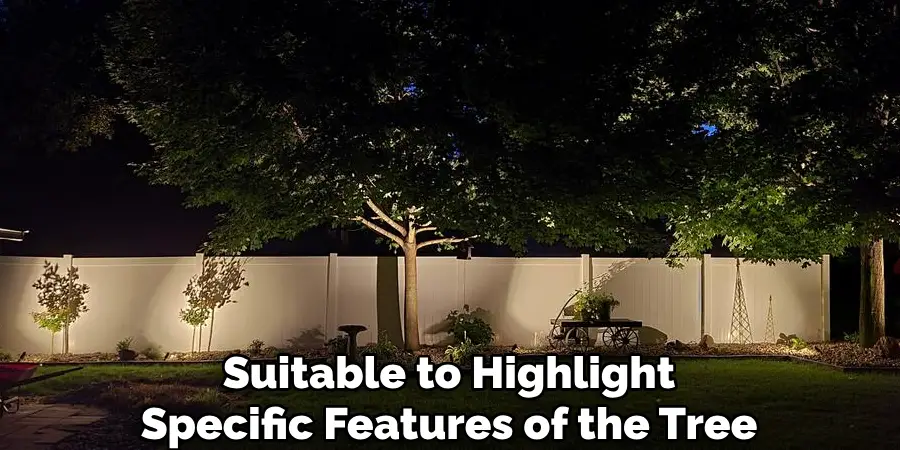
The beam angle for uplighting trees can vary depending on personal preference and the size of the tree. A wider beam angle, between 60-90 degrees, is generally recommended for larger trees to provide more coverage and a softer light. For smaller trees, a narrower beam angle of 30-45 degrees may be more suitable to highlight specific features of the tree.
The beam angle can also be adjusted by tilting or angling the lights in different directions. This allows for more flexibility and customization in creating the desired lighting effect. Ultimately, it is important to experiment and find what works best for your specific tree and landscape. So, keep experimenting with angles until you achieve the perfect balance of illumination and ambiance for your uplifted trees!
Conclusion
How to uplight trees is an art that combines functionality with aesthetics to transform your outdoor space into something truly extraordinary. By carefully considering the type and placement of lights, as well as the specific characteristics of your trees, you can create a landscape that not only highlights the natural beauty of your trees but also enhances the overall ambiance of your property.
Remember to avoid common pitfalls such as overlighting and neglecting maintenance, and instead, focus on creating a balanced and harmonious environment. Whether you’re aiming for a festive holiday look, a whimsical garden, or simply want to illuminate your trees in a way that accentuates their best features, the guidelines provided here can help you achieve stunning results.
With a bit of creativity and experimentation, uplighting can turn your trees into captivating features that draw admiration and provide enjoyment all year round.

