Are you struggling with a nonresponsive Z Wave light switch? A simple reset can help you fix the problem and get your smart lighting system back on track. This guide will discuss how to easily reset your Z Wave light switch.
Resetting a Z Wave light switch is an essential process that can help resolve connectivity issues, restore factory settings, or prepare the device for integration into a new Z Wave network. Whether you’re troubleshooting a problem or reconfiguring your smart home setup, understanding how to reset your switch properly ensures smooth operation and avoids potential conflicts.

This guide on how to reset z wave light switch will walk you through the steps required to reset your Z Wave light switch efficiently and safely.
What Will You Need?
To reset your Z-Wave light switch, you will need:
- A screwdriver (if your switch is wall-mounted)
- Access to your Z-Wave hub or controller
If you don’t have a screwdriver, you can use a flat, thin object like a credit card or butter knife to open the faceplate and gently access the reset button.
10 Easy Steps on How to Reset Z Wave Light Switch
Step 1. Turn Off the Power
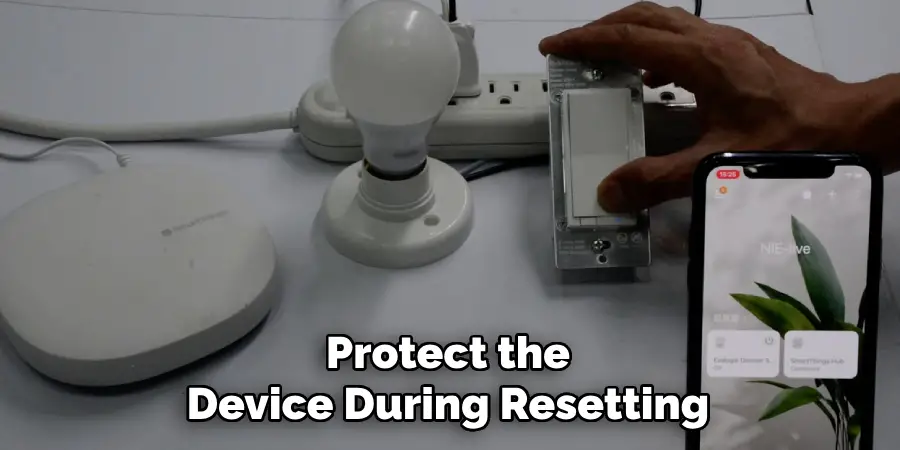
Before beginning any work, ensure the light switch’s power is turned off to avoid the risk of electrical shock. Locate the circuit breaker that supplies power to the switch you’re resetting and flip it to the “Off” position. Double-check that the switch is no longer receiving power by attempting to use it—the connected light or device should not function. This precaution is essential for your safety and to protect the device during resetting. Always exercise caution when working with electrical components.

Step 2. Remove the Faceplate
Using a screwdriver, carefully unscrew the screws holding the faceplate in place. Depending on the type of switch, these screws might be located at the top and bottom or along the sides of the faceplate. Once loosened, gently remove the faceplate, taking care not to force it off, as this can damage the surrounding wall or the faceplate itself. If the faceplate feels stuck, use a flathead screwdriver to pry it off, applying minimal pressure lightly.
This step offers you access to the internal screws and wiring of the switch, which are essential for the reset or replacement process. Be sure to keep the screws and faceplate in a safe place to ensure they don’t get misplaced during the procedure.
Step 3. Locate the Reset Button
Once you have removed the faceplate, carefully examine the switch’s internal components to locate the reset button. The reset button is typically a small, recessed button on the device’s body, often near the bottom or side. It may require a pointed object, like a pin or the tip of a pen, to press due to its design. Check for any labels or markings that indicate its position, as manufacturers often label it with the word “RESET” or a similar term.
Ensure that the electrical power to the switch is turned off before proceeding further to avoid any potential hazards. Identifying the reset button correctly is crucial for successfully carrying out the next step, whether it involves resetting the switch or preparing it for replacement. Take your time to confirm its position before continuing.
Step 4. Press and Hold the Reset Button
Once you have located the reset button, press it firmly using your finger or a suitable tool, if necessary. Ensure you apply consistent pressure and hold the button down for the specified duration, typically outlined in the device’s user manual. This step is essential as it allows the internal mechanism of the switch to register the reset command.
During this process, you may notice signs indicating the reset is in progress, such as a blinking light or a soft clicking sound. Be patient and avoid releasing the button prematurely, as this may interrupt the reset process and require you to start over. Once the process is complete, the switch may provide a confirmation signal, such as a steady light, indicating it is ready for operation.
Step 5. Wait for the Indicator Light
The indicator light serves as a crucial visual cue to confirm that the reset process has been completed. Depending on the model of the switch, the light may change from blinking to steady, switch to a specific color, or turn off altogether to signal that the device is now operational.
It is essential to refer to the user manual for your particular switch to understand what the indicator light behavior signifies. If the light does not display the expected pattern, it may indicate that the reset was unsuccessful or that an error occurred. In such cases, double-check the reset procedure and ensure all necessary steps were followed correctly.

Verify that the switch has been appropriately connected to its power source and any associated devices. If problems persist, consider consulting the manufacturer’s troubleshooting guide or contacting customer support for further assistance.
Step 6. Turn the Power Back On
After completing the reset procedure and ensuring all steps were followed accurately, the next step is to restore power to the switch. Begin by reconnecting the device to its power source and turning it on. Observe the device’s indicators, such as LED lights, to confirm it is powering up correctly. These lights usually follow a specific sequence to signify different status updates—refer to the manufacturer’s manual for the exact pattern expected for your model. Double-check the power connection to ensure it is secure and functioning if the lights display inconsistencies or do not illuminate.
Verify that the power outlet is working by testing it with another device. Restoring power is a critical step as it determines whether the reset was successful and if the device is ready for further configuration or use. If issues remain after turning the switch back on, it may be necessary to revisit earlier steps or escalate the matter to a professional or technical support team.

Step 7. Re-add to Your Z Wave Network
To re-add your device to the Z Wave network, ensure that your Z Wave hub or controller is in pairing mode. Refer to the hub’s instruction manual, as each system may have a unique method for initiating this process, such as pressing a specific button or accessing a pairing mode through its app or interface. Once the hub is ready, activate the inclusion mode on your Z Wave device. This usually involves pressing a button or following a sequence of actions as outlined in the device’s user guide.
Keep the device close to the hub during this process to avoid any communication issues caused by distance. The hub should acknowledge the device once it is successfully paired, often with a visual or audio cue. After re-adding the device, test it through the hub’s control interface to confirm it responds correctly to commands. If any errors occur, consider removing the device from the network and trying the process again.
Step 8. Confirm Successful Connection
To ensure the device is successfully connected, use the hub’s control interface to test its functionality. Perform simple commands such as turning the device on or off or adjusting its settings, depending on its capabilities. Verify that the device responds promptly and executes the commands without errors. Additionally, check the hub’s status display or app to ensure the device appears connected and functions correctly within the network. If everything operates as expected, the successful connection is confirmed, and the setup process is complete.
Step 9. Replace the Faceplate
After ensuring the device functions correctly, reinstall the faceplate to complete the setup. Align the faceplate with the mounting bracket or base of the device, ensuring it fits securely without forcing it into place. Gently press it until it snaps or screws into position, depending on the design. Use the appropriate tools if screws are required, taking care not to overtighten. Once the faceplate is securely attached, confirm that it does not interfere with the device’s operation or accessibility. The installation is complete, and your smart device is ready for use.
Step 10. Test the Switch
To test the switch, ensure that the power to the circuit is turned back on. Carefully toggle the switch on and off to verify proper functionality. Check if the connected device or light responds as expected. If the switch is part of an intelligent system, use the corresponding app or control interface to confirm remote functionality and settings. If any issues arise during testing, double-check the installation steps and connections. Once a successful operation is confirmed, the testing process is complete.
By following these steps, you can successfully reset your Z-Wave light switch and prepare it for seamless integration with your smart home system.

Conclusion
How to reset z wave light switch is a straightforward process that ensures your device is ready for optimal performance and integration into your smart home network.
By carefully following the prescribed steps—such as locating the reset button, initiating the reset operation, and confirming the device’s readiness—you can avoid potential connectivity issues and streamline your smart home experience.
Taking the time to properly reset your device restores its factory settings and sets the foundation for seamless operation in your Z-Wave ecosystem.

