Are you tired of struggling in the dark whenever you need to get something from your shed? Adding lights to your shed is a simple and cost-effective solution that will make your life easier.
How to put lights in a shed can significantly enhance its functionality, transforming it from a simple storage space into a versatile, well-lit area for working on projects, organizing tools, or relaxing. Understanding the basics of electrical installation is critical, whether you want to illuminate your shed for safety purposes or to create a more inviting atmosphere.
This guide will walk you through the necessary steps and considerations for safely and effectively adding lighting to your shed, from planning and selecting the correct light type to ensuring proper electrical wiring and connection. With the right preparation and tools, you can achieve a well-lit shed that meets your needs.
What Will You Need?
Gathering all the necessary tools and materials before starting any electrical work is important. This will save you time and effort in the long run and ensure proper installation.
- Lights: The first step is to decide on the type of lights you want to install in your shed. Popular options include LED, fluorescent, or incandescent bulbs. Before making a decision, consider their brightness, energy efficiency, and durability.
- Wiring: You will also need wiring to connect the lights to a power source. Make sure to use outdoor-rated wiring that can withstand exposure to weather elements.
- Electrical Box: An electrical box is used to mount the light fixture and connect it to the wiring. Make sure to choose a box rated for outdoor use.
- Switch: A switch will allow you to turn the lights on and off without unplugging them. You can install a primary toggle switch, a more advanced motion sensor, or a remote-controlled switch.
- Circuit Breaker: Adding lights to your shed will require additional power, so ensuring your electrical panel has enough space for a new circuit breaker is essential.
- Tools: For installation, you will need basic tools such as a drill, screwdriver, wire cutters/strippers, and pliers.
Once you have gathered all the necessary materials, it’s time to start planning for the installation.
10 Easy Steps on How to Put Lights in a Shed
Step 1. Plan the Layout:
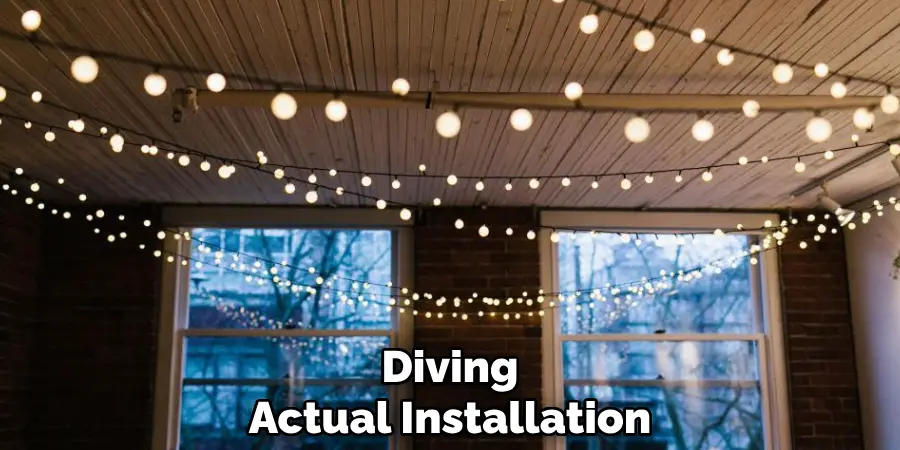
Before diving into the actual installation, it’s crucial to plan the layout of your shed lighting system. Start by evaluating your shed’s interior and determining where additional illumination is most needed. Consider functional zones where you typically work or store items, ensuring that these areas receive adequate light.
Assess the available power sources and consider your lighting preferences, such as whether you desire bright overhead lighting or a more subtle ambiance. Draw a simple diagram to visualize where each light fixture will be placed, including the location of switches and any necessary wiring routes. Make sure to position lights so that they illuminate the space evenly, eliminating dark corners and reducing shadows.
Step 2. Install the Electrical Box:
Begin the installation by mounting the electrical box at the predetermined location in your shed. Choose a spot that is accessible and allows for easy connection to your chosen power source. Use a drill to create mounting holes for the box, ensuring they align with the pre-existing screw holes in the box.
Secure the box to the wall or ceiling using screws that are appropriate for the shed’s material. Make sure the box is firmly attached and not loose, as it will need to support the weight of the light fixture. It’s crucial to verify that the electrical box is rated for outdoor use to protect against any weather-related damage.
Step 3. Run the Wiring:
With the electrical box securely in place, run the wiring from the power source to the box’s location. Measure the distance carefully to cut the appropriate length of outdoor-rated wiring.
Thread the wiring through the pre-drilled holes in the shed’s walls or ceiling, ensuring it follows the planned route to avoid interference with other structures. Utilize cable clips or conduits to maintain a tidy installation and protect the wiring from physical damage or accidental disconnection. When running the wiring, ensure it is secured at regular intervals and not stretched too tightly.
Step 4. Connect the Wiring to the Electrical Box:
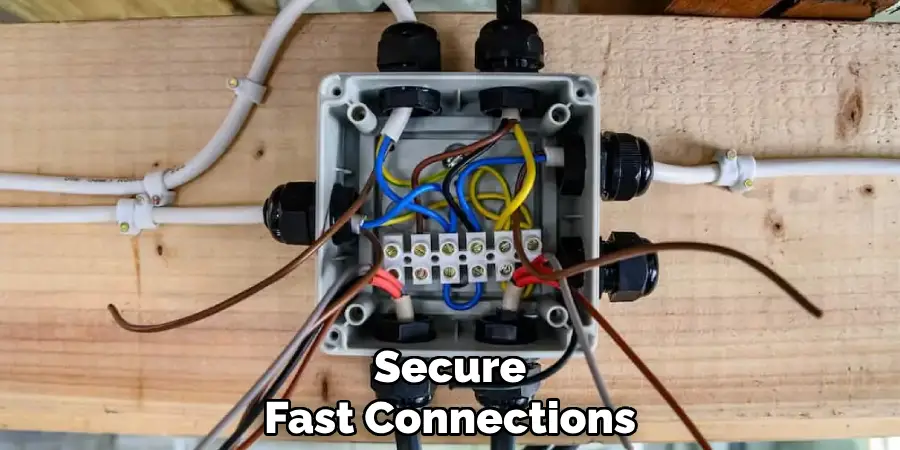
The next step involves connecting the wires after running the wiring to the electrical box. Start by carefully stripping about half an inch of insulation from the ends of the wires using wire strippers. Next, feed the stripped wires into the electrical box through the designated knockouts. Inside the box, connect the wires according to standard electrical color codes:
the black wire to the brass terminal (hot wire), the white wire to the silver terminal (neutral wire), and the green or bare wire to the green terminal (ground wire). Use wire nuts to securely fasten the connections, making sure there are no exposed wire ends. Ensure all connections are tight to prevent loose wiring when the power is turned on. Following proper wiring practices is essential to ensure a safe and functional lighting system.
Step 5. Install the Light Fixture:
Once the wiring connections are securely in the electrical box, installing the light fixture is time. Position the fixture’s mounting bracket or plate to the electrical box. Align the holes on the bracket with those on the box and use screws to attach it firmly. If the fixture has additional components or parts, follow the manufacturer’s instructions for assembly.
Next, connect the light fixture wires to the electrical box’s corresponding wires: black to black (hot wire), white to white (neutral wire), and green or bare to ground. Use wire nuts to secure these connections, ensuring there is no exposed copper wire. Carefully tuck the wires into the electrical box, and then attach the light fixture to the mounting bracket.
Step 6. Mount the Switch:
With the light fixture installed, the next step is to mount the switch that will control your shed’s lighting system. Choose an accessible location for the switch, ideally near the entry point of the shed. Use a drill to make holes in the switch box and secure it to the wall with screws suitable for the shed’s material.
Carefully run the wiring from the light fixture to the switch box, ensuring it follows a safe and logical path. Strip the ends of the wires and use wire nuts to connect them inside the switch box: the black wire from the power source to one terminal of the switch and the black wire leading to the light fixture to the other terminal. Connect the white (neutral) wires together using a wire nut and the ground wires.
Step 7. Test the Lighting System:
After installing the switch and ensuring all connections are secure, it’s time to test your shed lighting system. Before turning on the power, do a final check of all wiring connections to make sure they are adequately secured and insulated. Once you’re confident everything is correctly installed, turn on the power at your main electrical panel.
Then, test the light switch by flipping it on and off to verify that the light fixture responds correctly. Observe the lighting to ensure it illuminates the shed as planned, without flickering or hesitation. If the light does not function as expected, retrace your steps to identify any issues or loose connections.
Step 8. Secure the Final Installations:
With the lighting system successfully tested, securing any final installations and cleaning up the work area is essential. Confirm that all components, including the electrical box, light fixture, and switch, are firmly secured and properly aligned. Double-check that all wiring is neatly organized, with no exposed wires or connections that could pose a risk.
Use cable ties or additional clips to secure any loose cables further, ensuring they are out of the way and protected from potential damage or interference. Lastly, tidy up the shed by removing any leftover installation materials, such as wire scraps or packaging, keeping the area clean and safe for use.
Step 9. Maintenance and Troubleshooting:
Regular maintenance of your shed lighting system ensures its reliability and longevity. Begin by scheduling periodic inspections to check for any signs of wear or damage, such as frayed wires, loose connections, or corrosion on metal components. Clean the light fixture and switch as needed, removing dust or debris that may have accumulated.
Replace any burnt-out bulbs promptly and consider upgrading to energy-efficient options if available. In case of any malfunctions, such as flickering lights or unresponsive switches, troubleshoot by checking the connections and ensuring the power supply is functioning correctly. Consult the manufacturer’s instructions for specific troubleshooting tips, or seek professional electrical help if necessary.
Step 10. Energy Efficiency Considerations:
Enhancing the energy efficiency of your shed lighting system can lead to cost savings and environmental benefits. Start by evaluating the types of bulbs you are using, as LED bulbs are more energy-efficient compared to traditional incandescent or halogen bulbs.
Consider installing motion sensors or timers to ensure the lights are only on when needed. This not only conserves energy but also extends the lifespan of the bulbs. If possible, use natural lighting during the daytime by installing windows or skylights to reduce the need for artificial illumination. Investing in energy-efficient components and mindful usage practices will contribute to a more sustainable and economical lighting solution for your shed.
Following these steps, you can install a proper lighting system in your shed, making it a safer and more functional space.
Conclusion
How to put lights in a shed is a rewarding project that involves careful planning and execution.
You can ensure a safe and effective lighting solution by following a systematic approach, from preparing your tools and materials to securing the final installations. Remember the importance of regular maintenance and energy-efficient practices to prolong the life of your system and reduce costs. A well-lit environment enhances its usability and safety, whether you’re using your shed for work, storage, or leisure.
With the right setup, your shed can be transformed into a functional space that meets your needs at any hour.

