Multiplexing LEDs is a technique used to control multiple LEDs efficiently with fewer microcontroller pins. Instead of dedicating a separate pin to each LED, multiplexing allows you to organize LEDs in a matrix configuration, where rows and columns are managed to activate specific LEDs selectively.
These methods on how to multiplex Led are widely used in displays, indicators, and other applications where conserving resources is essential. By employing multiplexing, you can reduce complexity and cost while maintaining functionality.
Why is It So Important to Conserve Resources in Embedded Systems?
Embedded systems are designed for specific applications, and they often have limited resources such as processing power, memory, and input/output pins. This means that every resource needs to be used efficiently and effectively to ensure the proper functioning of the system.
Multiplexing allows for better utilization of resources by reducing the number of pins needed to control multiple LEDs. This not only saves physical space on the microcontroller but also reduces power consumption, which is crucial in battery-powered applications.
Moreover, conserving resources also leads to cost savings. By using multiplexing techniques, you can reduce the number of components needed for your project, ultimately lowering production costs.
Needed Materials
To implement multiplexing in your project, you will need the following materials:
Microcontroller:
This is the brain of your system and will be responsible for controlling the LEDs using multiplexing techniques. Popular microcontrollers used in embedded systems include Arduino, Raspberry Pi, and ESP32. Depending on the complexity of your project, you may need a more powerful microcontroller with multiple I/O pins.
LEDs:
Light-emitting diodes (LEDs) are the main components used in multiplexing. They come in various colors and sizes, and can be easily controlled by a microcontroller. For best results, choose high-brightness LEDs with a wide viewing angle.
Resistors:
Since LEDs operate at low voltages, they require current-limiting resistors to prevent them from burning out. The value of the resistor depends on the voltage supply and LED specifications.
Multiplexer/Demultiplexer ICs:
These integrated circuits (ICs) will act as the switch in the multiplexing circuit. They have multiple input/output pins that can be controlled by a microcontroller to select and route signals.
Shift Registers:
Shift registers are commonly used in multiplexing circuits to control the LEDs. They can store and shift data from one LED to another, allowing for efficient control of a large number of LEDs with limited pins on the microcontroller.

Transistors:
Transistors are used as amplifiers or switches in multiplexing circuits. They allow for higher current flow and thus can drive more powerful LED configurations. Commonly used transistors include NPN and PNP types.
PWM:
Pulse Width Modulation (PWM) is a technique used to control the brightness of LEDs. By varying the duty cycle of the ON and OFF times of an LED, it can appear dimmer or brighter to the human eye. This allows for precise control of LED brightness without using additional analog components.
Resistors:
Resistors are essential components in multiplexing circuits as they limit the amount of current flowing through an LED. They also prevent voltage spikes that can damage LEDs. The value of the resistor is determined by Ohm’s law, taking into account the desired current and voltage requirements for each LED.
6 Simple Step-by-step Guidelines on How to Multiplex Led
Step 1: Choose the Desired Number of LEDs to Be Multiplexed
Begin by determining the total number of LEDs you want to incorporate into your multiplexing circuit. This decision will influence the design of your circuit, including the number of control lines, the type of microcontroller or driver required, and the physical layout of your setup.
Keep in mind the purpose of your project and consider any constraints, such as power supply limits or space restrictions, to ensure your design is efficient and practical.
Step 2: Choose a Microcontroller or Driver
Once you have determined the number of LEDs to be multiplexed, you need to select a microcontroller or driver that can handle the required number of control lines.

Microcontrollers are small and cost-effective integrated circuits that can process data and control multiple components simultaneously. They are typically used in low-power applications and come in various sizes and capabilities. Some popular options for LED multiplexing include Arduino boards, Raspberry Pi, and PIC microcontrollers.
Step 3: Select the LED Driver
In addition to a microcontroller, you will also need an LED driver to efficiently control the multiplexed LEDs. An LED driver is a circuit that regulates and supplies power to LEDs, ensuring they operate at their optimal brightness and color.
LED drivers come in various forms, including constant-current and constant-voltage drivers. Constant-current drivers are best suited for high-power applications as they keep the current flowing through the LED consistent, preventing burnout or dimming.
Constant-voltage drivers, on the other hand, are more suitable for low-power applications as they maintain a steady voltage supply to the LED. When selecting an LED driver, consider its compatibility with your chosen microcontroller and the required power supply.
Additionally, pay attention to the driver’s efficiency and thermal management capabilities.
Step 4: Testing and Troubleshooting
After selecting and installing the appropriate LED driver, it is important to thoroughly test and troubleshoot your circuit before finalizing your project.
First, verify that the LED lights are turning on when they should be. If they are not turning on at all, double-check all connections and ensure that the power supply is functioning properly. You may also want to use a multimeter to measure voltage levels at different points in the circuit.
Next, observe the brightness level of the LEDs. If they are too dim or too bright, you may need to adjust the current or voltage supply from the driver. This can often be done through programming in your microcontroller.
Step 5: Fine-Tuning and Testing
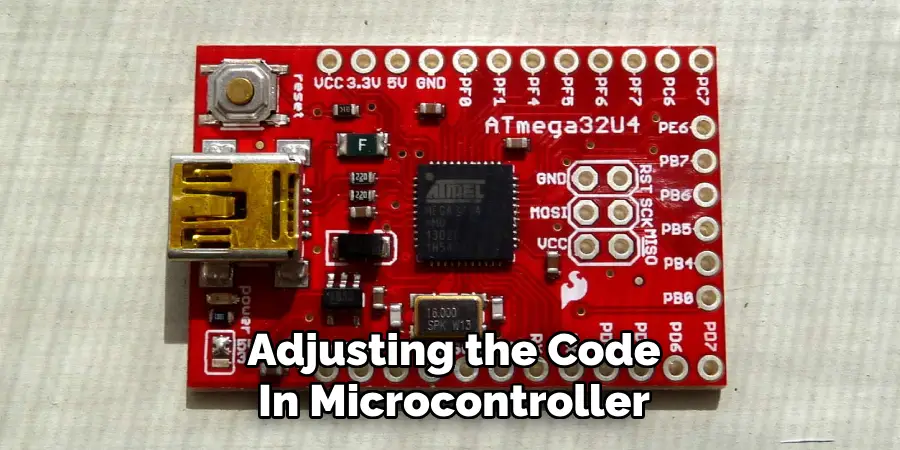
Once you have verified that all connections are secure and the LEDs are functioning properly, it’s time to fine-tune your system. This step involves adjusting the code in your microcontroller to achieve the desired lighting effects. It may also involve making physical adjustments, such as positioning the LEDs or diffusing their light.
After fine-tuning, it’s important to thoroughly test your LED strip for any potential issues. Run different patterns and sequences to ensure that the lights are responding correctly. You may also want to leave them running for an extended period of time to check for any overheating or other malfunctions.
Step 6: Mounting and Securing
Once you have completed testing and are satisfied with the performance of your LED strip, it’s time to mount and secure it in its desired location. Depending on where you will be installing the LED strip, there are a variety of methods for mounting and securing it.
For flexible LED strips, adhesive backing is often included, which allows for easy installation on smooth surfaces such as walls or cabinets. If you want a more permanent solution, you can also use screws or clips to secure the strip in place.
Following the manufacturer’s instructions on how to multiplex Led, carefully adhere or secure the LED strip in its desired location. Make sure to leave enough slack for any necessary connections and consider using cable ties to neatly organize and secure any excess wiring.
Advantages of using LED drivers
There are several advantages to using LED drivers in your lighting projects:
Improved Energy Efficiency:
By providing a constant and stable source of power, LED drivers help reduce energy consumption and improve overall efficiency. This not only saves on electricity costs but also contributes to a greener environment.
Longer Lifespan:
LED drivers help regulate the amount of current flowing to an LED, which can significantly extend its lifespan. This is because LEDs are sensitive to overdriving and can fail if not properly regulated.
Greater Flexibility in Design:
With LED drivers, you have more flexibility in terms of design options. You can easily adjust the brightness and color temperature of your lighting by choosing the appropriate driver for your specific needs.
Enhanced Safety:
By ensuring a consistent power supply, LED drivers also improve safety by reducing the risk of electrical hazards such as short circuits or overheating. This makes them a reliable choice for residential and commercial use.
Better Thermal Management:
LED drivers play a crucial role in managing the heat generated by LED lights. They help dissipate excess heat, prolonging the lifespan of your lighting system and ensuring long-term performance.

Energy Efficiency:
LED drivers are highly energy-efficient, making them a popular choice for reducing energy consumption and lowering electricity bills. This is because they convert power more effectively than traditional lighting systems, with less energy wasted as heat.
Conclusion
In summary, LED drivers are essential components for optimizing the performance, efficiency, and longevity of LED lighting systems. By providing better thermal management, consistent power delivery, and enhanced energy efficiency, they enable a more reliable and cost-effective lighting solution.
Investing in high-quality LED drivers ensures that your lighting systems operate at their best, contributing to energy savings and overall sustainability. Thanks for reading this article on how to multiplex Led.

