Marquee lights have become popular in home decor and celebrations, admired for their nostalgic charm and versatility. Once a staple of theater signage and glamorous events, these illuminated signs have transformed into cherished decorative pieces suitable for a range of occasions. From weddings and parties to cozy living spaces, marquee lights add a touch of whimsy and personalization. Marquee Lights’ evolution reflects advances in technology and design as they have transitioned from large, heavy fixtures to manageable DIY projects.
The purpose of this article is to provide you with a comprehensive guide on how to make marquee lights at home. This guide will walk you through the entire process, from selecting the right materials to following detailed step-by-step instructions, ensuring your creation is both stunning and functional. Dive into this creative project and explore the endless possibilities of custom marquee lighting.

Materials and Tools Needed
Creating your own marquee lights involves gathering several key materials and tools to ensure a successful project. Here’s what you’ll need:
Essential Materials:
- Wood or Cardboard: For a sturdy base, consider using plywood, MDF board, or thick cardboard. Each material has its advantages; wood offers durability, while cardboard is lightweight and easy to cut.
- LED Lights: Choose from string lights, individual LED bulbs, or fairy lights. Each type offers different aesthetic possibilities and ease of installation.
- Paint or Decorative Finish: Personalize your marquee with paint, glitter, or other decorative finishes. Select colors and styles that match your theme or ambiance.
- Battery Pack or Power Source: Depending on your preference, opt for battery packs for portability or AC adapters for a continuous power supply.
Tools Required:
- Cutting Tools: A jigsaw is recommended for cutting wood into intricate shapes, while a craft knife is ideal for cardboard.
- Drill and Bits: Essential for making holes in your marquee to accommodate lights, ensuring they are evenly spaced.
- Adhesive: Use a suitable glue for securely bonding wood or cardboard.
- Ruler and Pencil: Precision in measurement and marking is crucial for a professional result.
- Safety Gear: Always wear gloves and safety goggles to protect yourself when working with cutting tools and power equipment.
Designing Your Marquee Sign
Choosing a Design
Designing your marquee sign begins with creative brainstorming and sketching. Consider what you want your sign to convey – whether it’s a name, a popular phrase, or an eye-catching shape. Sketch out various ideas, testing different fonts, sizes, and arrangements to see what resonates most with your decor theme. Popular choices often include inspirational words, initials, or symbols like stars and hearts, which add a personal touch. Align your design with the space’s ambiance where it will be displayed, ensuring cohesion and harmony.

Measuring and Planning
Once you’ve settled on a design, measure the space where the marquee will be placed. This step is crucial to ensure the sign fits perfectly without overwhelming or underwhelming the area. Carefully plan your layout, accounting for the spacing of lights and the overall dimensions. This will streamline the construction process and help anticipate any needed adjustments regarding letter size or spacing.
Creating a Template
With your design in hand, create a template to guide the cutting of your letters or shapes. You can draw the template freehand or use software to print it out. Lay it on top of your material and secure it in place. Use a pencil or marker to clearly transfer your design outlines onto the wood or cardboard, ensuring accuracy and providing a clear guide for the cutting process. This detailed planning will serve as the backbone for crafting a professional, polished marquee sign.
How to Make Marquee Lights: Cutting Out the Shapes
Preparing the Material
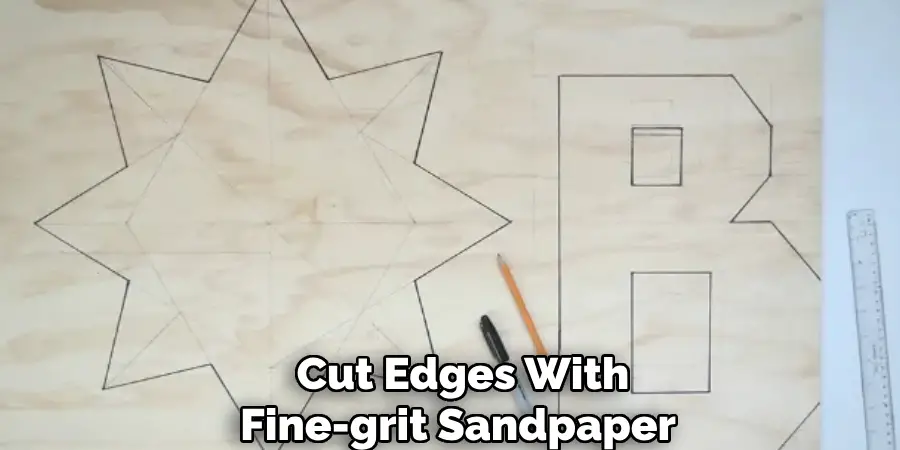
To begin cutting the shapes for your marquee sign, gather the wood or cardboard sheets and ensure they’re of adequate size to accommodate your design. If using wood, secure the sheet firmly to a workbench. For cardboard, lay it flat on a stable surface. Using a ruler and pencil, make initial light markings according to the dimensions in your design. Consider cutting slightly larger than needed to allow for adjustments. Once cut, use fine-grit sandpaper on the edges to smooth out any roughness, providing a polished and safe finish.
Transferring the Template
Lay your prepared template over the material you’re working with, ensuring it lies flat without any wrinkles or creases. Use tape to secure it in place to prevent movement. Check that the template is centered and aligned to your satisfaction before proceeding. With a pencil or marker, trace the outlines of your design onto the material clearly and accurately. This step is crucial as it dictates the precision of your final shapes.

Cutting Techniques
For Wood: Utilizing a jigsaw, adopt a slow and steady cutting motion, guiding the saw carefully along the traced lines. Take your time, especially around tighter curves, to maintain control and avoid mistakes.
For Cardboard: Opt for a craft knife, employing a cutting mat beneath to protect your work surface. Make several light, controlled passes with the knife rather than attempting to cut through in a single stroke, ensuring clean and straight edges.
Drilling Holes for Lights
Once your shapes are cut, it’s time to drill holes for the lights. Measure and mark the placement of each hole, keeping a consistent distance between them for uniform illumination. Choose a drill bit size that suits the diameter of your bulbs or lights. Carefully drill through the marked points, ensuring that each hole is cleanly executed and aligns smoothly with your lighting plan.
Painting and Decorating
Preparing the Surface
Before painting your marquee shapes, prepare the surface to ensure a flawless finish. Begin by sanding the cut edges with fine-grit sandpaper to eliminate any splinters and achieve a smooth surface. This step is crucial for both safety and aesthetics. After sanding, clean the surface thoroughly to remove dust and debris that could affect the paint’s adhesion. Use a damp cloth to wipe down the material, allowing it to dry completely before applying paint.

Painting Techniques
For a sleek and even color, consider using spray paint or acrylic paint, each offering distinct advantages for your marquee project. Spray paint provides a smooth, uniform finish and is ideal for covering large areas quickly. Alternatively, acrylic paint allows for greater control when applying intricate details. Apply multiple thin coats rather than a single thick one, ensuring each coat dries thoroughly to prevent dripping and achieve even coverage. Between coats, lightly sand any rough patches to maintain a smooth surface.
Adding Decorative Elements
Enhance your marquee with decorative elements, such as glitter, decals, or stencils, to add a personal touch that complements your decor. These embellishments can transform a simple design into an eye-catching centerpiece. If your marquee is intended for outdoor use, consider sealing the finish with a clear protective coat to guard against weather elements and UV damage. This final step ensures durability and preserves the aesthetic appeal of your marquee for years to come.
Installing the Lights
Preparing the Lights
Before starting installation, ensure your lights are adequate for your marquee design. Opt for LED string lights or individual bulbs based on your aesthetic preference. Measure their length, ensuring they will cover your design’s entirety without stretching or leaving gaps. Prior to inserting the lights, check each bulb to ensure it’s functioning correctly—this will save time and prevent the frustration of fixing issues post-installation. If possible, test the lights using an external power source to confirm their brightness and functionality.
Attaching the Lights
To insert the lights, begin at one end of the marquee sign. Gently push each bulb through the pre-drilled holes from the backside until they sit flush on the front surface. Ensure that each bulb is seated securely to maintain a consistent look and prevent any from falling out. Use a small amount of non-permanent adhesive or clips to hold the bulbs in place if necessary. Work methodically, moving from one hole to the next, and take care to handle the bulbs delicately to avoid fracturing or damaging them.
Wiring and Powering the Lights
Manage the excess wiring behind the sign by bunching and securing it with adhesive clips or zip ties. This keeps the back tidy and prevents any wires from obstructing the marquee’s placement or look. Connect the lights to your chosen power source. A battery pack can offer portability, while a plug-in adapter ensures steady power if a socket is nearby. Follow all manufacturer safety instructions to avoid electrical hazards. Ensure connections are secure to prevent interruptions in lighting.

Testing the Lights
After installing and connecting the lights, conduct a thorough test to ensure every bulb illuminates smoothly and evenly. If any bulbs or sections are not lighting up, check their connections and replace any faulty bulbs. Adjust their position as needed to ensure consistent illumination across the marquee. By following these steps, you affirm the aesthetic appeal of your creation and its functionality for display.
Final Assembly and Display
Securing the Marquee
Secure any loose elements or wiring effectively to ensure the durability of your marquee. Use strong adhesive clips or non-permanent glue to fasten loose wires and parts tightly to the back of the marquee, minimizing movement and wear. If using lightweight material, reinforce the back with a sturdy backing such as plywood or metal strips to provide additional stability, preventing warping or sagging over time.
Mounting or Placing the Marquee
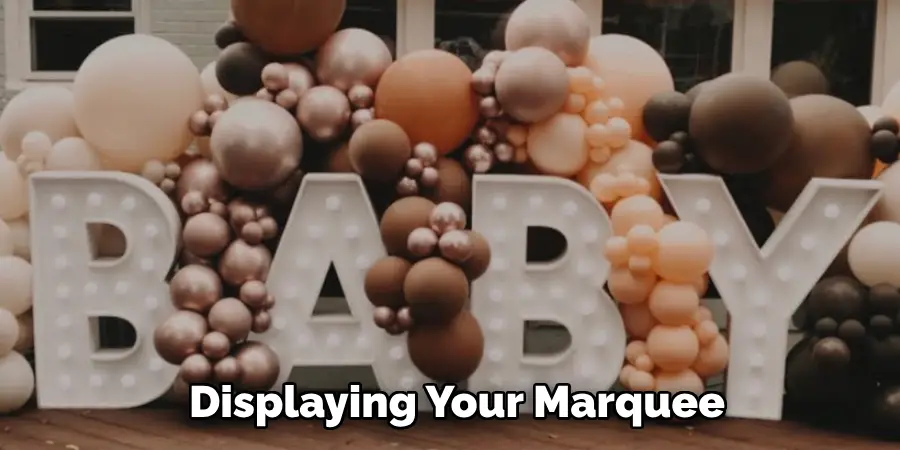
When it comes to displaying your marquee, consider various options: hanging, wall mounting, or tabletop placement. For hanging, use durable hooks or brackets to support the weight securely. Wall mounting can be achieved with screw anchors, ensuring they are appropriately spaced for balance. For a table display, ensure the surface is stable and large enough to accommodate the sign. Choose a location that enhances visibility, such as an entryway or focal point in a room, to complement and elevate the overall decor.

Maintenance Tips for Marquee Lights
Regular Cleaning
To keep your marquee lights looking their best, clean them regularly using a soft cloth and a mild cleaning solution. Gently wipe each bulb and the surrounding marquee surface to remove dust and dirt. Avoid using harsh chemicals or abrasive materials that could damage the lights or paint finish.
Checking the Lights
Periodically inspect the lights and their wiring for signs of wear or damage. Look for any frayed wires or flickering bulbs, as these can compromise the marquee’s safety and appearance. Replace any burnt-out bulbs promptly and make minor repairs as needed to ensure all lights function correctly.
Seasonal Decorating
Change decorations or messages to enhance your marquee for various occasions or holidays. For holiday events, add festive elements like themed decals or color gel covers over the bulbs. This allows you to refresh the look and maximize the versatility of your marquee throughout the year.

Conclusion
Creating your marquee lights is a rewarding project and a fun way to personalize and enhance your space. By following a clear step-by-step process, anyone can learn how to make marquee lights that shine brightly and add charm to any setting. From choosing the right materials and paints to installing and testing the lights, each stage of the creation process contributes to the overall success of your project.
Remember to secure each component and perform regular maintenance to keep your marquee in optimal condition. Customizing your marquee with decorative elements or seasonal touches ensures that it continues to be a versatile statement piece year-round. With patience and creativity, crafting your marquee light sign becomes a delightful endeavor that results in an eye-catching addition to your home or business.

