Are you tired of walking into your loft and feeling like you’re in a dark, cavernous space? High ceilings can be both impressive and daunting when it comes to lighting.

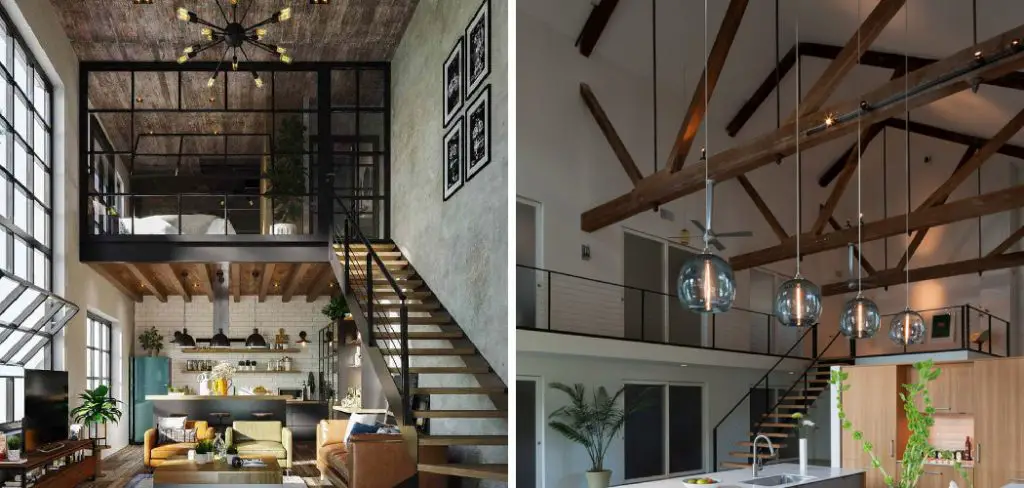
How to light a loft with high ceilings can be both a challenge and an opportunity to create a truly striking space. High ceilings tend to make a room feel open and spacious, but without the proper lighting, they can also feel cold or uninviting. To strike the perfect balance, it’s essential to layer different types of lighting and consider the loft’s overall design.
Whether you’re aiming for a cozy ambiance or a dramatic statement, understanding how different fixtures, placements, and techniques work together is key to achieving a well-lit and functional space.
What Are the Benefits of Proper Lighting in a Loft?
Here are some key benefits of having proper lighting in a loft:
1. Enhances Visual Appeal: One of the most apparent benefits of proper lighting is its ability to enhance the visual appeal of your loft. The right combination of ambient, task, and accent lighting can create a warm and inviting atmosphere while highlighting the unique architectural features or design elements in your space.
2. Sets the Mood and Atmosphere: Lighting plays a significant role in setting the mood and atmosphere of a room. In a loft, you have the flexibility to adjust the lighting according to your needs and preferences.
3. Increases Functionality: Proper lighting can also increase the functionality of your loft space. For instance, task lighting such as under-cabinet lights in the kitchen or reading lamps in your living area can provide focused illumination for specific tasks. This can make it easier and more comfortable to carry out daily activities in your loft.
4. Creates Illusion of Space: Loft spaces are often limited in terms of square footage, but proper lighting can help create the illusion of more space. By strategically placing lights to highlight certain areas and using light colors in your décor, you can make your loft feel bigger and more open.
What Will You Need?
When it comes to lighting your loft, there are a few key items you will need. These include:
- Overhead lighting fixtures, such as chandeliers or ceiling lights
- Task lighting options, like desk lamps or reading lamps
- Accent lighting, such as spotlights or wall sconces, for highlighting specific areas
- Light bulbs in various sizes and strengths to fit different fixtures and create desired levels of brightness
Once you have all of these items, you can start planning how to use them in your loft space.
9 Easy Steps on How to Light a Loft With High Ceilings
Step 1: Evaluate the Natural Light
Begin by assessing the amount of natural light your loft receives throughout the day. Observe how sunlight enters the space, paying particular attention to the size and placement of windows, skylights, or glass doors. Take note of any areas that remain dim even during daylight hours, as these spots will likely require extra artificial lighting.

Additionally, consider the direction your loft faces—lofts facing north typically receive cooler, softer light, while those facing south are often brighter and can benefit from more direct sunlight. Understanding your loft’s natural light patterns will help you determine how to balance artificial lighting effectively and identify where to focus your efforts.
Step 2: Choose the Right Fixtures
Selecting the right light fixtures is crucial for effectively illuminating a loft with high ceilings. Consider pendant lights or chandeliers that hang down to bring light closer to your living spaces, adding a stylish design element. Wall sconces can be an excellent choice for providing additional ambient lighting around the room and creating a cozy atmosphere.
For functional areas like kitchens or workspaces, opt for recessed lighting or track lighting for a focused and modern look. Ensure the fixtures you choose complement the overall aesthetic of your loft while serving their intended purpose.
Step 3: Layer Your Lighting
To effectively light a loft with high ceilings, creating layers of light is essential. Start with ambient lighting to provide overall illumination—this can be achieved through large chandeliers, track lighting, or a series of wall-mounted fixtures.
Next, incorporate task lighting for functional areas like kitchens, workspaces, or reading nooks; adjustable floor lamps or under-cabinet lights work well here. Finally, add accent lighting to highlight architectural features or decor, such as wall sconces or LED strip lights along beams. Combining these layers ensures a well-lit and visually appealing space.
Step 4: Utilize Dimmer Switches
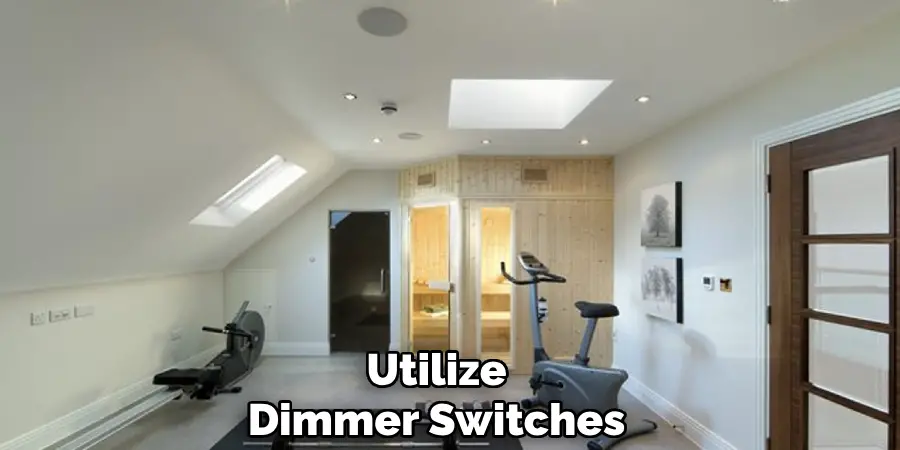
Dimmer switches are an excellent addition to a loft with high ceilings, as they allow you to control the light intensity based on the time of day or mood. Pair them with your primary and accent lights to create a versatile lighting system that adapts to different activities. Dimmers not only enhance the ambiance but also help save energy over time.

Step 5: Incorporate Natural Light
Maximize the use of natural light in your loft by leveraging large windows, skylights, or glass doors. High ceilings often create opportunities for expansive windows that let in ample sunlight.
Use light, airy curtains or blinds to maintain privacy while still letting light enter. Reflective surfaces, such as mirrors or light-colored walls, can also help distribute natural light throughout the room, reducing the need for artificial lighting during the day.
Step 6: Choose Light Fixtures that Complement the Space
Select light fixtures that enhance the aesthetic and scale of your loft. Pendant lights or chandeliers with adjustable rods can be used to fill vertical space and make a stylish statement.
Alternatively, industrial or minimalist designs suit a modern loft, while oversized fixtures can add grandeur without overwhelming the area. Consider the height and volume of the ceiling to ensure the light fixtures are proportionate to the room’s dimensions.
Step 7: Check for Proper Ventilation
Proper ventilation is crucial in any living space, but it is crucial in a loft due to the open floor plan and high ceilings. Ensure there are enough windows to provide natural airflow, and consider installing ceiling fans or air conditioning units if needed.
Additionally, make sure that your loft has proper insulation to regulate temperature and reduce energy costs.

Step 8: Furniture Placement Matters
With an open floor plan, furniture placement is crucial in creating designated areas and defining the space’s flow. Consider using rugs to visually separate different areas, such as a living room, dining room, and bedroom.
Use multi-functional furniture, such as storage ottomans or sofa beds, to maximize space. And don’t be afraid to experiment with different furniture arrangements until you find one that works best for your needs.
Step 9: Create Cohesion Through Color
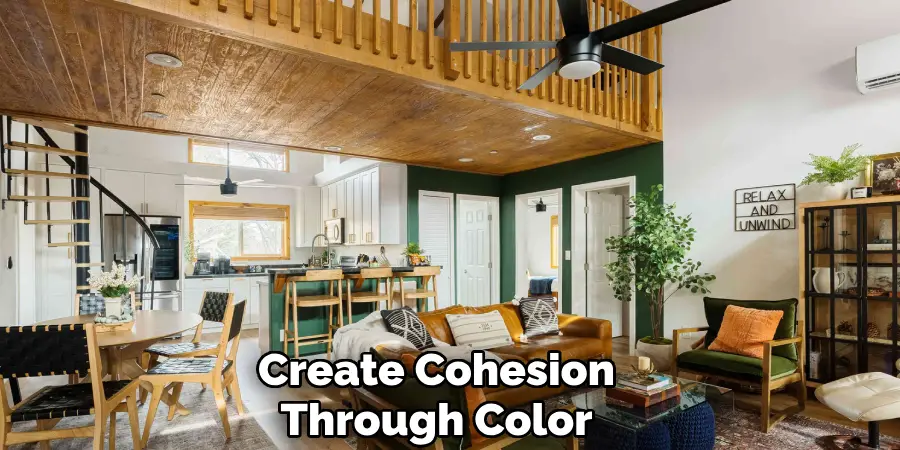
Using a cohesive color palette is essential for tying an open floor plan together and promoting visual harmony. Start by selecting a base color that can act as a unifying element across the space. Neutral tones, such as white, beige, or gray, often work well because they provide a versatile foundation.
Once you have your base, incorporate complementary accent colors through accessories like throw pillows, art, or decorative items. To further strengthen cohesion, consider repeating similar tones or hues in larger elements such as curtains, rugs, or furniture pieces.
This repetition will help create a seamless flow between different areas while still allowing for subtle individuality in each space. Remember, balancing bold colors with softer tones can add interest while maintaining a unified look.
By following these guidelines, you can confidently incorporate color into your home design and create a space that is both visually appealing and reflects your personal style.
5 Things You Should Avoid
- Ignoring Layered Lighting
Avoid relying solely on one type of lighting, such as recessed lights or chandeliers. High ceilings require a combination of ambient, task, and accent lighting to properly illuminate the space and create a balanced and inviting atmosphere.
- Using Too Few Light Fixtures
Skipping on the number of light fixtures can leave your loft feeling dim and underlit. Ensure you have enough lights spread throughout the space to adequately address the room’s height and size.
- Choosing Fixtures That Are Too Small
The vastness of high ceilings can easily overshadow small or undersized light fixtures. Opt for larger fixtures or statement pieces that complement the room’s scale and draw the eye upward.
- Not Considering Adjustable Lighting Options
Without adjustable options like dimmers or adjustable heads, you may lack versatility in lighting levels. This can result in a lighting setup that feels too harsh or too dim for different activities and times of day.
- Forgetting About Wall and Floor Lighting
Failing to add wall sconces or floor lamps can make the lighting feel one-dimensional and visually unbalanced. Incorporate these elements to enhance the ambiance and fill in darker areas that ceiling lights might miss.

By avoiding these common mistakes, you can create a well-lit and visually appealing living space.
Conclusion
How to light a loft with high ceilings requires a combination of thoughtful planning and creative design.
By layering different types of lighting, such as ambient, task, and accent lighting, you can create a space that feels both welcoming and functional. Incorporating fixtures like pendant lights and chandeliers adds vertical interest, while wall sconces and floor lamps help balance the light throughout the room. Additionally, using dimmers allows for flexibility to adjust the mood and brightness.
With careful consideration and the right choices, you can transform a lofty space into a beautifully lit and harmonious environment.

