Wall sconces are a versatile and stylish way to enhance the lighting in any space while adding a decorative touch. Whether you’re aiming to create a cozy ambiance, highlight specific features in a room, or simply improve overall illumination, wall sconces can be a practical and attractive solution.

This guide will walk you through the steps ofhow to install wall sconces safely and efficiently, ensuring a professional-looking result for your home or office.
Common Places for Installation
Wall sconces can be installed in a variety of locations to suit your lighting and design needs. Some of the most common places include hallways, where they provide both illumination and a welcoming atmosphere. They are also popular in living rooms, often flanking a fireplace or mounted near seating areas for added warmth and charm. Bedrooms benefit from wall sconces as reading lights placed on either side of the bed, creating a practical yet stylish setup. Bathrooms frequently feature sconces on either side of a mirror to ensure even and flattering lighting. Additionally, entryways, dining rooms, and staircases are excellent locations, as sconces can serve as both functional lighting and decorative accents.
Tools and Materials You’ll Need
When installing wall sconces, having the right tools and materials is essential to ensure a smooth and successful process. Below is a list of items you’ll need:
Tools
- Screwdriver (flathead and Phillips)
- Drill and drill bits
- Wire stripper/cutter
- Voltage tester
- Level
- Measuring tape
- Ladder or step stool
Materials
- Wall sconces of your choice
- Mounting hardware (often included with the sconces)
- Electrical box (if not already installed)
- Electrical wire
- Wire connectors
- Wall anchors (optional, depending on the wall type)
Having these tools and materials prepared in advance will help streamline the installation process and ensure the sconces are securely and safely mounted.

10 Methods How to Install Wall Sconces
1. Choose the Right Placement
Before starting any installation, determining the optimal placement of your wall sconces is crucial. The location will depend on the purpose of the lighting—ambient, task, or accent. For bedside sconces, they should generally be mounted about 60 inches from the floor and slightly above shoulder height when seated.
In hallways, the standard is to place sconces approximately 6 feet apart and 5 feet from the floor. Placement should ensure even lighting and visual balance within the room. Marking the wall with painter’s tape before drilling will help you visualize the position and make any needed adjustments easily.
2. Turn Off Power and Test Wiring
Safety is paramount, so always begin by turning off the power to the room at the circuit breaker box. Even if a switch is off, electricity could still be running to the wires. Use a voltage tester to confirm that there is no live current at the installation site.
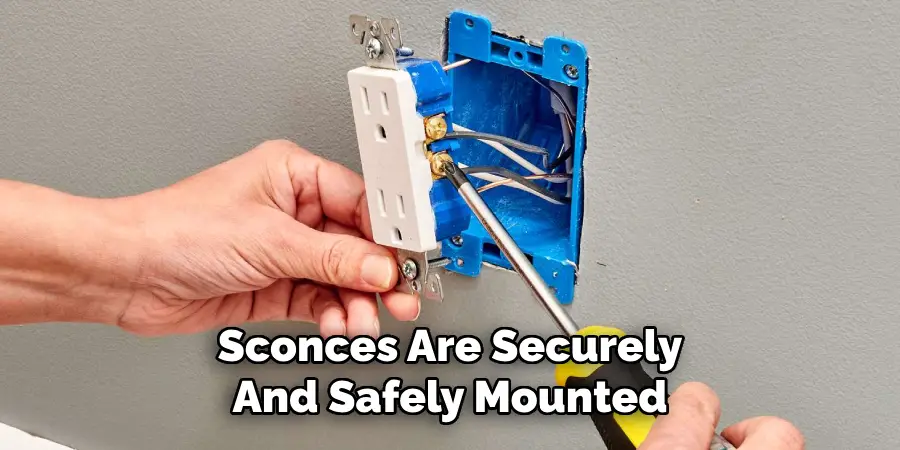
Remove the old fixture, if there is one, and examine the existing electrical box. If it’s not flush with the wall or isn’t mounted securely, it may need to be replaced. Ensure the box is rated to support the weight of the new fixture to prevent any hazards after installation.
3. Install a New Electrical Box (if needed)
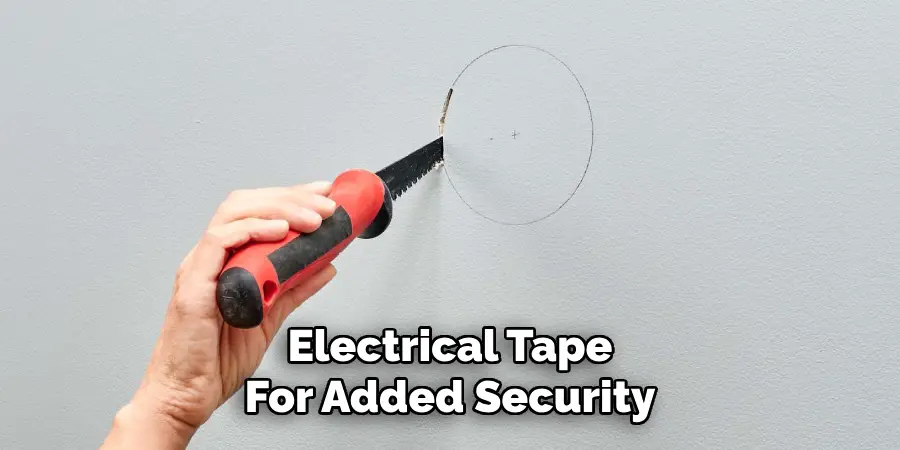
If you’re adding sconces to a wall that previously had no fixture, you’ll need to install a new electrical box. Cut a hole using a drywall saw, and mount a remodeling box, which is designed to clamp into drywall without a stud. If you’re working with solid walls, a surface-mount box may be more appropriate.
Run new electrical cable from a power source to the new box, following local electrical codes. This step often requires fishing wires through walls and may be best handled by a licensed electrician if you’re not experienced with wiring.
4. Mount the Bracket or Backplate
Most wall sconces come with a mounting bracket or backplate that attaches directly to the electrical box. Align the bracket with the screw holes on the box and secure it using the screws provided. Ensure that the bracket is level; a small tilt can be noticeable once the sconce is installed.
If the sconce is particularly heavy or if you’re installing it into drywall alone, consider using wall anchors or toggle bolts to add additional support. This step creates a stable foundation and ensures that your sconce will stay securely in place.
5. Connect the Electrical Wiring
Once the mounting plate is in place, carefully connect the wires from the fixture to those from the wall. Typically, you’ll be matching black (hot), white (neutral), and green or copper (ground) wires. Use wire nuts to twist each pair together, and wrap them with electrical tape for added security.

Gently tuck the wires back into the electrical box, making sure there is no tension or sharp bends that could cause stress or disconnection over time. If the wires from the wall and sconce differ in color, refer to the manufacturer’s instructions to match them correctly.
6. Attach the Fixture to the Wall
With the wiring complete, you can now attach the sconce body to the mounted bracket or backplate. This usually involves aligning the fixture with mounting screws or decorative bolts, then tightening everything in place.
Be cautious not to overtighten, especially with delicate or decorative sconces that might have fragile elements. Once attached, adjust the sconce to sit straight and flush with the wall. Some designs include a decorative cover or collar that hides the mounting screws for a seamless finish, so be sure to attach those final pieces carefully.
7. Install the Light Bulbs and Covers
Now that your sconce is securely installed, you can insert the appropriate light bulb(s). Check the maximum wattage listed by the manufacturer and select bulbs accordingly. Consider using LED bulbs for energy efficiency and longer life. Depending on the design, you may also need to attach a glass shade, fabric cover, or other decorative element.
Secure all parts according to the fixture’s design, taking care not to overtighten glass pieces which could crack under pressure. This final step completes the look and functionality of your wall sconce.
8. Turn Power Back On and Test the Fixture
Once everything is installed and secure, return to your circuit breaker and turn the power back on. Test the sconce by switching it on to ensure it functions correctly. If the light doesn’t turn on, double-check the bulb and wiring connections.
Also verify that the circuit isn’t overloaded or that the breaker didn’t trip. In some cases, dimmers or smart switches may need to be calibrated to work with the sconce. Testing immediately after installation ensures everything is working properly and allows you to troubleshoot issues while your tools are still at hand.
9. Conceal Wires for a Clean Finish
If you’re installing a plug-in sconce or surface-mounted light, you may have visible wires. To maintain a clean and professional look, consider using wire covers or raceways that can be painted to match the wall.
These plastic or metal channels conceal wires and keep them tidy, especially when sconces are installed without in-wall wiring. Another creative solution is using decorative cord covers, such as braided fabric sleeves or metal tubing, to complement the aesthetic of your fixture and room decor.

10. Style and Maintain the Sconces
Beyond installation, styling your sconces within your room’s décor enhances their impact. Coordinate the sconce design with nearby furnishings, artwork, or architectural features. Use dimmable bulbs to control ambiance, especially in bedrooms or dining areas.
Regularly dust the fixture and clean the bulb and shade to maintain brightness and appearance. For bathroom sconces, check for moisture-rated fixtures and wipe them down to prevent corrosion. A well-maintained sconce not only lasts longer but continues to enhance the room’s atmosphere for years to come.
Maintenance and Upkeep
Proper maintenance is key to ensuring your sconces remain both functional and visually appealing. Start by routinely checking the wiring and connections for any signs of wear or damage to prevent potential electrical issues. Replace bulbs as needed, ensuring you use the correct wattage and type specified by the manufacturer.
For fixtures with glass or delicate components, carefully remove and clean them with a soft, lint-free cloth and a mild cleaning solution to avoid scratches or discoloration. If your sconce is located outdoors, inspect it regularly for weather-related wear, such as rust or fading, and apply touch-up paint or protective coatings as necessary. These simple steps can significantly extend the life of your sconces while keeping them looking their best.

Conclusion
Installing wall sconces may seem like a small task, but it offers immense value in improving both the functionality and aesthetics of a space. By following these ten methods—each with detailed planning and execution—you can achieve a safe and stylish result that enhances your home.
Whether you’re a seasoned DIYer or a beginner looking for a creative project, wall sconces provide a beautiful way to light your world. Thanks for reading our blog post on aaaaaaaaa! We hope you found it helpful and informative.

