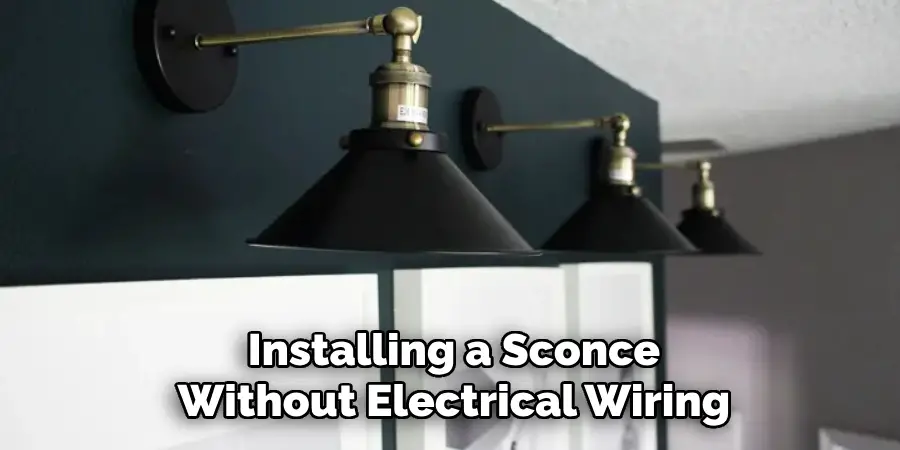
Are you looking to add a touch of elegance to your home without dealing with the hassle of wiring and electricity? Look no further because installing sconces without electricity is easier than you think!

Adding wall sconces to your space can create a warm and inviting atmosphere while also serving as elegant and functional decor. But what if your walls lack electrical wiring for traditional lighting? Fear not, because installing sconces without access to electricity is not only possible, but it’s also a relatively simple DIY project that can elevate the ambiance of your home.
In this guide on how to install sconces without electricity, we’ll walk you through the step-by-step process to install battery-operated or solar-powered sconces, ensuring that even areas without electrical infrastructure can be beautifully illuminated. Get ready to enhance your living space with the charm and convenience of wireless lighting.
What are the Uses of Sconces?
Sconces can serve various purposes in your home, making them a versatile lighting option. They can provide ambient lighting to create a cozy atmosphere, task lighting for reading or other activities, and even act as decorative accents to enhance the overall aesthetics of your space.

Whether you want to add sconces to your bedroom, living room, hallway, or even outdoor area, they can add dimension and style to any room. With the added bonus of not requiring electricity, sconces are a flexible and convenient option for lighting up your home.
Types of Sconces
Before we dive into how to install sconces without electricity, let’s take a moment to explore the different types available. There are two main types of sconces: battery-operated and solar-powered.
- Battery-operated Sconces: These are the most common type and require AA or AAA batteries to function. They usually come with a remote control, making them easy to turn on and off without physically reaching for the sconce.
- Solar-powered Sconces: As the name suggests, these sconces are powered by solar energy and come with a small solar panel mounted on the wall or placed near a window to capture sunlight. They are a great eco-friendly option for lighting up your home.
These two types of sconces come in various designs and styles, so you can choose the one that best suits your decor and lighting needs.

What Will You Need?
Before you begin, gather the following materials to ensure you have everything you need for a successful installation:
- Sconce: The first thing you’ll need is, of course, the sconce itself. Choose a battery-operated or solar-powered model that fits your style and lighting requirements.
- Batteries or Solar Panel: Depending on your choice of sconce, you’ll need the appropriate power source. Procure either battery (usually AA or AAA) for battery-operated sconces or ensure the solar panel is included with solar-powered models.
- Mounting Hardware: Most sconces come with their own set of mounting hardware. This typically includes screws and wall anchors suitable for the weight and size of your selected sconce.
- Level: A level is an indispensable tool to ensure your sconce is perfectly horizontal.
- Drill: You’ll need a drill to create holes for the screws if you’re mounting the sconce to a wall.
- Screwdriver: A screwdriver is necessary to secure the sconce’s mounting hardware to the wall.
- Adhesive Strips (Optional): For a less permanent fixture or if you prefer not to drill holes, consider using adhesive solid strips that are rated for the weight of your sconce.
- Measuring Tape: A measuring tape will be crucial to place your sconce at the correct height and ensure even spacing.
Once these items are ready, you’ll be well-equipped to start the installation process.
10 Easy Steps on How to Install Sconces Without Electricity
Step 1. Choose the Location:
The first and arguably most crucial step in installing your sconces is to choose the perfect location for them. Consider where you require additional lighting and how the sconce will fit with your current décor.
- Determine Purpose: Decide if the sconce will be used for a task, accent, or ambient lighting. This decision will impact the ideal height and location.
- Visual Balance: Choose a spot that contributes to the room’s visual balance. It could be alongside a piece of furniture or artwork, above a nightstand, or beside a doorway.
- Accessibility: Ensure the sconce is easily accessible to turn on and off, either by remote control or by physically reaching for it.
- Height: Place the sconce at eye level (approximately 60 inches from the floor) for task lighting. For accent or ambient lighting, the sconce can be placed higher.
Step 2. Measure and Mark:
Before you proceed with mounting, precision is critical to ensure your sconces will be evenly placed. Using your measuring tape, carefully measure the desired height and distance from elements in your room where the sconces will complement the space best.

Make light pencil marks where the top of the sconce will align on the wall. These marks are your reference points and should be easy to erase or paint over if adjustment is needed.
Step 3. Check for Wiring:
Safety first—before drilling any holes into your wall, you must ensure that there are no electrical wires where you plan to install the sconce. Use a wire detector to scan the area marked for installation.
If you do find wiring, you may need to consider a different location for your sconces to avoid potential damage or hazards. Remember, an ideal sconce placement is free from hidden wiring and other obstructions.
Step 4. Prepare the Mounting Area:
After you’ve determined the location and ensured there are no hidden wires, it’s time to prepare the mounting area. If you’re using adhesive strips, clean the wall with a mild cleaner to ensure the area is free of dust and debris for optimal adhesion. For drilling:
- Align Mounting Hardware: Hold the mounting hardware against the wall, lining up with your marks.
- Level: Use your level to ensure that the hardware is straight.
- Mark Drill Holes: With the hardware in place and level, mark the spots where you need to drill.
Proceed with caution and drill the holes for the wall anchors, being sure to wear appropriate safety gear such as goggles.
Step 5. Install Wall Anchors:
Once you’ve made the drill holes, you’re ready to install the wall anchors:
- Insert Wall Anchors: Gently tap the wall anchors into each drill hole until flush with the wall.
- Secure in Place: Use the screwdriver to screw into the wall anchors slightly, ensuring they expand and are tightly fixed within the wall.

This will provide a stable and secure base to mount your sconce, allowing it to hang safely and evenly.
Step 6. Attach the Sconce Mounting Bracket:
Now it’s time to attach the sconce’s mounting bracket to the wall. This is where your sconce will be anchored, so it’s vital to get this step right:
- Align Bracket with Wall Anchors: Place the mounting bracket over your installed wall anchors. Make sure the bracket is aligned with the holes and is sitting level.
- Screw in the Bracket: Using your screwdriver, screw the mounting bracket securely into the wall anchors. Refrain from overtightening, as this could strip the anchors or damage the wall, but make sure it’s secure.
- Check for Stability: Pull on the mounting bracket to ensure it’s solidly in place. It should not wobble or move if adequately secured.
With the mounting bracket in place, you’re one step closer to having your new sconces lighting up your space.
Step 7. Attach the Sconce to the Bracket:
With the mounting bracket securely in place, you can now attach the sconce itself:
- Position Sconce: Align the sconce with the mounting bracket, ensuring that any holes or hooks on the sconce line up with the corresponding parts on the bracket.
- Secure Sconce: Use the screws provided to affix the sconce onto the bracket. Depending on the design, it may also snap or slide into place.
- Tighten and Adjust: Once attached, tighten the screws so that the sconce sits firmly against the wall. Make any necessary adjustments to ensure it’s straight and level.
- Check Security: Give the sconce a gentle tug to ensure it’s well-secured and will not come loose over time.
By following these steps attentively, your wall sconce’s physical installation is complete, and you can move on to the final touches.
Step 8. Insert Batteries or Attach to Power Source:
Now that your sconce is mounted, the next step is to power it up. Since we are installing a sconce without electrical wiring, you will likely be using batteries or an alternative power source:

- Open Battery Compartment: Locate the battery compartment on the sconce and open it as per the manufacturer’s instructions.
- Insert Batteries: Depending on the sconce model, insert the recommended battery type and ensure they are positioned correctly according to the +/- indicators.
- Test the Light: Before closing the battery compartment, test the light to ensure it’s working. This saves you the hassle of reopening the compartment if there are any issues.
- Close Compartment: Once confirmed that the sconce is operational, close the battery compartment.
If your sconce uses an alternative power source like solar or a rechargeable battery pack, follow the manufacturer’s instructions for connection and charging. Ensure that all components are secure and the power source will not be exposed to conditions that could damage it or the sconce.
Step 9. Add Finishing Touches and Test Lighting:
With the installation complete and the power source connected, it’s time to add the finishing touches to your new wall sconce:
- Install Light Bulb or LED: If your sconce requires a light bulb, carefully screw it into the socket, or if it uses an LED module, ensure it is securely in place.
- Place Cover or Shade: If your sconce has a cover or shade, attach it according to the manufacturer’s instructions, ensuring it is properly aligned and secure.
- Turn On the Light: Switch on the sconce to verify it illuminates correctly. Check how the light casts on the wall and if it achieves the desired ambiance for your space.
- Adjust Settings: If your sconce has dimming capabilities or different lighting modes, experiment with these settings to find the right mood for your environment.
- Final Inspection: Step back and inspect your installation from different angles to ensure everything appears symmetrical and well-placed.
Step 10. Routine Maintenance:
Maintaining your wall sconce is critical to ensuring its longevity and optimal performance:
- Dust Regularly: Use a soft, dry cloth to dust the sconce and prevent buildup gently.
- Check Bulbs: Periodically inspect the bulbs or LED to ensure they function correctly and replace them as needed.
- Secure Components: Over time, parts may slightly loosen. Check and tighten any screws or fittings to maintain stability.
- Battery Replacement: If using batteries, monitor their life and replace them as required to keep the light functioning.

Regular maintenance will keep your sconce looking great and working perfectly, enhancing the ambiance of your space for years to come.
By following these steps, you can confidently install a wall sconce in your home without the need for professional assistance.
5 Additional Tips and Tricks
- Opt for Battery-Operated LED Sconces: These are a fantastic alternative that offers a long-lasting glow without hardwiring. Look for designs with a built-in timer to conserve energy and extend battery life.
- Use Adhesive Strips for Easy Mounting: For renters or those who avoid drilling holes, consider using powerful adhesive strips designed for hanging decor. They are strong enough to hold lightweight sconces and can be removed without damaging walls.
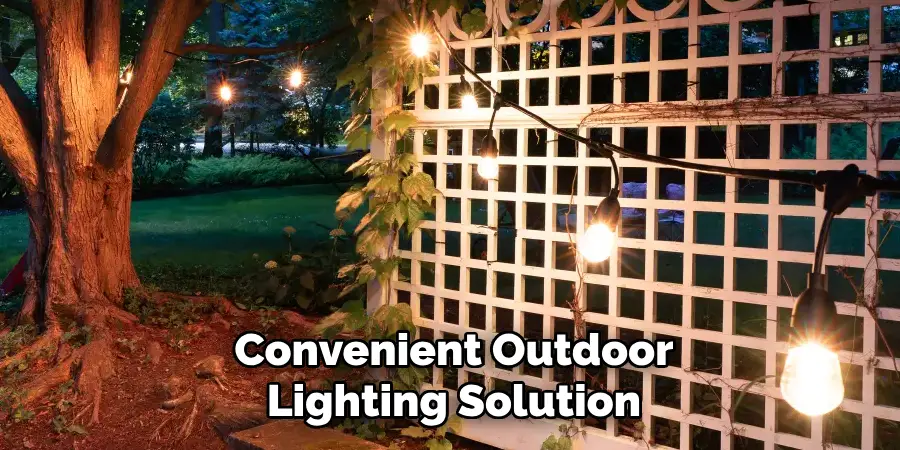
- Consider Solar-Powered Options: If the sconce is to be installed outdoors or in an area that receives ample sunlight, opting for solar-powered sconces can be an excellent energy-saving and environmentally friendly solution.
- Add a Dimmer Switch: Even though your sconces are not wired to electricity, you can still control the brightness by attaching a battery-operated dimmer switch to your LED sconces for added ambiance control.
- Embrace Decorative Candle Sconces: For a more traditional and atmospheric touch, decorative candle sconces can create a beautiful, warm light; use flameless candles as a safer alternative that still provides the flickering effect of real candles.
With these additional tips and tricks, you can easily install sconces without electricity and still achieve the same level of ambiance and functionality as wired sconces.
5 Things You Should Avoid
- Don’t Overlook Safety Considerations: Avoid placing battery-operated or candle sconces near flammable objects or in high-traffic areas where they can be easily knocked over to minimize fire hazards and accidents.
- Avoid Cheap, Low-Quality Lighting: Skimping on quality can lead to poor illumination and short-lived products. Invest in high-quality LED bulbs and sconces to ensure a bright, reliable light source that will last.
- Never Ignore Manufacturer Instructions: Failing to follow the installation guide or manufacturer’s instructions can result in improper mounting, which could potentially damage your wall or the sconce itself.
- Don’t Use Indoor Sconces Outside Be sure to use sconces that are rated for outdoor use when installing them outside to ensure they can withstand the elements and operate safely.
- Avoid Battery Overreliance for Outdoor Sconces: If you’re installing sconces in an area that doesn’t get much light and relies on batteries, you may frequently replace them. Instead, look to solar-powered options as a more sustainable and convenient outdoor lighting solution.

By avoiding these common mistakes, you can ensure a safe and effective installation of sconces without electricity.
How Are Sconces Powered?
Sconces can be powered in several ways depending on their design and intended use. Traditional sconces are typically hardwired into the home’s electrical system, while more modern options may rely on batteries or solar panels for power.
Some sconces also come with a plug-in option, allowing them to be connected to an outlet via a cord. Additionally, there are sconces that use candles as their light source, which do not require any electricity.
It’s essential to choose a power source that suits your needs and the location of where you plan to install the sconce. Consider factors such as accessibility, convenience, and safety when deciding on how to power your sconces.
Ultimately, the goal is to have a reliable and functional light source that enhances the ambiance of your space. So, choose a power source that fits your lifestyle and preferences to achieve the best results.
Conclusion
In conclusion, how to install sconces without electricity can be a versatile and creative endeavor. Whether it be through the use of batteries, solar energy, or candles, each method provides unique benefits and allows individuals to customize their lighting solutions to fit their environment and preferences.
By following the outlined tips and avoiding common pitfalls, one can safely and effectively illuminate spaces with sconces that require no electrical wiring. This approach to lighting not only facilitates aesthetic enhancement but also promotes energy conservation.
As innovation advances, the options for such installations will only grow, offering even more ways to brighten our lives with practical, sustainable elegance. So, go ahead and get creative with your lighting solutions to make your space truly stand out. Happy sconce installing!

