Ah, the joyous sparkle of Christmas lights—nothing quite says “festive cheer” like decking your house out with glowing bulbs twinkling in the winter night. That is until one rogue strand decides to play Grinch and flicker out, leaving a dark, gaping void in your otherwise luminous masterpiece.
You’re not alone if you’ve ever been tangled in strings of stubborn lights! This guide is here to save your sanity, offering a step-by-step approach on how to fix a strand of Christmas lights. We’ll walk you through the most common culprits behind those pesky outages, arming you with the know-how to get those lights shining bright again. Along the way, we’ll sprinkle in some safety tips because nothing kills festive fun like an unexpected zap from a holiday hazard.

Common Issues with Christmas Lights
Before launching into full panic mode when your lights go kaput, let’s explore some usual suspects behind these holiday hiccups. First up, Burnt-Out Bulbs. If one bulb calls it quits, the entire strand can go on strike, refusing to light up until that little troublemaker is swapped out. Keep an eye out for a bulb that looks suspiciously cloudy or dark—it’s probably your culprit.
Next, Loose Connections are like the unreliable Wi-Fi of Christmas lights—one moment everything’s working, the next, you’ve got blank gaps. Poor connections mean parts of your strand might go MIA. Check those plugs and sockets to make sure they’re snug and not playing the disappearing act.
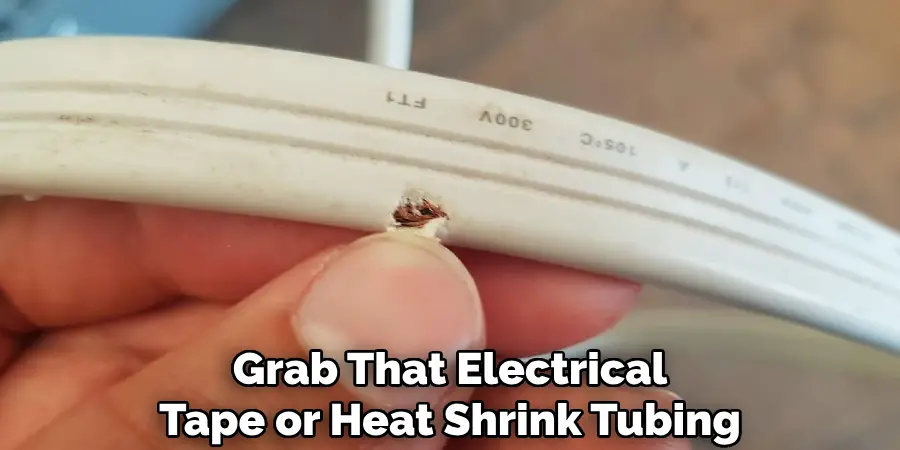
Frayed Wires are not just a pain in the Christmas spirit but a hazard that could turn your holiday into a literal hot mess. If your wires look like they’ve been through a battle, it’s time to tape them up or replace them to prevent any unwanted sparks or shocks.
And last but definitely not least, Blown Fuses. Think of them as tiny guardians for your lights, protecting them from power surges. When a fuse blows, the whole strand can go dark. Usually, you’ll find them in the plug; pop in a fresh one, and voilà, let there be light!

Safety Precautions
Before you dive headfirst into repairing your unruly Christmas lights, let’s chat about safety precautions. First things first, Unplugging the Lights is non-negotiable. You know that shocking feeling when you open your electric bill? Imagine that, but coursing through your body—yikes! Always unplug your lights before tackling repairs to avoid an impromptu holiday shindig with electricity. Next up, we’ve got Using Protective Gear.
Channel your inner superhero and gear up with gloves and safety glasses. Protect those digits and peepers while dealing with broken bulbs or frazzled wires. Finally, let’s not forget about Checking the Environment. Make your workspace as safe as Santa’s workshop by clearing away any moisture or sneaky hazards lying around. You wouldn’t want your repair mission to get derailed by a slippery surface or surprise puddle. With these precautions in mind, you’re ready to outsmart that sneaky strand of lights!
Tools and Materials Needed
You’ll need a trusty arsenal of tools and materials before you start the battle against those uncooperative Christmas lights. First, gather the Essential Tools. A multimeter is your detective, helping you track down any electrical mischief. A pair of scissors is handy for cutting damaged sections of wire, while electrical tape acts as your makeshift glue, ready to patch up those frayed wires. And because light bulbs are as moody as teenagers, have some replacement bulbs on standby—trust me, they’ll be the heroes of this saga.
Now, on to Replacement Parts. Finding the right bulbs and fuses is like a quest for that perfect Christmas gift. Your first stop should be local hardware stores or online marketplaces, where you can snag replacement bulbs and fuses tailored to your specific light strand. Manufacturer websites are also a goldmine for finding compatible parts. With your toolkit ready, you’re all set to bring those lights back to life!
How to Fix a Strand of Christmas Lights: Step-by-Step Guide
Step 1: Inspect the Strand
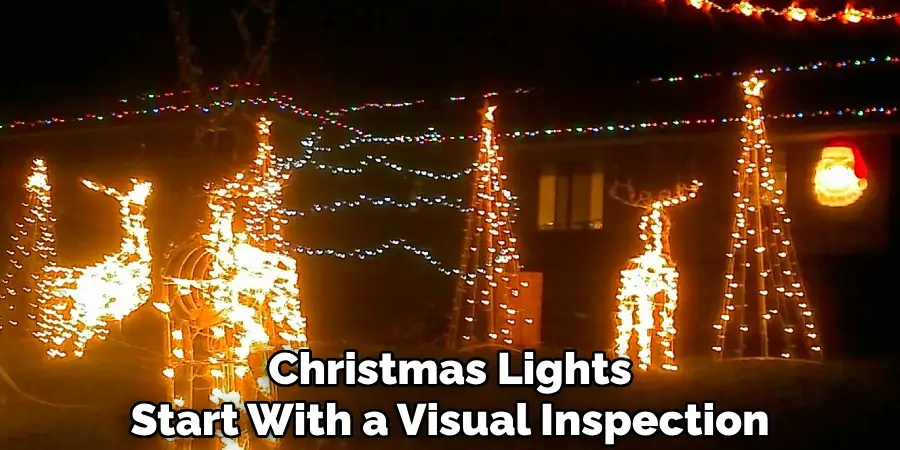
Before you go all CSI on your Christmas lights, start with a visual inspection. Lay out the entire strand on a flat surface and look for any glaringly obvious issues. Keep an eagle eye out for broken or missing bulbs and frayed wires. The aim is to spot anything that screams, “I’m the problem child!” Check bulb sockets for corrosion and ensure there’s no debris wedged in there. You might even hum the “Mission Impossible” theme for effect.

Step 2: Identify the Problem Area
Now, it’s time to play detective with your multimeter. This handy device is like a truth serum for your lights, telling you exactly where the problem lies. Set your multimeter to the continuity setting, which checks if the electrical flow is taking a detour. Clip the leads to different strand sections, paying special attention to the suspicious areas you identified initially. The areas with no continuity are your prime suspects—focus your repairs there.
Step 3: Replace Burnt-Out Bulbs
Once you’ve pinpointed the problematic area, it’s time to give some bulbs their pink slips. Carefully twist and pull out the offenders, ensuring you’ve disconnected the power first! Check the bulb’s wattage and replace it with one that’s identical. Remember, putting the wrong bulb in is like using salt instead of sugar—it just won’t work out! Insert the new bulb snugly to ensure it’s well connected without yanking on the wires like you’re in a tug-of-war match.
Step 4: Secure Loose Connections
Connections can get loose over time, like my old college jeans. Carefully check each plug and socket along your strand for a snug fit. Push plugs in all the way without forcing them, as delicate connections require a gentle touch. If you find a loose cul-de-sac, it’s time to tighten it up. Use a smidge of pliers pressure or your trusty needle nose to secure those pesky pins in place.
Step 5: Repair Frayed Wires
If time has turned your wires into tattered threads, it’s repair time. Grab that electrical tape or heat shrink tubing to wrap up those exposed areas. Think of it as wrapping a special gift of electricity, only without the bow. If the damage is extensive, don’t be afraid to cut out the damaged section and splice the wires back together neatly. Safety first, remember?

Step 6: Replace Blown Fuses
Fuses are tricky little heroes hiding in the plug, ready to sacrifice themselves. To replace them, start by removing the old fuse with a gentle pull (no Hulk required). Check it visually for burnt marks, confirming it’s indeed blown. Then, insert a fresh fuse, ensuring it’s securely in place. Give it a quick test with your multimeter to avoid any after-replacement blues, and finally, plug in to bask in the triumphant glow of a fully functioning light strand!
Preventative Measures for Future Issues
Proper Storage Techniques
To keep your Christmas lights glowing brightly year after year, proper storage is key. Start by employing the grand art of coiling—this isn’t your everyday yarn ball. Gently wrap each strand around a sturdy piece of cardboard or a plastic spool, keeping them tangle-free and ready for action come the next holiday season. Shoulder rolls while unwinding are optional but encouraged for dramatic flair. Once cooled, store your lights in a dry, temperature-controlled space, like a storage bin or tote, to shield them from moisture and curious household pets.
Regular Inspections
Before you dust off those twinkling beauties annually, conduct a thorough inspection. Plug them in to ensure they’re illuminating as brightly as your optimism for the holidays. Check for any signs of wear and tear, such as frayed wires or flickering bulbs. Catching these gremlins early means fewer surprises when you’re knee-deep in tinsel and eggnog. A meticulous preseason check is your secret weapon against light-strand despair.

Using Quality Products
Investing in high-quality lights is like buying the turbo-charged sleigh over the rusty old sled. Ensure your lights meet safety standards and resist the siren call of the bargain bin if longevity is your game plan. Quality lights and components mean fewer repairs, a happier holiday season, and more time enjoyed snuggled up away from tangled wire frustration.
When to Seek Professional Help
Signs That Repair Is Needed
There comes a time when even the most seasoned DIY warrior must admit defeat. If your light strand behaves like it’s joined a punk rock band—flickering wildly and refusing to be tamed—it might be time to throw in the towel and call a professional. When faced with extensive electrical issues, such as repeated blown fuses, or if you’re grappling with a complicated repair that feels more like solving a Rubik’s Cube in the dark, it’s probably wise to seek expert help. After all, safety should trump stubbornness.
Where to Find Assistance
For those times when even your trusty multimeter shrugs in confusion, you have options. Local hardware stores often have lists of reliable electricians or seasonal lighting specialists. You can also explore online directories or community bulletin boards for recommendations. Some retail chains and specialty stores offer repair services, so don’t hesitate to ask. Leaving it to the pros might just save your holiday spirit from a meltdown!
Conclusion
Troubleshooting and fixing Christmas lights can be a fulfilling DIY project. By following key steps—like inspecting, identifying problem areas, and securing connections—you’ll effectively learn “how to fix a strand of christmas lights” effectively. Remember to coil and store properly, use quality lights, and regularly inspect long-lasting decorations. There’s immense satisfaction in illuminating your home with your handiwork, contributing to that warm and festive atmosphere everyone cherishes during the holidays. While DIY repairs are rewarding, always prioritize safety. So, enjoy seeing your well-lit home become a beacon of holiday cheer!

