Are you tired of your flashing LED lights that are too bright? Do you want to adjust the brightness for a more comfortable experience? Look no further, as in this tutorial, we will discuss various methods on how to adjust brightness of flashing LED lights.

Adjusting the brightness of flashing LED lights is a simple yet effective way to customize their appearance and functionality. Whether used for decorative purposes, signaling, or practical lighting solutions, LEDs offer flexibility in brightness control to suit various needs. This process often involves using dimmers, pulse-width modulation (PWM) techniques, or specialized control circuits designed for LED lights.
Understanding the basics of how LEDs work and the tools required for adjustment can help you achieve the desired level of brightness while ensuring efficient energy use and prolonging the lifespan of the lights.
What Are the Benefits of Brightness Control in LEDs?
There are several benefits to having control over the brightness of LED lights. These include:
- Energy Efficiency: One of the main advantages of adjusting the brightness of LEDs is improved energy efficiency. By reducing the amount of current flowing through an LED, its brightness can be reduced without affecting its color or overall performance.
- Customization and Versatility: Having flexibility in brightness control allows for customization and versatility in lighting solutions. For example, dimming LED lights can create a cozy atmosphere for relaxation or enhance concentration for studying or working.
- Longer Lifespan: By dimming LEDs, the overall lifespan of the light source can be extended. This is because LEDs are not continually operating at full power, which reduces the strain on the diodes and other components. As a result, the bulbs will last longer before needing replacement, making them more cost-effective in the long run.
- Energy Savings: Dimming LED lights also leads to energy savings as less electricity is used to power them. According to research, dimming a light by just 25% can save up to 20% of energy usage. This not only reduces electricity bills but also helps reduce the carbon footprint and promotes sustainability.
- Increased Flexibility: With traditional incandescent bulbs, there are limited options for adjusting the brightness levels. However, with LED lights, dimming capabilities allow for more flexibility in creating different lighting moods and settings. This feature is particularly useful in areas like restaurants, theaters, and homes, where ambiance plays a crucial role.

What Will You Need?
To make the switch to LED lighting, you will need the following materials:
- LED Light Bulbs: These come in a variety of shapes and sizes, so make sure to choose ones that fit your existing fixtures.
- Appropriate Fixtures: If you’re replacing traditional incandescent bulbs with LEDs, ensure your current fixtures are compatible with LED lights. Sometimes, minor modifications may be necessary.
- Ladders or Step Stools: Depending on the height of your ceiling, you may need a ladder or step stool to reach and replace bulbs.
- Dimmer Switches: If you want to take full advantage of the dimming capabilities of LED lights, consider installing dimmer switches in areas where you wish to adjust the lighting levels.
- Color Temperature: LED lights come in different color temperatures, ranging from warm white to cool white. Consider the mood and ambiance you want to create in a particular room when choosing the color temperature of your LEDs.
9 Easy Steps on How to Adjust Brightness of Flashing Led Lights
Step 1. Identify the LED Controller
The LED controller is a crucial component that manages the functionality and brightness of your LED lights. Start by locating the controller, which is typically a small box connected to the LED strip or fixture. This device may have buttons, a dial, or even a remote control for adjusting settings.
If your LED setup comes with a smartphone app, make sure to download it and pair your device with the controller via Bluetooth or Wi-Fi for advanced customization options. Understanding how your specific controller operates is the first step toward successfully adjusting the brightness and achieving your desired lighting effect. Refer to the manufacturer’s instructions for additional guidance on setting up and locating the controller.
Step 2. Check for Dimmer Compatibility
Many LED lighting setups are designed to work with dimmer switches, but not all are compatible with all dimmer switches. It’s essential to confirm that your LED lights are dimmable by checking the product specifications or packaging.
Using an incompatible dimmer switch can cause issues such as flickering, buzzing, or even damage to the LED components. If your LED lights are compatible, ensure that the dimmer switch you are using is specifically designed for LEDs.
Step 3. Use the Remote or App
Many modern LED lighting systems come with advanced features that can be controlled via a remote or a dedicated mobile app. These tools allow users to adjust brightness levels, change colors, set timers, and even create customized lighting scenes.

Using the remote or app typically involves pairing the device with your lights, a process that might vary depending on the manufacturer. Some systems require syncing the remote through a specific button sequence, while apps often connect through Bluetooth or Wi-Fi. Refer to the user manual for detailed instructions on setup.
Step 4. Adjust Brightness Using Knobs or Buttons
To adjust brightness using knobs or buttons, identify the dedicated controls on your lighting device. Knobs are typically rotary switches that allow you to smoothly transition between different brightness levels by turning the dial clockwise or counterclockwise.
Buttons, on the other hand, might include options for incremental adjustments, such as pressing “+” to increase brightness or “-” to dim the lighting. Some lights may also feature preset brightness levels triggered by specific button presses, providing quick-access modes like “Low,” “Medium,” or “High.” These user-friendly options make it easier to control the lighting according to your needs, whether you want a soft ambient glow for reading or a bright light for completing tasks.
Step 5. Configure the Power Supply
Properly configuring the power supply is crucial to ensure the lighting system operates efficiently and safely.
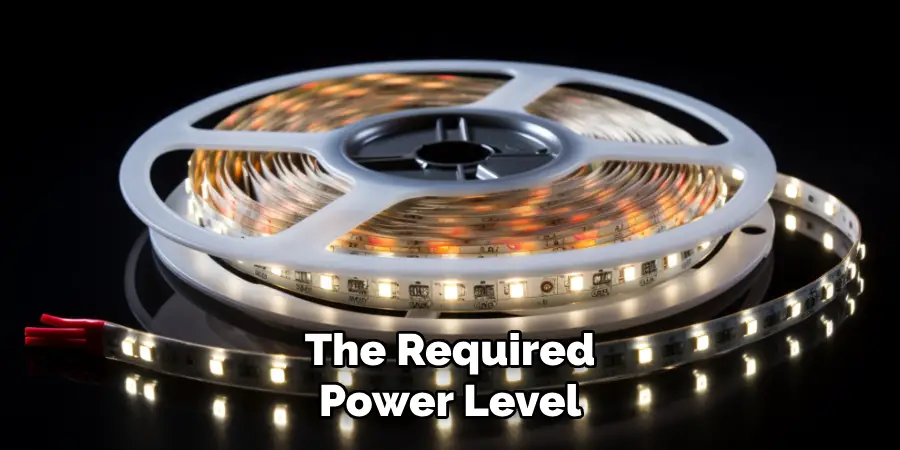
Start by carefully reviewing the manufacturer’s specifications for voltage and wattage requirements to ensure compatibility with your electrical setup. Depending on the type of lighting, you may need to use a specific type of adapter or transformer to match the required power level.

Step 6. Change the Flashing Settings
Adjusting the flashing settings allows you to customize the lighting effects to suit your preferences or specific requirements. Begin by referring to the user manual provided by the manufacturer, as different lighting systems often have unique control mechanisms.
If your system includes a remote control or app-based interface, use these tools to access the setting options. Experiment with different modes, such as steady, strobe, or fading effects, to determine the style that works best for your application. Pay attention to the speed and intensity settings, ensuring they are programmed to align with the intended ambiance or functional purpose of the lighting.
Step 7. Connect a Compatible Dimmer Switch
If your lighting setup supports dimming functionality, connecting a compatible dimmer switch can significantly enhance its versatility and energy efficiency. Start by ensuring the dimmer switch is suited to the type of lighting you are using, such as LED, incandescent, or fluorescent. Compatibility is essential to avoid flickering, buzzing, or improper operation.
Carefully follow the manufacturer’s instructions during installation, adhering to safety precautions and proper wiring practices. A dimmer switch allows you to adjust brightness levels with ease, helping you create tailored lighting for various activities or moods, from cozy, intimate settings to bright, focused environments.
Step 8. Test in Different Conditions
Once the installation is complete, it’s important to test the lighting under various conditions to ensure optimal functionality and performance. Start by testing the lights at different times of the day to assess how natural light interacts with the installed fixtures. This can help you determine whether adjustments to brightness settings or additional lighting sources are necessary. Next, try different dimmer levels to ensure smooth transitions without flickering or interruptions. Pay attention to how the lighting works with various activities, such as reading, working, or relaxing, to verify that it meets your needs.
Step 9. Consult the Manufacturer’s Guide
The manufacturer’s guide is an invaluable resource for understanding the specific features and functions of your lighting system. It often contains detailed instructions on installation, troubleshooting, and maintenance, tailored to the exact model you are using. Take time to thoroughly review the guide to uncover any advanced settings or capabilities, such as programmable timers, smart home integrations, or energy-saving modes.
By following these tips and utilizing the resources available to you, you can ensure that your lighting system is not only functional but also efficient and cost-effective.

Conclusion
How to adjust brightness of flashing LED lights is a straightforward process when you follow the right steps and utilize the tools at your disposal.
Start by consulting the product manual to ensure you understand the specific controls or settings available for your model, whether they involve physical knobs, remote controls, or a smartphone app. Many LEDs offer dimming options within their settings, which can be adjusted to your preferred level of brightness. Additionally, ensure that compatible dimmer switches are used if required, as not all LEDs work with standard dimmers.
Taking these steps ensures you can tailor the brightness and functionality of your LED lights to suit your needs perfectly.
You Can Check It Out To How to Make LED Lights Chase

